Tele Vue NP127is User Manual
Page 3
3
Imaging System Adapter or brass clamp ring within the 2” Accessory Adapter.
The threaded holes on top of the focuser body accept the Digital Indicator Kit.
Operation of the rack and pinion focuser is via the 10:1 ratio Focusmate on the right side or either
of the 1:1 knobs. You might consider the optional Focusmate Driver for vibration-free focus control.
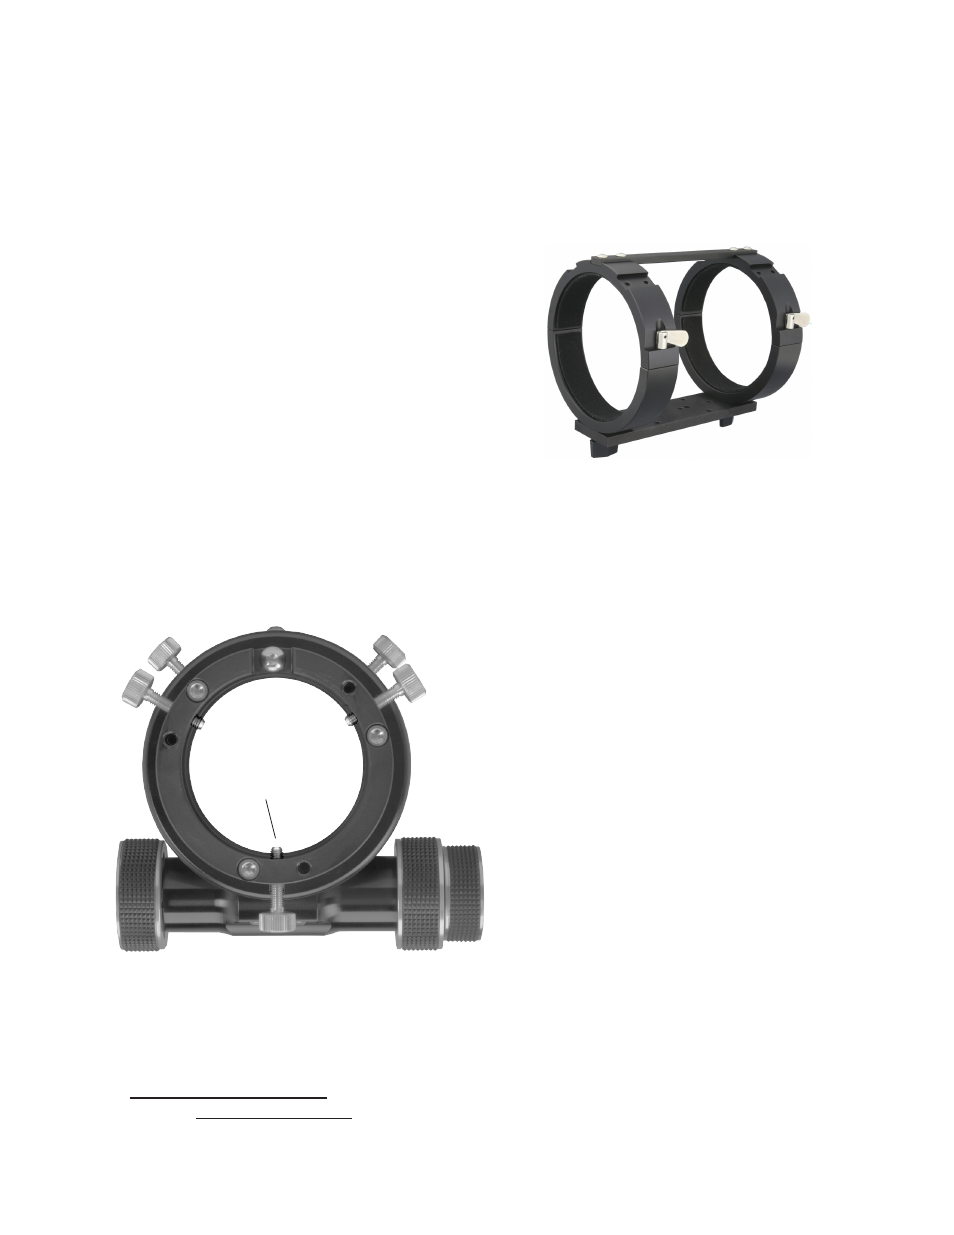
2.0 Mounting Options and Set Up
The telescope tube diameter is 5”. The dual ring MRS-5000
is suited for photography and CCD imaging with a variety
of adapter plates that can be bolted to the base plate.
The base plate also bolts to the Tele Vue Gibraltar5 Alt-Az
mount if a more travel-friendly, visual use mount is desired.
Each tube ring has two machined channels with #10-32
threaded holes for mounting accessories. A central bar
spans across the top of the two rings for added stability.
The bottom of the tube rings have ¼-20 holes to accept
mounting studs or screws. Telescope balance is achieved
by unlocking the “bat handle” screws and sliding the tube
fore or aft. Once the O.T.A. is repositioned, retighten the
bat handle screws.
3.0 Visual Observing Set Up
As previously mentioned, the NP127is is shipped in its “visual” configuration. If you have removed the 2”
Accessory Adapter and would like to re-install it, loosen the three end ring lock screws sufficiently to remove
any accessory that may be in place. However, do not retract them fully into the end ring. By allowing them
to protrude into the body (note photo below), they act as locators. Looking at the 2” Accessory Adapter,
note the three grooves with holes machined 120° apart. The grooves help index the holes in the adapter
to the three thumb screw arrangement in the end ring. This will ease installation in the dark. Insert the 2”
Accessory Adapter into the end of the focuser. If
it does not go all the way in, rotate the adapter.
When the grooves in the adapter align with the
protruding screws, the adapter will seat fully into
the focuser. Tighten the three screws a few turns
so they enter the holes in the adapter. The lock
screws will now act against the brass clamp ring
in the 2” Accessory Adapter.
Slip a Tele Vue 2” Everbrite diagonal into the focuser
and tighten the lock screws. You will now be able
to reach focus with any Tele Vue eyepiece.
IMPORTANT CAUTION: When replacing the
orange plastic plug into the 2” Accessory Adapter,
push it in far enough to seat. Do not use the lock
screws to clamp the plug in place as the clamp
screws will distort the brass clamp ring in the 2”
accessory adapter.
3.1 Eyepieces
With its wide, highly corrected, flat field and fast f/ratio, the NP127is puts eyepieces to the test. This
scope demonstrates the superiority of Tele Vue eyepiece performance and, with a range of 12x to 330x
(if the atmosphere allows) there is a magnification for all purposes. See chart at the end of this manual or
call Tele Vue for recommendations. In general, we suggest choosing low and medium power eyepieces
in ratios of field stop diameters. For example, factors of 1.4 or 2.0. When choosing higher power eye-
pieces, use ratios of magnification. (See reference chart in the “Choosing Your Eyepieces” article.)
MRS-5000
Focuser set to accept 2” Accessory Adapter
Lock Screws threaded
partially in to use as
guides for inserting
the 2” Accessory
Adapter.