Star Water Systems S07AF10 Filter User Manual
Page 4
4
4. WATER SUPPLY CONNECTIONS
Figure 2 shows typical installations. Inlet and outlet
connections are 3/4 inch pipe size and are marked with
raised arrows on the sides of the plastic valve. Turn off main
water supply and connect the pipes, valves and fittings.
CAUTION: IF COPPER PIPING WITH
SWEAT FITTINGS IS USED, DO NOT
SWEAT DIRECTLY INTO THE IN/OUT
MANIFOLD OF FILTER VALVE OR
BY-PASS VALVE. HEAT WILL DAMAGE
RUBBER AND PLASTIC PARTS.
5. DRAIN LINE CONNECTIONS
Install 1/2” I.D. plastic pipe or tubing from the hose barb
located on right side of main control valve to an open
drain. Do not connect the drain line directly to a sewer as
this would violate sanitary codes. A 4 inch gap between
the end of the drain line and a sewer is recommended.
Keep drain line as short as possible. An overhead drain
line can be used if necessary, but should discharge below
the main control valve if possible.
CAUTION: NEVER CONNECT DRAIN LINE
INTO A DRAIN, SEWER LINE OR TRAP.
ALWAYS ALLOW AN AIR GAP BETWEEN
THE DRAIN LINE AND THE WASTE WATER
TO PREVENT THE POSSIBILITY OF
SEWAGE BEING BACK SIPHONED.
6. ELECTRICAL CONNECTIONS
Automatic filters are equipped with a 6 ft., 115 volt,
grounded power cord. When the plug is inserted into a
properly grounded receptacle, it will guard the user against
electrical shock if the unit insulation should fail for any
reason.
Do not plug into an outlet controlled by a wall switch or a
pull chain that could be inadvertently turned off.
AUTOMATIC CONTROL VALVE
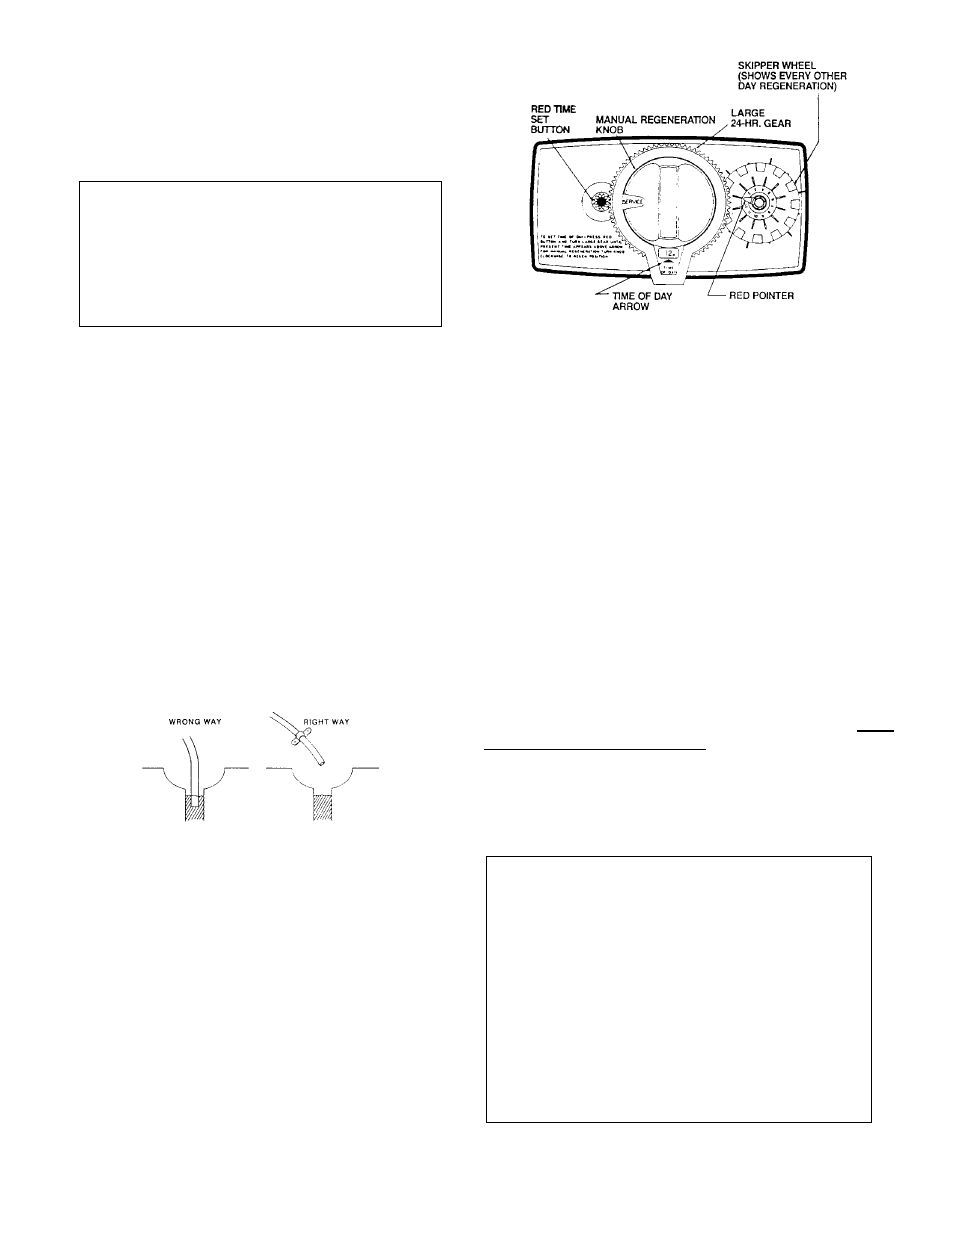
7. SETTING THE TIME CONTROL
Time of Day - Depress the red button, disengaging the large
gear. Turn the large gear until the actual time of day appears
at the Time of Day arrow. Note “AM” and “PM” selections on
the large gear and set the time accordingly. Release the red
button, making sure the gear is engaged.
Backwash Frequency - Set the days you want regeneration
to occur by sliding tabs on the skipper wheel outward to
expose fingers. By sliding one tab, the filter will backwash
every 12 days. Slide tabs 1 and 7 to backwash every 6
days.
Other Settings - The starting time of backwash is preset for
2:00 A.M. on each day for which skipper wheel tab is slid
out. All other settings such as Backwash, Rinse, and Fast
Rinse have been preset.
8. CONTROL VALVE POSITIONS
AUTOMATIC FILTER - The automatic control valve
must
be started in service position! The words “In Service” are
imprinted in the manual regeneration knob dial. Rotating the
manual knob CLOCKWISE will place the unit in the various
positions printed on the dial.
The positions printed on the dial and cycle times are as
follows:
DIAL READING
1. In Service
2. Regeneration
3. Rinse
4. Backwash
5. Pause
6. Rapid Rinse
7. Settle Rinse
CYCLE TIME
5 Min. Rinse
12 Min. Backwash
46 Min.Settling period
12 Min. Backwash
5 Min. Rinse