Star Lights Revolution T5-12 User Manual
Page 3
- 3 -
3. With the lens & ballast cover removed, locate
the Fluorescent fixtures Ballast, see Figure 3.
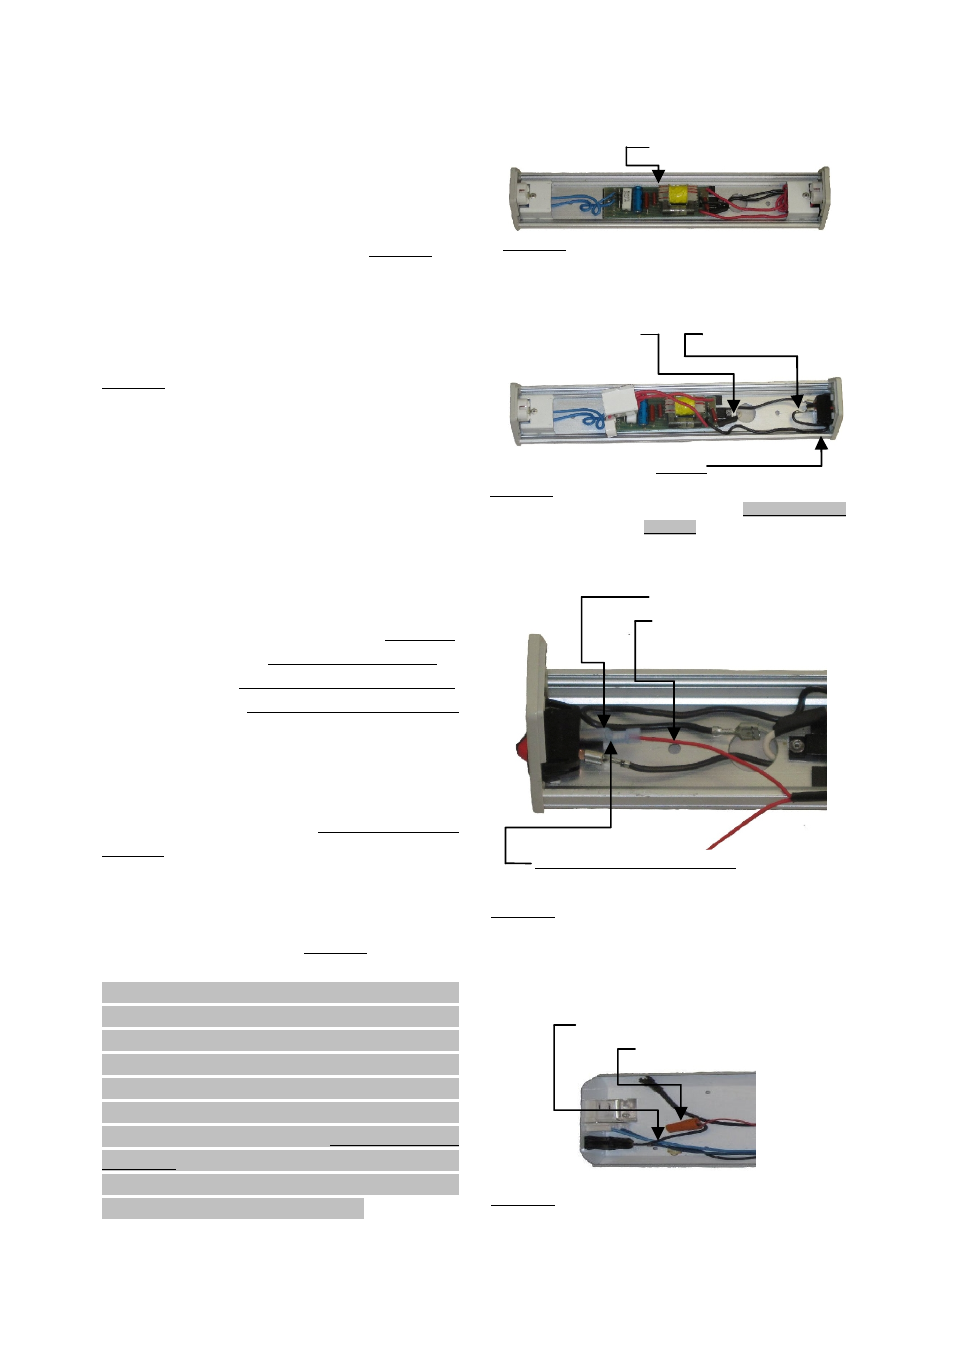
4. After locating the fixtures ballast find the
Positive (+) and the Negative (-) wires, see
Figure 4.
Hint
The Positive (+) and the Negative (-) wires will, in
most cases, come into the fixture through the
fixtures access hole. One wire will be attached to
the Ballast Board and the other in most cases will
be attached to the fixtures Off/On Switch.
5. After locating the Fluorescent fixtures Positive
(+) and the Negative (-) input wires Figure 6,
remove the fixtures Positive Switch Wire, if
attached with a Quick Disconnect Terminal.
Replace with the Quick Disconnect Terminal
that has been added to one of the ends of the
REV T5 LED TUBE LIGHT™ harness as
shown in Figure 6. If your fixture is not
equipped with a switch or has one that the wire
is not attached with a Quick Disconnect
Terminal than cut off the factory installed
terminal on the REV T5 LED TUBE LIGHT™
harness, cut the Switched Power wire and strip
the wires and use the Wire Nut provided to make
the connection as shown in Figure 7.
To install 2 tubes in a double fixture the
installation is the similar, the only difference is
that you need to attach one end of each harness
to the ground wire using the supplied wire nut.
Cut the wire that has the spade connection,
leaving 2 inches of wire attached to the
connector. Replace one of the Quick Disconnect
Terminals to the switch and connect the two
harness ends and the spade connector wire end
together with the wire nut provided.
Fluorescent fixtures Ballast
Figure 3
-
T5 Fluorescent Tube Fixture with Ballast Cover
Removed
Negative (-) Wire
Positive (+) Wire
Switch
Figure 4
-
T5 Fluorescent Tube Fixture showing Input Positive
(+) Power and Negative (-) wires and Switch (if unit is equipped
with one)
Positive (+) Switched Wire
New Wire Harness
Quick Disconnect Terminal on New harness
Figure 6
- Showing the New Harness Connected to switched
side of Power switch using the factory installed
terminal.
Positive (+) Switched Wire
Wire Nut
Figure 7
- Showing the New Harness Connected to switched
side of Power switch using supplied Wire Nut.