Star Lights Revolution G4-205 Back Pin User Manual
Installation instructions for the revolution g4
- 1 -
INSTALLATION INSTRUCTIONS For the REVOLUTION G4
™
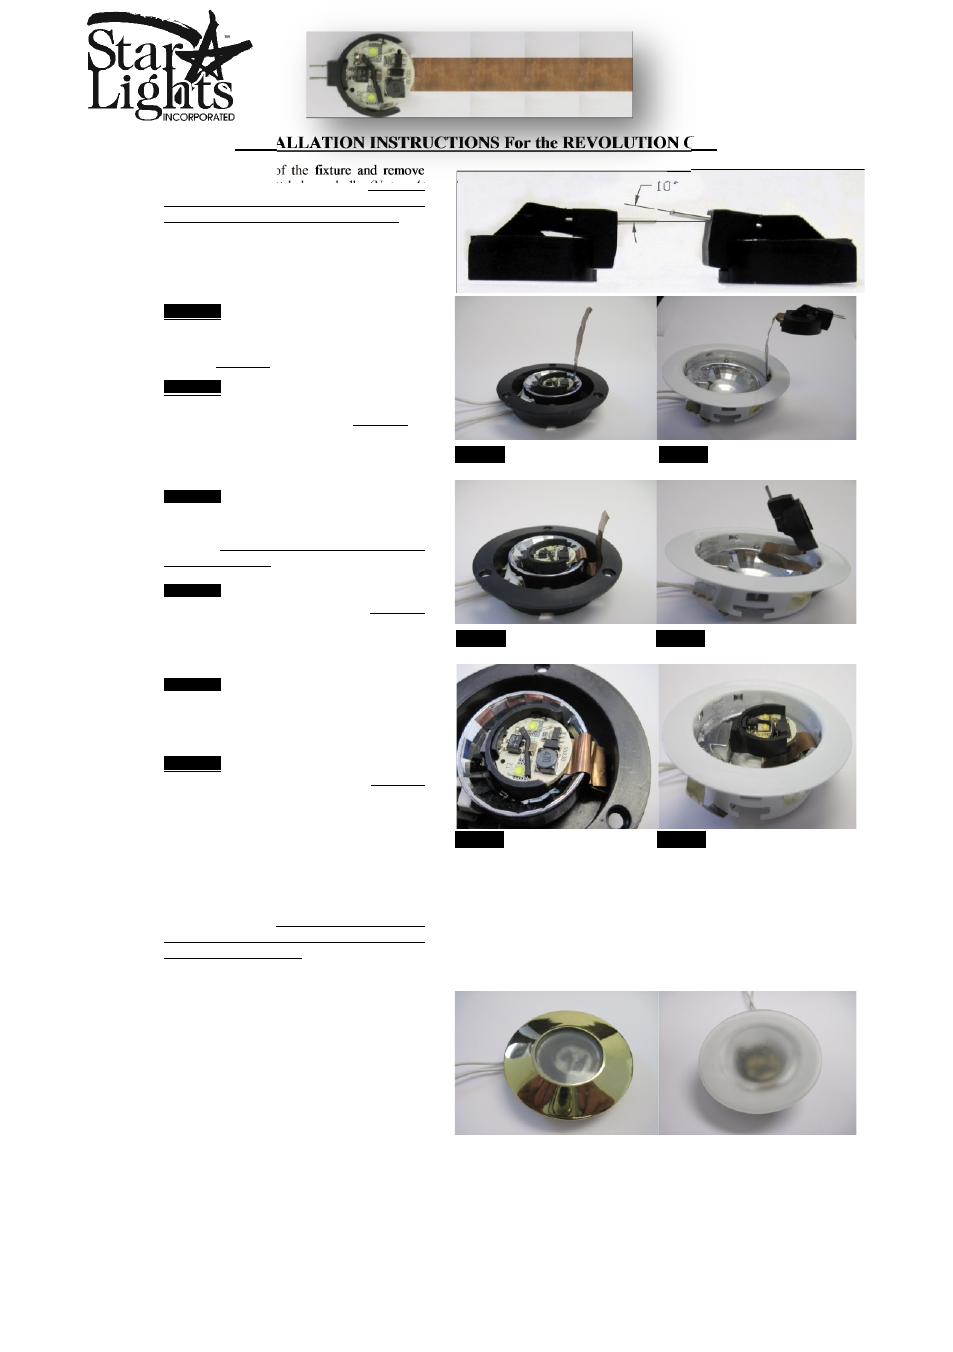
1.
Remove the cover of the fixture and remove
the G4 based 10 watt halogen bulb. (Note - At
this time check to see if the bulb is inserted
straight or at a 10° angle into the fixture) The
REVOLUTION G4™
will adjust for this
difference between fixtures.
2.
Examples of Two different Fixture installations
Fixture 1
Insert the REVOLUTION G4™
into the
fixtures socket, bending the copper ribbon as
shown in Fixture 1 to the right.
Fixture 2
Insert the copper ribbon between the reflector
and the metal body as shown in Fixture 2 to
the right.
3.
Examples of Two different Fixture installations
Fixture 1
Bend the copper ribbon around the old reflector
making sure the ribbon makes contact with the
reflector. The ribbons function is to transfer
heat to the reflector
Fixture 2
Bend the copper ribbon as shown in Fixture 2
to the right.
4.
Examples of Two different Fixture installations
Fixture 1
DO NOT CUT EXCESS RIBBON! Stuff the
excess between the Reflector and the plastics
inside the fixture as shown to the right.
Fixture 2
Bend the Copper ribbon as shown in Fixture 2
to the right and install the G4 into the socket.
The installation may differ from one fixture to
another but always be sure that the copper is
put into contact with the fixtures metal so the
copper can transfer heat!
5.
Replace cover.
Fixture 1
Fixture 2
Fixture 1
Fixture 2
Fixture 1
Fixture 2
- 1 -
INSTALLATION INSTRUCTIONS For the REVOLUTION G4
™
1.
Remove the cover of the fixture and remove
the G4 based 10 watt halogen bulb. (Note - At
this time check to see if the bulb is inserted
straight or at a 10° angle into the fixture) The
REVOLUTION G4™
will adjust for this
difference between fixtures.
2.
Examples of Two different Fixture installations
Fixture 1
Insert the REVOLUTION G4™
into the
fixtures socket, bending the copper ribbon as
shown in Fixture 1 to the right.
Fixture 2
Insert the copper ribbon between the reflector
and the metal body as shown in Fixture 2 to
the right.
3.
Examples of Two different Fixture installations
Fixture 1
Bend the copper ribbon around the old reflector
making sure the ribbon makes contact with the
reflector. The ribbons function is to transfer
heat to the reflector
Fixture 2
Bend the copper ribbon as shown in Fixture 2
to the right.
4.
Examples of Two different Fixture installations
Fixture 1
DO NOT CUT EXCESS RIBBON! Stuff the
excess between the Reflector and the plastics
inside the fixture as shown to the right.
Fixture 2
Bend the Copper ribbon as shown in Fixture 2
to the right and install the G4 into the socket.
The installation may differ from one fixture to
another but always be sure that the copper is
put into contact with the fixtures metal so the
copper can transfer heat!
5.
Replace cover.
Fixture 1
Fixture 2
Fixture 1
Fixture 2
Fixture 1
Fixture 2