Check ball valve drawing – SANDPIPER S05 Non-Metallic User Manual
Page 19
s05conductiveacetal-rev0211
Model S05 Conductive Acetal Design Level 2 Page 17
Check Ball Valve Drawing
34
2
25
14
18
10
9
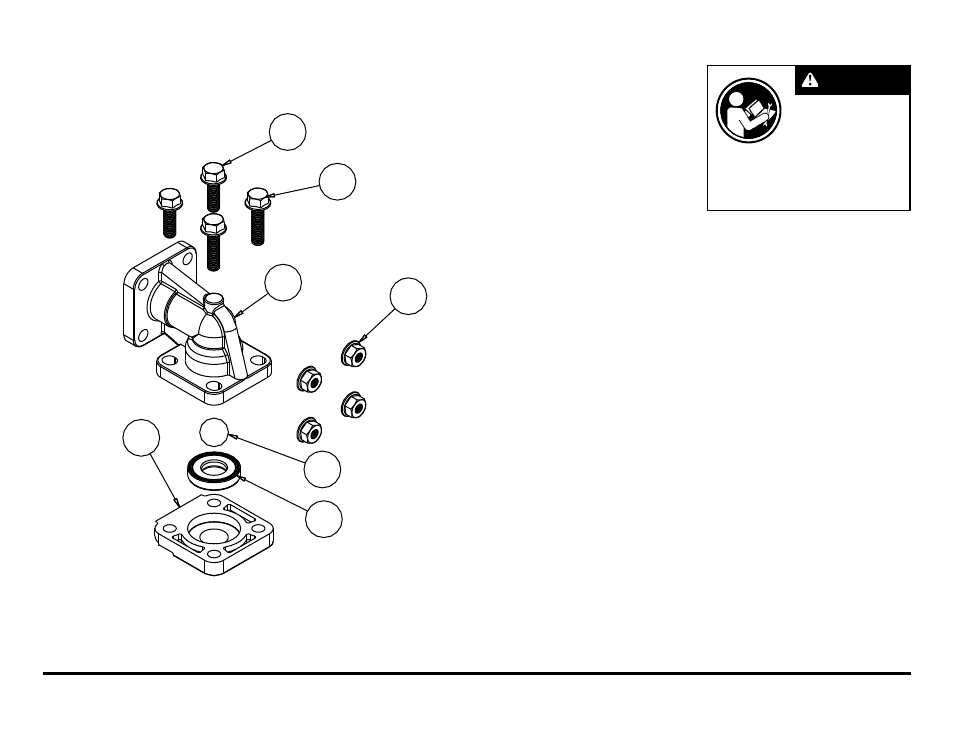
MODULAr CheCk BALL VALVe
SerViCing
Before servicing the check valves,
first shut off the suction line and then
the discharge line to the pump. Next,
shut off the compressed air supply,
bleed air pressure from the pump, and
disconnect the air supply line from
the pump. Drain any remaining fluid
from the pump. The pump can now be
removed for service.
To access the modular check valve,
remove the elbows (items 16 and 17
from pump composite repair parts
drawing). Use a 1/2" wrench or socket
to remove the fasteners. Once the
elbows are removed, the modular check
valves can be seen in the cavities of the
outer chamber (items 13).
Inspect the check balls (items 2) for
wear, abrasion, or cuts on the spherical
surface. The check valve seats (items
33) should be inspected for cuts,
abrasive wear, or embedded material
on the surfaces of both the external
and internal chamfers. The spherical
surface of the check balls must seat
flush to the surface of the inner chamfer
on the check valve seats for the pump to
operate to peak efficiency. Replace any
worn or damaged parts as necessary.
re-ASSeMBLe The CheCk VALVe
Place a check ball (item 2) in the
ball cage of either the discharge elbow
or the outer chamber. Install a check
valve seat in the counter on each end
of the chamber. Refasten the elbows to
the chamber.
Read these instructions
completely, before in-
stallation and start-up.
It is the responsibility of
the purchaser to retain
this manual for reference. Failure to
comply with the recommendations stated
in this manual will damage the pump, and
void factory warranty.
iMPOrTAnT