Assembly instructions, Fig. h fig. i – RIKON Power Tools 80-805 User Manual
Page 13
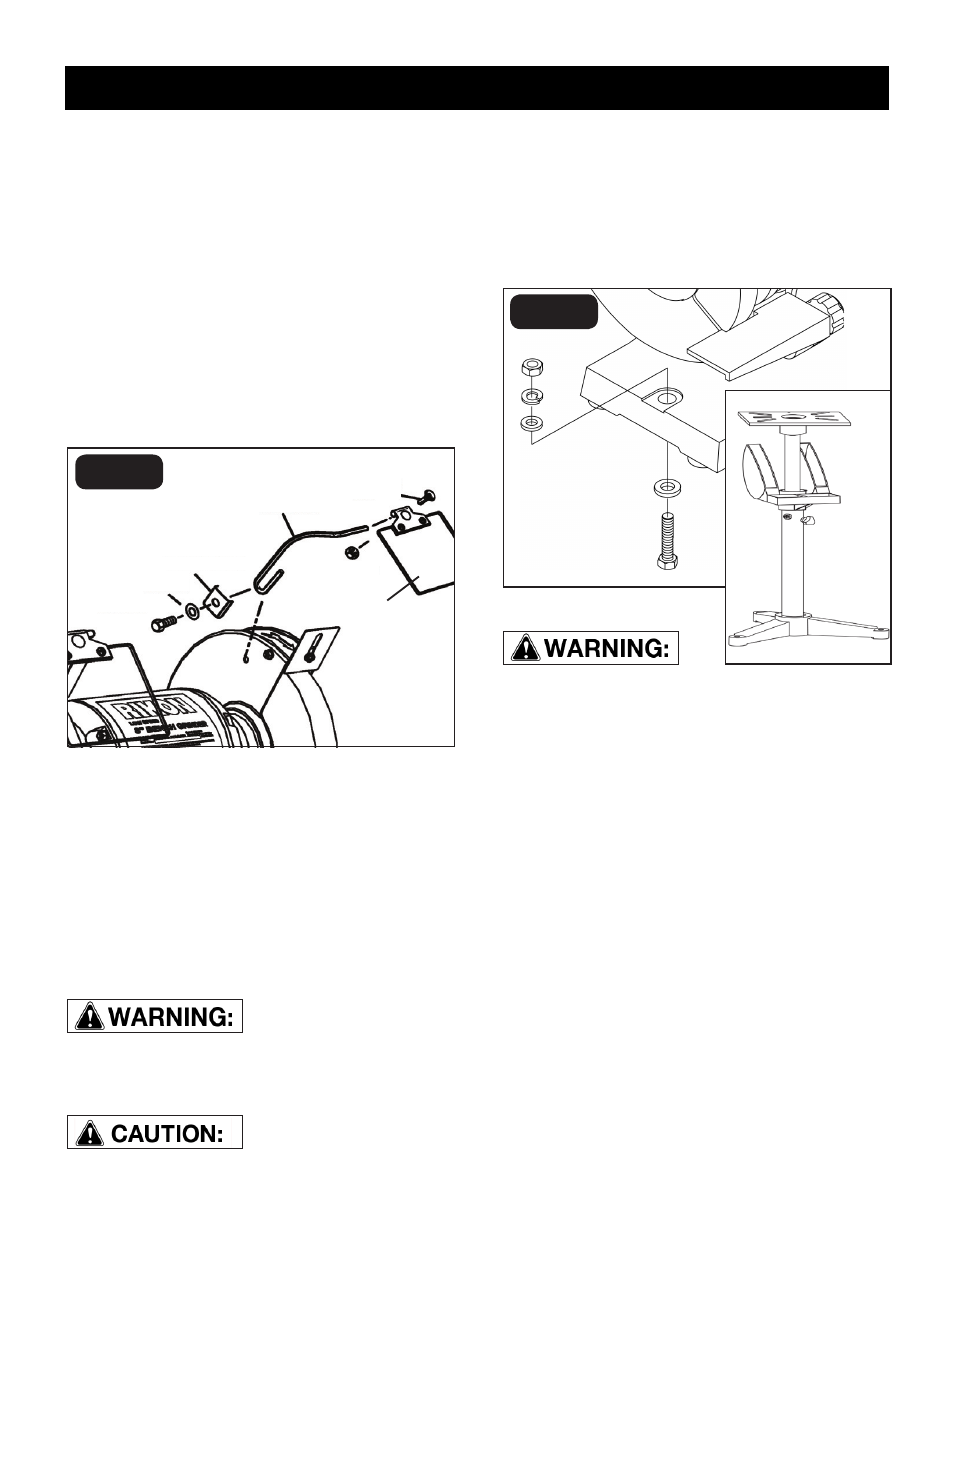
EYESHIELDS (Fig. H)
1. Assemble the eyeshields (A) onto the
eyeshield rods (B) and secure in place with
the carriage bolts and hex nuts (C).
2. Assemble the lower portion of the eyeshield
rod (B) to the wheel cover. Assemble the
hex bolts through the washers, clamp
brackets (D) and lower, curved ‘U’ portion of
the eyeshield rod (B), and screw the hex bolts
into the threaded holes on the inside face of
the grinding wheel covers (E).
3. The eyeshield should be positioned over
the grinding wheel to protect the user against
any sparks or debris that may be thrown
during use.
4. Adjust the eyeshield rod and eyeshield into
the desired position above the grinding wheel,
then tighten the hex bolt (D) and carriage bolt
(C).
ALWAYS USE THE EYESHIELDS AND
WHEEL GUARDS provided with the grinder.
ALWAYS WEAR EYE PROTECTION.
Everyday eyeglasse are NOT safety glasses.
ALWAYS wear Safety Goggles (that comply
with ANSI standard Z87.1) when operating
power tools.
PERMANENT MOUNTING (Fig. I)
Use the mounting holes in the base of the
grinder to firmly attach grinder to a solid work
surface or grinder stand (mounting hardware
and stand not included). See Figure I.
To avoid serious injury, secure the Bench
Grinder to a solid work surface. If the Grinder
is not permantly mounted to a work surface,
and remains portable, the Grinder’s base
should be temporarily clamped to a table or
board/plywood. Make sure that the clamps
do not interfere with the tool rests, wheels or
hinders the movement of the user and the
material being ground during use.
If the Bench Grinder is not securely mounted,
it will have the ability to move or tip over
during grinding operations and possibly
cause the operator’s fingers to contact the
grinding wheels.
ASSEMBLY INSTRUCTIONS
FIG. H
FIG. I
Page 12
HEX BOLT(D)
WASHER (D)
CLAMP BRACKET (D)
EYESHIELD ROD (B)
CARRIAGE
BOLT (C)
HEX NUT (C)
EYESHIELD (A)
(E)