Assembly – RIKON Power Tools 50-150 User Manual
Page 6
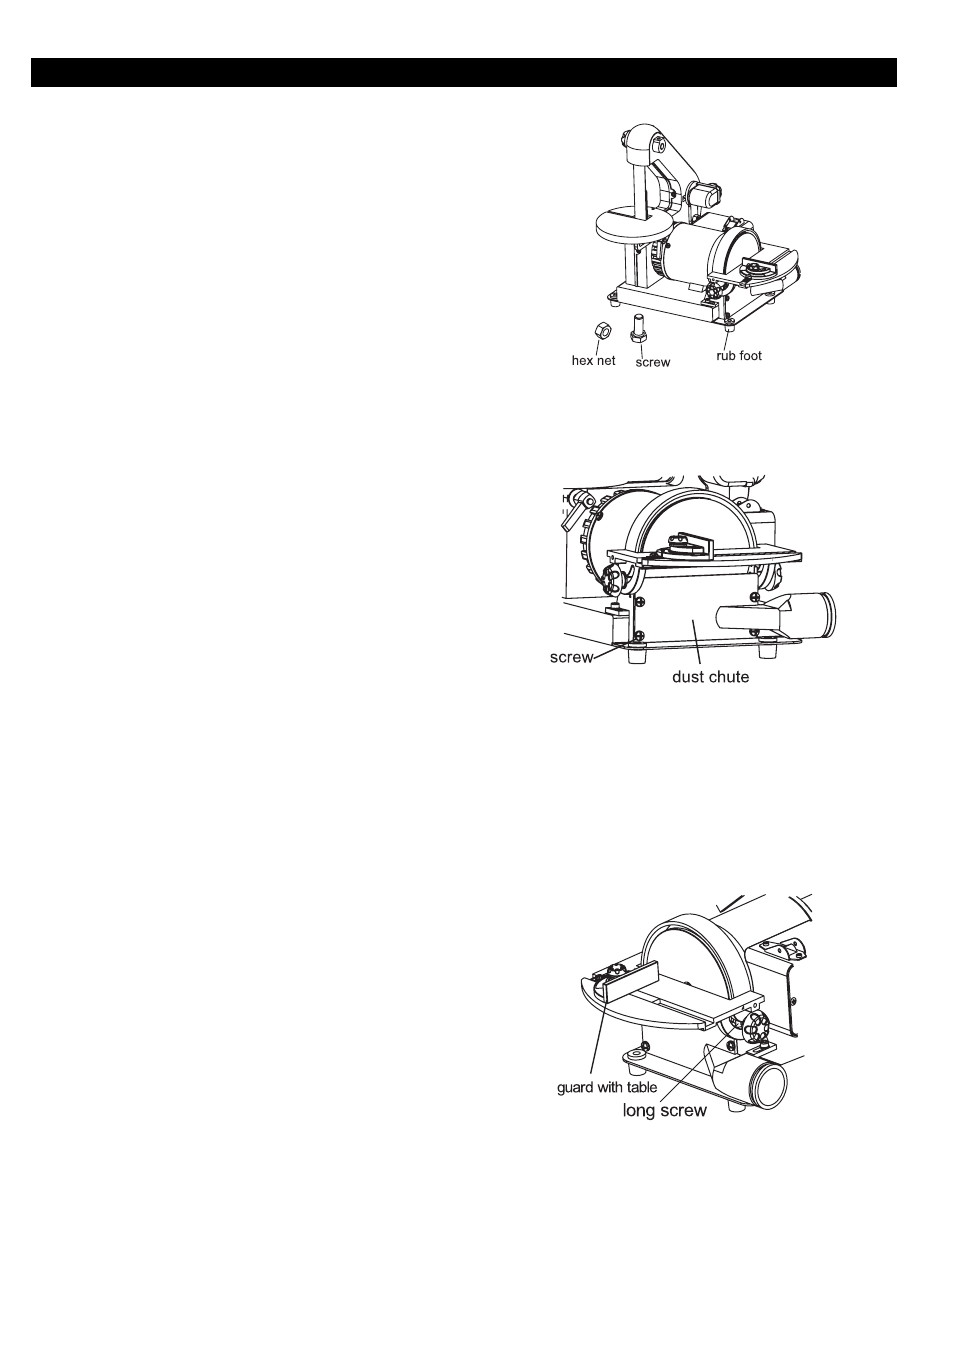
Fig. 01
Fig. 02
6
Assembly
Before You Start – Assembly and Installation
WARNING! Always ensure the sander is unplugged
prior to attempting any assembly, installation or
changing of parts and accessories.
Mounting the Sander to the Workbench
CAUTION: If during operation there is any tendency
for the sander to tip over, slide or walk on the
supporting surface, the sander should be properly
mounted to a workbench or stand.
1. Rubber feet were not fastened to this sander prior
to shipping. Do not install rubber feet when attaching
sander to a bench or stand.
2. Position the sander on the workbench.
3. Mark the workbench through the four mounting
holes located in the sander base (holes for rubber
feet).
4. Drill holes in the workbench at the marks.
5. Using long bolts, washers, lock-washers and nuts,
as shown (not supplied), secure the sander to the
workbench.
Dust Chute Installation – Disc Sander
1.
Fasten the sanding disc dust-chute to the
machine using the four Phillips M5 long screws
Assembling the Belt Sander Table
WARNING! When assembling the belt & disc sander,
ensure the machine is disconnected from any power
source.
1. Locate the belt-sanding table. (Part # 41 on Parts
Schematic)
2. Position the table by threading the belt and plate
through opening in table.
3. Fasten the table by using the table-adjustment
knob .
4. Bring the adjustment knob screw through the
opening on the underside of the table, then through
the mounting bracket into the nut.
5. Fasten by using the adjustment handle to turn the
integral screw into the nut.
Assembling the Sanding Disc Table and Mitre
Gauge
Ensure sander is disconnected from the power supply
prior to commencing work.
Fig. 03