Stand assembly – RIKON Power Tools 10-315 User Manual
Page 8
8
Caution: To avoid back injury, get help lifting the bandsaw. Bend your knees, lift with your legs, not
your back.
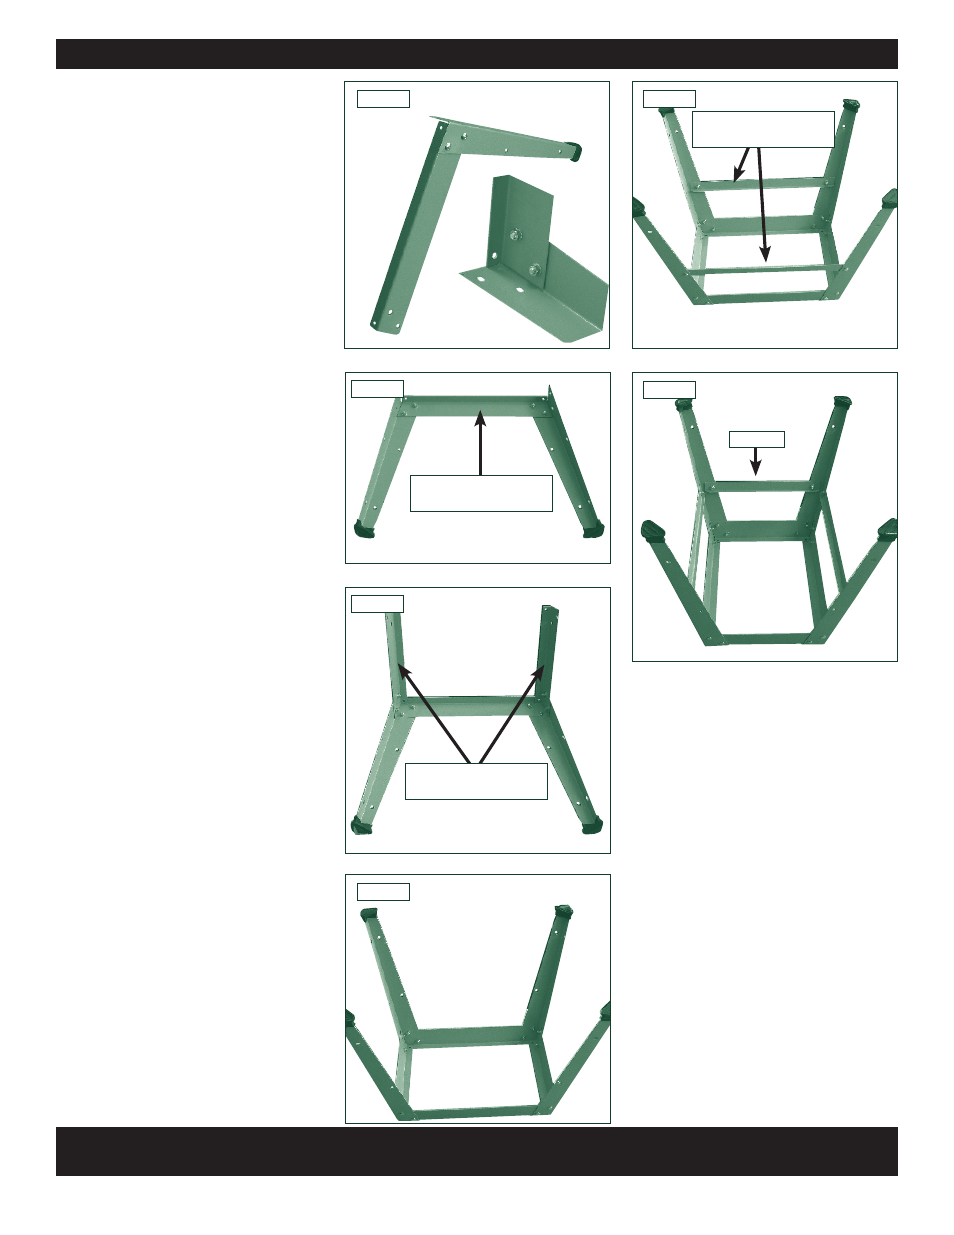
Stand Assembly
Note: When assembling this
legstand do not fully tighten
the nuts and bolts until the
assembly is complete.
1. Locate the first leg and
secure it to one of the long top
brace supports using the nuts,
bolts and washers supplied
Fig.1S.
2. In the same way, attach the
second leg to the brace support
Fig.2S.
3. Locate the short top brace
supports and install to the legs
as shown Fig.3.S.
4. Continue in this way until
all of the legs and top brace
supports have been installed
Fig.4S.
5. Holes a third of the way down
each leg are for securing the
mid brace supports. Attach the
long mid brace supports to the
frame using the nuts, bolts and
washers Fig.5S.
6. Finally, install the short mid
brace support to one of the
shorter sides Fig.6S.
Note
The side with the short mid
brace support installed will
referred to as the front of the
stand. This leaves the back
area free for the optional wheel
kit operation.
Fig.4.S
Fig.1S
Fig.6S
FRONT
LONG TOP BRACE
SUPPORT
SHORT TOP BRACE
SUPPORTS
Fig.5S
LONG MID BRACE
SUPPORT
Fig.2S
Fig.3.S