Rhino Shelter Dog Kennel 7.5W X 7.5L X 4H User Manual
Page 3
Warning: The warnings, precautions, and instructions discussed in this manual cannot cover all possible
conditions and situations that may occur. The operator must understand that
common sense and caution are factors which cannot be built into this product, but must be supplied by the
operator.
Unpacking
When unpacking this product check to make sure all parts listed on page 7 are included. If any
parts are missing or broken, please call MDM Products at 1-800-447-7079.
Assembly
Your Commercial Shelter will require complete assembly. It will require two people to assemble this
product. It is important that you read the entire manual to become familiar with the product BEFORE you
assemble and use the Shelter.
1.
Decide on an area to set up the Commercial Shelter. The area must be large enough to
accommodate the Shelter, including additional room to open and have access through the
Door (1). It must be a level, flat, secure area capable of supporting the Shelter.
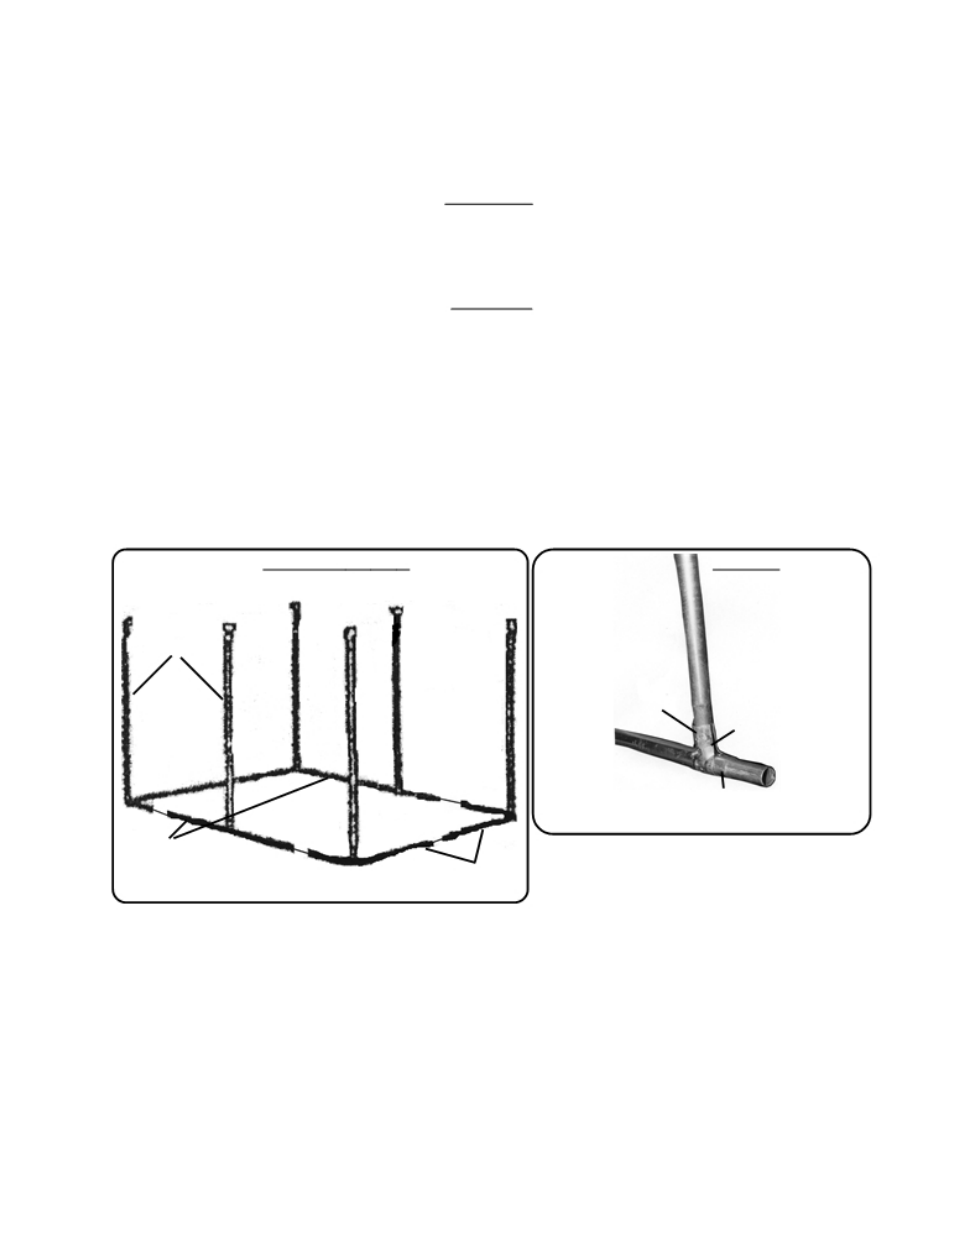
2.
To build the lower frame, connect one Straight Frame Rail (4) to each Corner Frame Rail (3).
Connect two Corner Frame Rails (3) together as shown in Figure 1.
Figure 1-Top View
Figure 2
Upright
Pipe (6)
Upright Pipe (6)
Pipe Clamps (8)
Medium Carriage
Bolt (14)
Frame Rail
Small
Hex Nut (16)
Straight
Frame Rail (4)
Corner
Frame Rail (3)
3.
Attach 6 Upright Pipes (6) to the lower frame created in Step 2-see Figure 1. Set one Upright
Pipe (6) on each corner, and one at midpoint on each Straight Frame Rail (4)-see Figure 1.
4.
To secure each Upright Pipe (6) in place, use two Pipe Clamps (8) and one Medium Carriage
Bolt (14). Insert the Upright Pipe (6) into the Pipe Clamp (8) and secure by inserting one
Medium Carriage Bolt (14) into the Pipe Clamp (8) and threading on one Small Hex Nut (16)
as shown in Figure 2.
5.
Verify that all of the Upright Pipes (6) are straight up and down. Securely tighten all of the
Pipe Clamps (8) in place.
6.
To build the upper frame, repeat Step 2 and attach this to the existing framework with the
Pipe Clamps (8), Medium Carriage Bolts (14) and Small Hex Nuts (16) as seen inFigure 3.
DK75754JJ/DK751306JJ
Please DO NOT return unit to store or dealer. For all questions or shortages please contact Page 3
Customer Service at: 800-447-7079 or 203-877-7070