Anchor step 2, End panel installation, Assembly instructions – Rhino Shelter EXT ROUND-12WX24LX8H User Manual
Page 6
Assembly Instructions
Extended Round Style 12 x 24 x 8
V2.2
Please Do NOT Return Assembly to Dealer or Store. For All questions or Shortages please call MDM Products directly
Customer Service 800-447-7079 or 203-877-7070
6
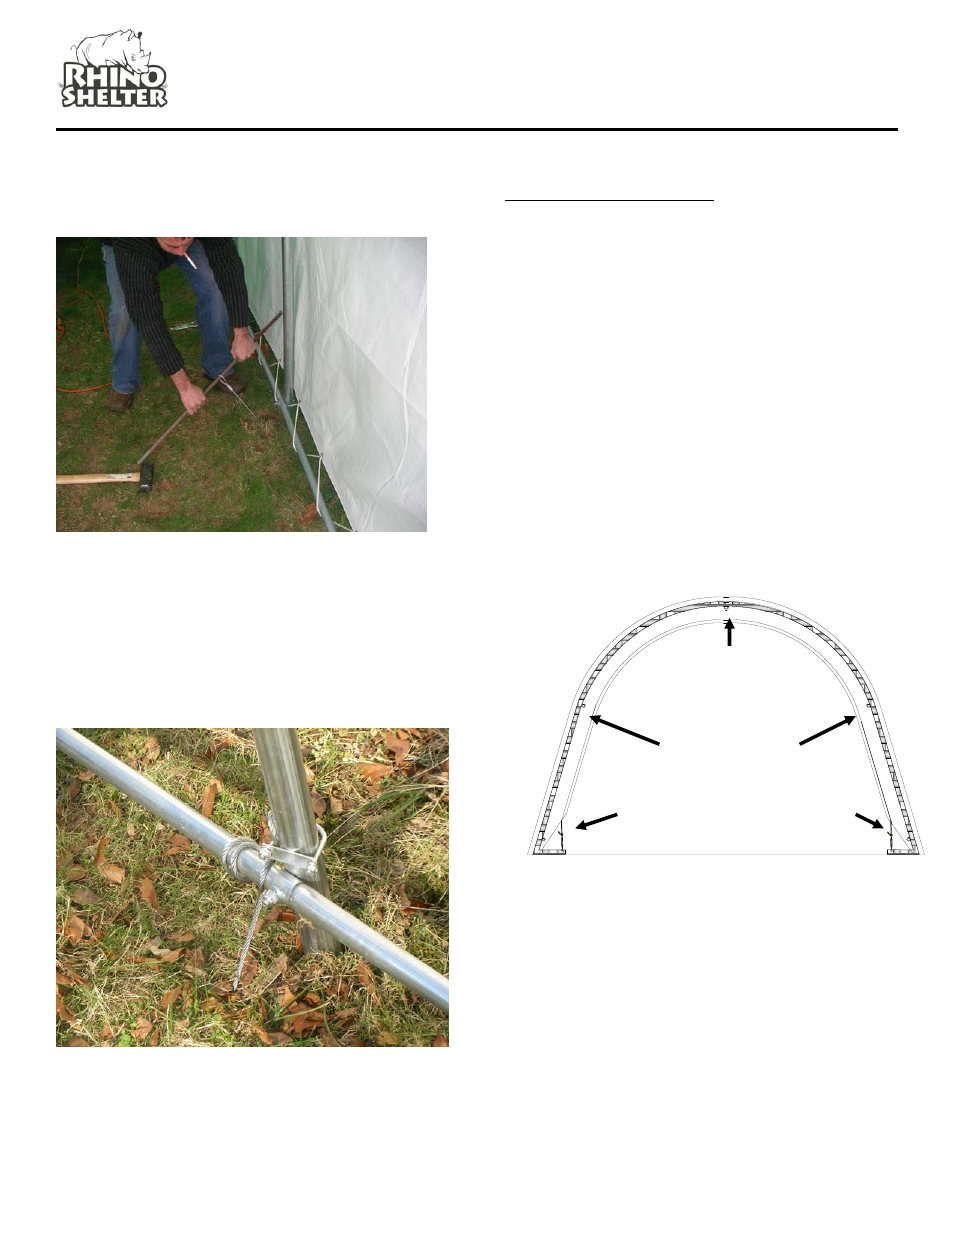
ANCHOR STEP 2
Place the Drive Rod through the loop in the anchor
lanyard. Pull upward to set anchor head into the ground.
END PANEL INSTALLATION
ANCHOR STEP 3
Slip one side of the U-bolt through the eyelet at the end
of the anchor cable. Attach the cable to the Arch leg
upright with the U-bolt and tighten. Do not attach to base
cross rails. Ensure there is no slack in the cable. Slack
can be removed by wrapping the cable around the tie-
down rail.
Note: End panels MUST be installed before installing
Main Cover onto frame.
Step1. Remove Carriage bolts from the Top Crest Rail
and the two Upper Cross Rails. Install one End Panel
Door w/Zippers DZD-5002 at a time to the Frame
assembly. Carefully align the door material over the
arch to make an even fit.
Step 2. Place the end panel over the first arch and wrap
the material over the End Arch bringing the slits in the
end panel to the inside of the frame. End Door Panels
have pre-cut slots that allow frame members to pass
through so rope pocket is inside unit. Place the top ridge
rail pole and the side cross rail poles through the
material slits and replace the carriage bolts and tighten.
Each door end will also require removal of the wind
brace bolts and placement of the wind braces through
slits in the ends panel. Reconnect wind braces with
carriage bolts once end panel is put into place.
Side Rails thru
Door Panels
Top Ridge
Rail thru
Door Panels
Rope Tie Off To Turnbuckles