Using your rainbow warning, Rainbow features – Rainbow e2 (Silver) User Manual
Page 5
USING YOUR
RAINBOW
WARNING
Because of the danger
of shock, any electrical
appliance should be used
only as directed. There
should be no unapproved
use of any electrical
product. Electrical
leakage and shorts can
occur whenever there
is electricity. With any
electrical appliance, if
the user is not grounded,
there is generally no
serious hazard. But if the
user is standing on the
ground, in a basement
or in a room where a fi lm
of water can reach the
ground, severe shock
could result. Therefore,
use the Rainbow only
as directed in this
owner’s manual.
Refer to the IMPORTANT
SAFETY INSTRUCTIONS
found on page 2. This,
of course, is true of
any use of electricity
when electrical fi xtures
or appliances that can
develop shorts.
1
FILLING WATER BASIN:
Fill the basin with cool water from a faucet
until the top of the water-level dome located
in the bottom center of the basin is just
covered.
NEVER FILL BASIN ABOVE
WATER-LEVEL DOME. When the water
becomes thick with lint and dirt, empty
the water basin and refi ll with clean water.
Add two capfuls of Rainbow Deodorizer Air
Freshener to maximize freshening of the air
while cleaning.
2
ATTACHING POWER UNIT TO WATER
BASIN:
Attach power unit to the water basin by
placing power unit over the basin so that
the air intake opening of the basin is aligned
with the air inlet opening in the power unit.
Attach water basin latches on each side to
secure the power unit.
NOTE: THE POWER
UNIT WILL NOT OPERATE WITHOUT
THE WATER BASIN IN PLACE.
3
ATTACH RAINBOW HOSE:
A
A
Insert hose coupling of hose into the air
intake until it clicks. To remove, press both
latches and pull hose from machine.
4
CONNECT ELECTRICAL CORD TO
WALL OUTLET:
Connect the electrical cord to wall outlet.
Toggle the switch forward to the “high-
speed” setting (>>). Use this setting for
normal cleaning operations. To turn the
Rainbow off, toggle the switch to the “OFF”
position (0).
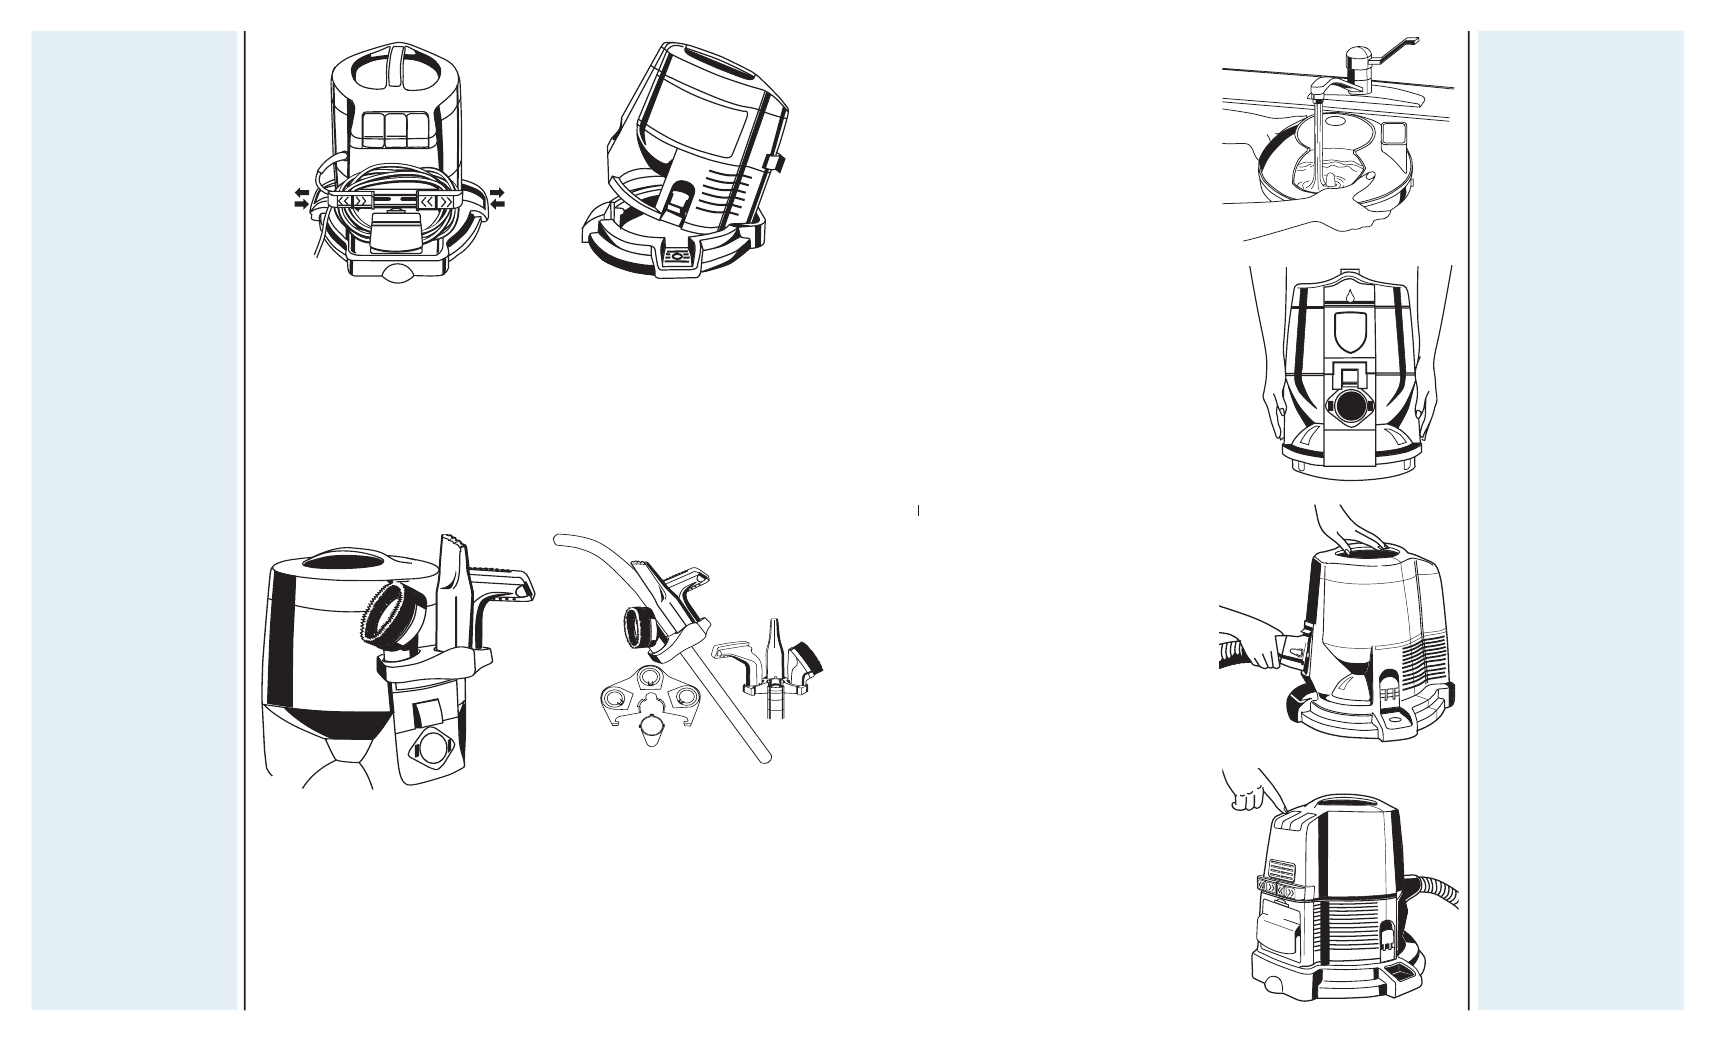
RAINBOW CORD CADDY:
The
Rainbow power cord attaches to the back
of the power unit. Sliding holders and
a stationary holder on the exhaust vent
panel door are used to store the power
cord. To use the power cord, simply
retract the cord caddy holders using the
fi nger grips (see illustration), and cord is
then accessible.
PLACING POWER UNIT ON DOLLY:
Place power unit on dolly by tipping front
end slightly upward so that the lip at the
back of the unit slips under the lip at the
rear of the dolly. Unit will then drop into
place on the dolly. A foot latch at the front
of the power unit locks unit in place. To
remove, depress foot latch and lift unit
from dolly by tipping slightly backward
and pulling upward.
RAINBOW
FEATURES
ATTACHMENT CADDY (WANDS): The attachment caddy is a one-piece unit that
holds the dusting brush, upholstery tool and crevice tool. It attaches to the front of
the power unit by slipping over the front of the housing into notches located on either
side of the housing (see illustrations). Pressing downward locks the caddy in place.
Attachments are stored by slipping them over the posts on the caddy. Push in button
lock to release attachment.
The attachment caddy can also be assembled to any wand end. Line up the tabs on
wand end with the inside slots on the caddy. Press caddy onto wand until it locks
onto the wand end. To remove, disassemble wands and twist caddy off of wand from
the front.
11
4