Johnson Level & Tool Mfg. 40-6250 User Manual
Page 9
©2013 Johnson Level & Tool - Rev. 2
9
Calibration Procedure:
1. Put sensor on a flat plate (±3°)
2. Power up sensor and remote. Red LED power light is on both
devices.
3. Hold the X/Y back LED icon for 5 seconds to enter
calibration mode. There will be five beeps.
4. The LCD screen is flashing except for the number 1. This
means you have entered calibration step 1.
5. Press the X/Y back LED icon again to enter calibration
step 2. First beep acknowledges the button press. The three
additional beeps indicate it has entered the 2nd stage of
calibration.
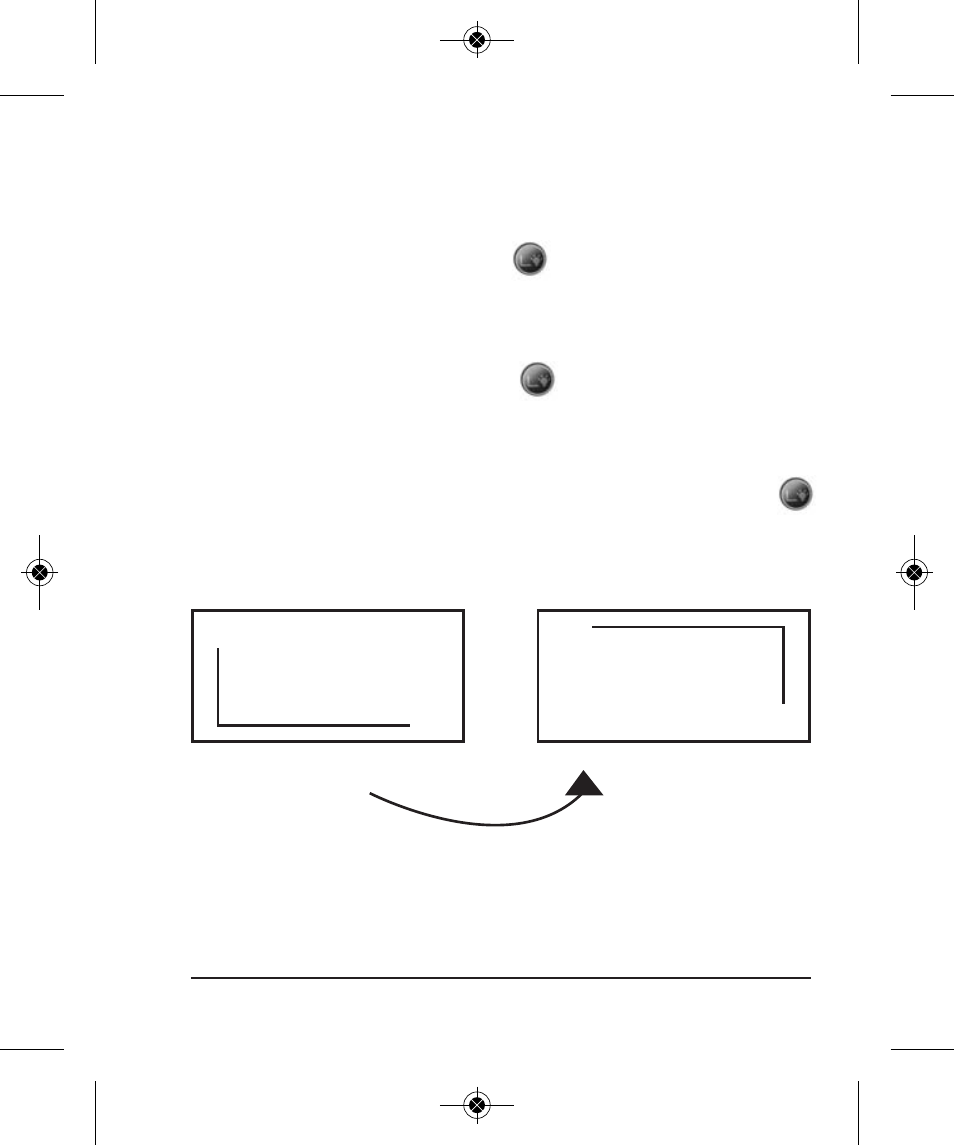
6. Rotate the sensor 180°, then press the X/Y back LED icon
button again (see below illustration).
7. The “2” will disappear and calibration is finished.
Y
X
Rotate 180º Clockwise
Johnson
40-6250
Y
X
Johnson
40-6250
6657H-English_Manuals 1/28/13 1:45 PM Page 9
- 1750-1000 (2 pages)
- 40-6900 (16 pages)
- 40-6926 (12 pages)
- 40-6926 (12 pages)
- 40-6910 (16 pages)
- 40-6936 (38 pages)
- 40-6065 (16 pages)
- 1455-0000 (42 pages)
- 1457-1000 (12 pages)
- 40-6060 (12 pages)
- 1880-2400 (12 pages)
- 40-6028 (12 pages)
- 40-6500 (24 pages)
- 40-6080 (16 pages)
- 40-6515 (84 pages)
- 40-6527 (24 pages)
- 40-6580 (30 pages)
- 40-6529 (30 pages)
- 40-6530 (21 pages)
- 40-6502 (22 pages)
- 40-6537 (18 pages)
- 40-6525 (21 pages)
- 40-6522 (26 pages)
- 40-6535 (20 pages)
- 40-0917 (8 pages)
- 40-0922 (14 pages)
- 40-6064 (2 pages)
- 40-6932 (36 pages)
- 40-6004 (24 pages)
- 40-6001 (32 pages)
- 40-6430 (2 pages)
- RAS-1 (67 pages)
- 40-6620 (16 pages)
- 40-6640 (20 pages)
- 40-6662 (20 pages)
- GL100 MX (3 pages)
- L100M MX (4 pages)
- 40-6602 (18 pages)
- 40-6230 (1 page)
- 40-6616 (12 pages)
- 40-6210 (5 pages)
- 40-6200 (5 pages)
- 9100 (3 pages)
- 40-6540 (24 pages)