The easy to upgrade hdd module – Elitegroup 558 User Manual
Page 76
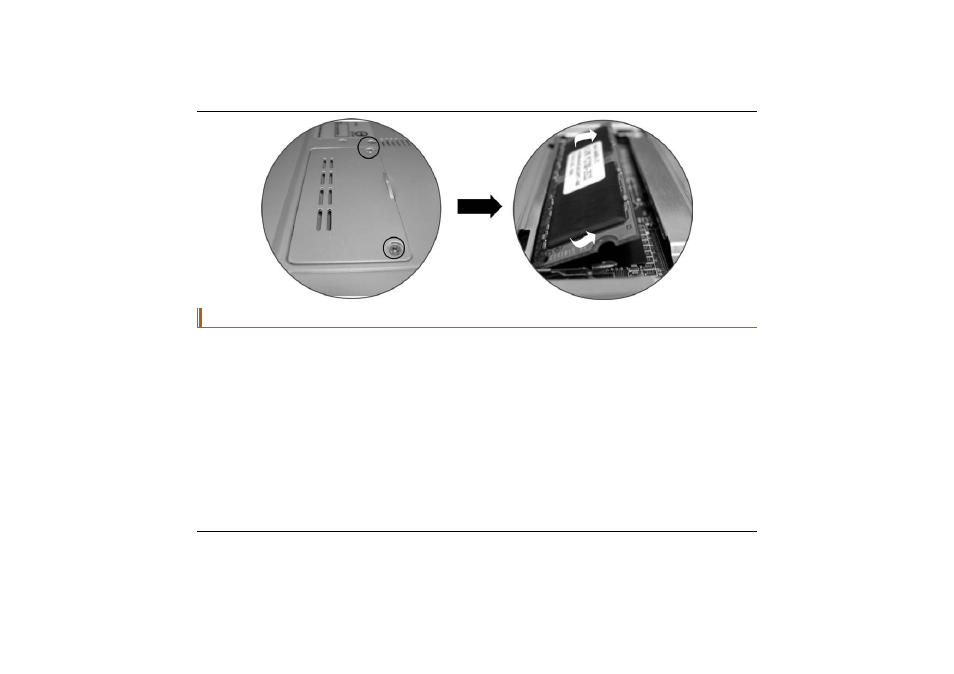
The Easy to Upgrade HDD Module
Power down the system completely. Turn the system over with the front of the unit facing you.
Remove the three screws that secure the compartment cover and set them in a safe place.
Slide the HDD cover away from the compartment.
The drive is attached to a special bracket that secures it to the notebook computer. There are 4 screws hold
the bracket. Remove the screws and set them in a safe place.
Push the HDD slightly in the direction of the arrow as shown in the illustration to release it from the pins of
the drive.
Gently hold the grip of the HDD, lift it up to release from its compartment.
To install the new HDD, you will need to align the tabs on the drive bracket with the slots on the bay. Press
down gently on the drive bracket until it engages with the system. Do not force the drive into place this can
bend the pins on the hard drive.
68
- MB50II / IA ID 1 (72 pages)
- MB40II ID 9 (73 pages)
- MB40II / IA ID 8 (73 pages)
- MB40II ID 7 (71 pages)
- MB40II ID 6 (57 pages)
- MB40II ID 5 (56 pages)
- MB40II ID 4 (53 pages)
- MB40II / IA ID 3 (73 pages)
- MB40II / IA - 41II ID 2 (72 pages)
- MB40II ID 1 (73 pages)
- L41II (69 pages)
- U40-50SA (70 pages)
- U41II (65 pages)
- U10IL (84 pages)
- A900 (V2.1) (85 pages)
- A535 (117 pages)
- A531_TM5800 (110 pages)
- 755SI4 v.1 (22 pages)
- 755SI4 v.2 (17 pages)
- 755SI4 v.3 (6 pages)
- 755SI4 v.4 (7 pages)
- 755SI4 v.5 (8 pages)
- 755IN v.1 (22 pages)
- 755IN v.2 (10 pages)
- 755IN v.3 (14 pages)
- 755IN v.4 (10 pages)
- 755IN v.5 (17 pages)
- 755IN v.6 (6 pages)
- 755IN v.7 (7 pages)
- 755IN v.8 (9 pages)
- 755II1 v.1 (22 pages)
- 755II1 v.2 (10 pages)
- 755II1 v.3 (14 pages)
- 755II1 v.4 (10 pages)
- 755II1 v.5 (17 pages)
- 755II1 v.6 (6 pages)
- 755II1 v.7 (7 pages)
- 755II1 v.8 (9 pages)
- 557 (81 pages)
- 536 (71 pages)
- 532 (83 pages)
- 332 (73 pages)
- 331 (77 pages)
- 331 (75 pages)
- 330 (73 pages)