Davey 2060s OD KINETICO DOMESTIC WATER SOFTENER User Manual
Page 6
R ev. 11/ 20 10
P age 6
P roduct N o. 14 19 7
11
12
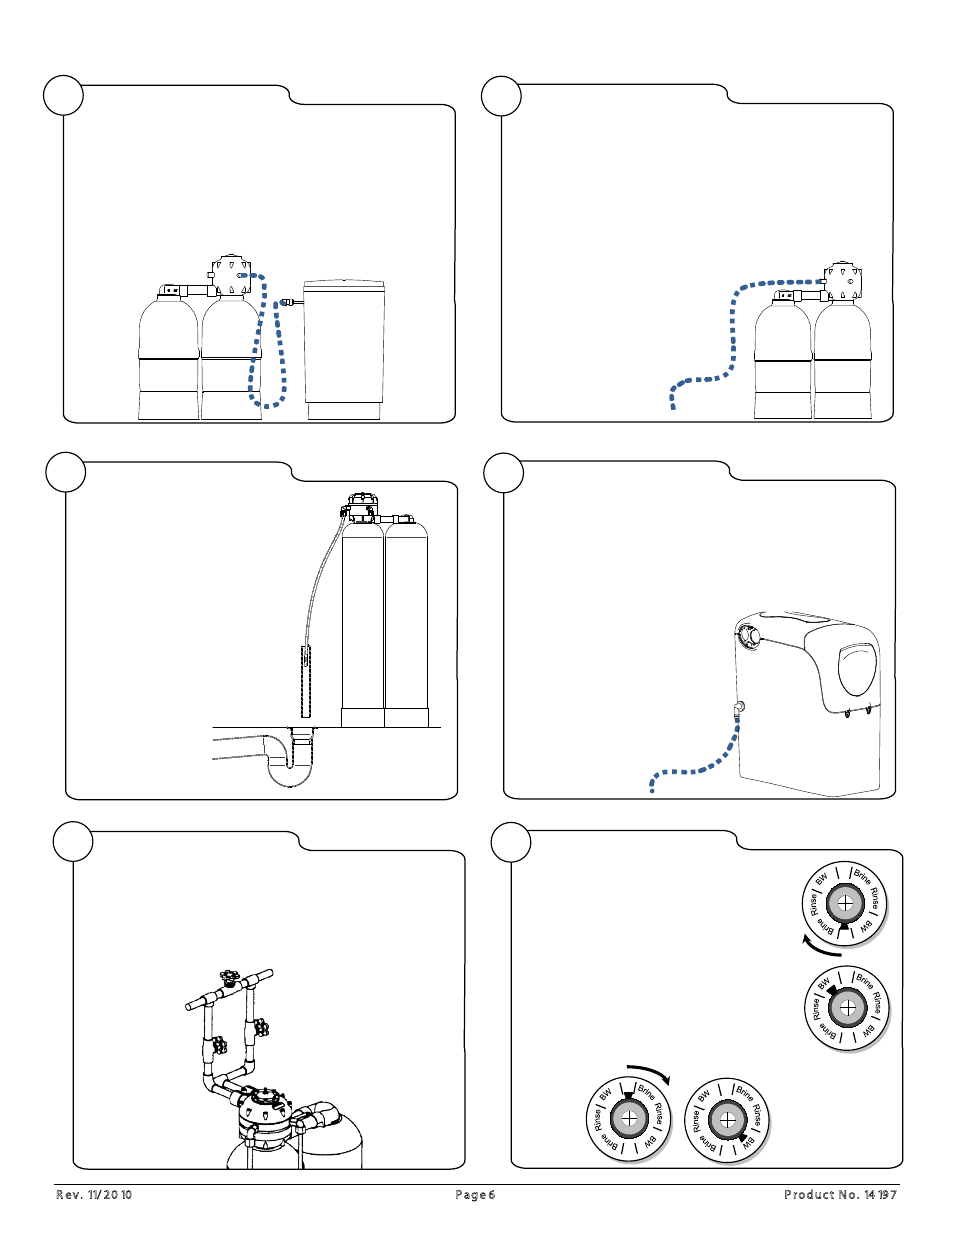
Connect Brine Tank
Apply 2 – 3 wraps of Teflon
®
tape to nipple on
control valve.
Locate tube elbow.
Hand tighten elbow, then turn once with wrench.
Attach tube from elbow to brine valve
– hand tighten tube side nuts.
Make sure tubing is not kinked.
Install Drain Line
Apply 2 – 3 wraps of Teflon
®
tape to ½” nipple on
control valve.
Locate ½” x tube elbow.
Hand tighten elbow, then turn once with wrench.
Attach drain line from elbow to drain.
Make sure line is not kinked.
Drain lines must not travel more than 2.4 meters up
from module head.
On lines traveling more than
10 meters, increase
diameter of the drain line.
13
14
Install Brine Tank Overflow
Install drain line on the barbed overflow fitting on the drum
and connect it to a drain.
Make sure the drain is not higher than the barbed fitting.
FOLLOW PLUMBING CODES.
15
16
Flush System
Flush both the inlet and outlet lines by opening the
by-pass valve and allowing water to rinse out any
debris in the lines.
Flush lines for 10 minutes.
Start-Up System
Put by-pass into service position.
Using #2 Philips screwdriver,
depress and turn actuator
clockwise into backwash
position.
Brine tank will begin to fill.
After 5 minutes, turn actuator
until alternate tank is in
backwash.
Confirm Drain Air Gap
Waste connections or drain
outlets shall be designed and
constructed to provide for
connection to the sanitary
waste system through an air
gap of 2 pipe diameters or
25 mm, whichever is larger.