Remove coolant from overflow tank, Draft effect procedure – UView Vacufill Coolant Exchanger User Manual
Page 6
TO TEST VACUUM
1. The air in the radiator must be evacuated. (See instructions above).
2. After one minute, set to "
TEST"
, set to "
OFF"
.
3. Observe gauge for 20 seconds for any drop in vacuum. No drop in vacuum means no leaks.
If there is no vacuum loss then proceed with filling the cooling system.
NOTE:
Fill cooling system with proper coolant as per manufacturer’s specifications.
TO EVACUATE AIR FROM COOLING SYSTEM
Attach and secure RadNeck assembly to cooling system.
Clamp off over-flow hoses to get a vacuum in the cooling system.
Attach air-line hose to .
Set to "
REMOVE"
and to "
REMOVE"
and to "
ON"
.
If vehicle is warm, the gauge will show a vacuum reading of 15 (Minimum). If the vehicle is cold
then a higher reading will show between 15-26.
REMOVE COOLANT FROM OVERFLOW TANK
1. Set to "
REMOVE"
and to "
REMOVE"
and to "
ON"
.
There will be a hissing sound from the Coolant Changer system.
Repeat Steps 8 to 10 (Pg. 2) to remove coolant.
4
5
Figure 10
HEATER HOSE
HEATER CORE
Disconnect Here
DRAFT EFFECT PROCEDURE
This procedure is performed once the open system procedure is completed to
maximize coolant removal.
Remove heater hose at heater core leading to the water pump.
(Figure 10)
Plug or pinch off the removed hose using appropriate tools (pinch-off pliers
or heater core plugs).
Temporarily plug heater core using heater core plug (not included).
Draw system down to 24-26 inches of vacuum.
Remove the temporary plug from the heater core.
core and engine block into the radiator.
For best results, repeat this procedure until no more coolant is extracted.
down to 24-26 inches of vacuum
Set to "
TEST"
to check cooling system for any vacuum leaks.
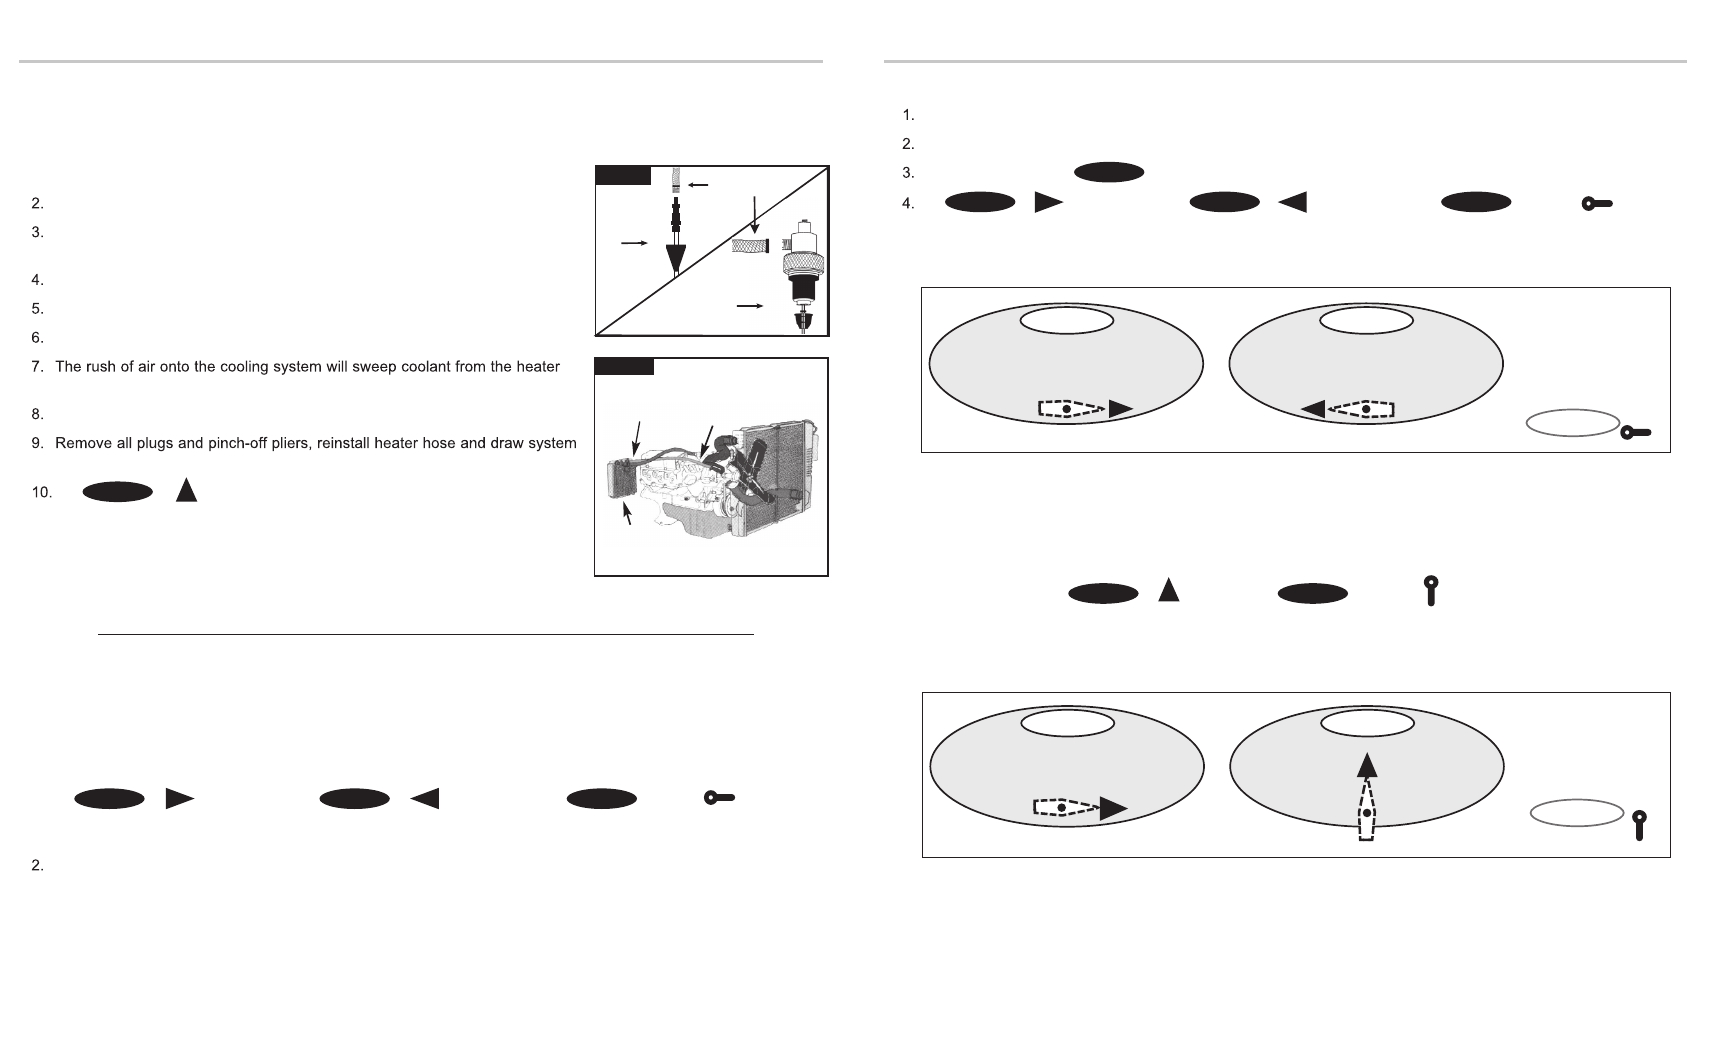
VALVE 1
VALVE 2
VALVE 2
VALVE 3
VALVE 3
VALVE 3
VALVE 1
VALVE 2
VALVE 2
VALVE 3
B
B
C
C
D
D
"ON"
"OFF"
VALVE 3
VALVE 3
REMOVE
B
TEST
D
VALVE 1
REMOVE
B
C
REMOVE
VALVE 2
VALVE 1
VALVE 2
An Extension Tube Assembly is needed to remove coolant from Overflow tanks. The tube in the Extension
tube Assembly should reach the bottom of an Overflow tank. If not, then slide the Cone up the tube until it
reaches the bottom.
1. Disconnect the Extension Tube Assembly or RadNeck Assembly from the
extraction hose via the coupler connection. (
Figure 9)
EXTENSION
TUBE
ASSEMBLY
Figure 9
RADNECK
ASSEMBLY
EXTRACTION HOSE