Sterling RT User Manual
Page 23
(U) RC015
To avoid any property damage or
personal injury, it is the installers responsibility
to make sure that the installation will not impair
the function of this curb, or the unit to be
installed.
All platforms must be mounted on level areas. The roof
must be suitable to support the weight of both the plat-
form and the unit to be mounted.
Position and assemble the platform, referring to Figures
2 and 3, and the following procedure:
1. All hardware used for these assembly procedures is
included with your platform, and should be used. Do
not tighten any hardware until the platform is com-
pletely level and square, and installed in a suitable
position on the roof, with proper alignment to the
roof/unit.
2. Position and install the platform rails.
3. Secure the platform to the roof decking.
4. Follow all installation instructions with any other unit
that may be used for this installation.
To avoid any property damage or
personal injury, it is the installer’s responsibility
that the roof curb and unit must be completely
sealed, preventing any water or air leakage/
damage.
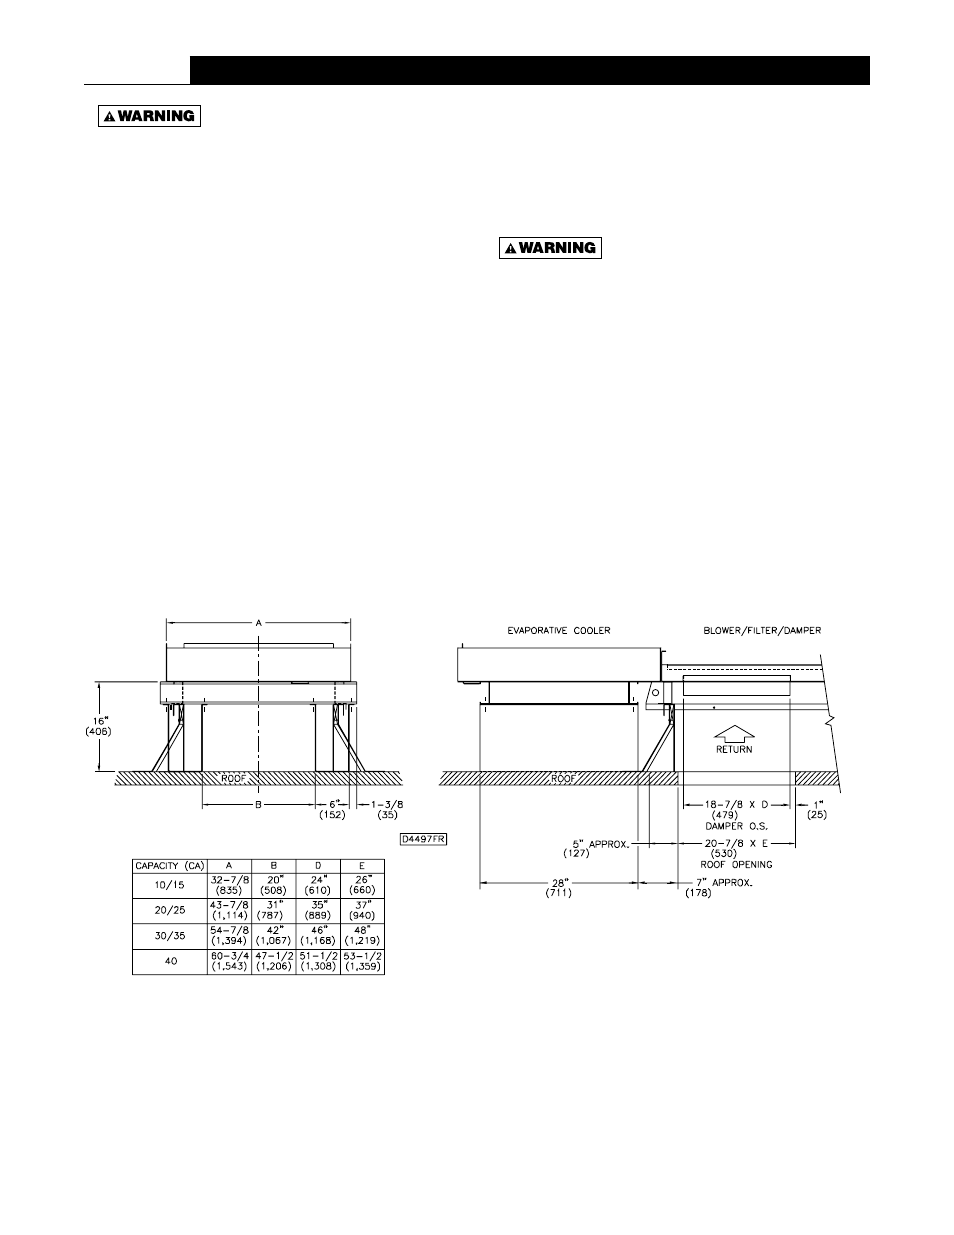
1 - Evaporative Cooler Assembly
2 - Platform Curb
3 - 1/4-20 “keps” nut (8 required)
4 - 1/4-20 x 5/8 Ig. hex head bolt (8 required)
Figure 32 - Evaporative Platform Curb to Rooftop Arrangement Installation
23