Style upgrade procedure, Checking the style of the mx100 main module, Style – Yokogawa PC-Based MX100 User Manual
Page 2: Affix the upgrade seal
IM 772050-01E
Style Upgrade Procedure
MX100 Main Module
1.
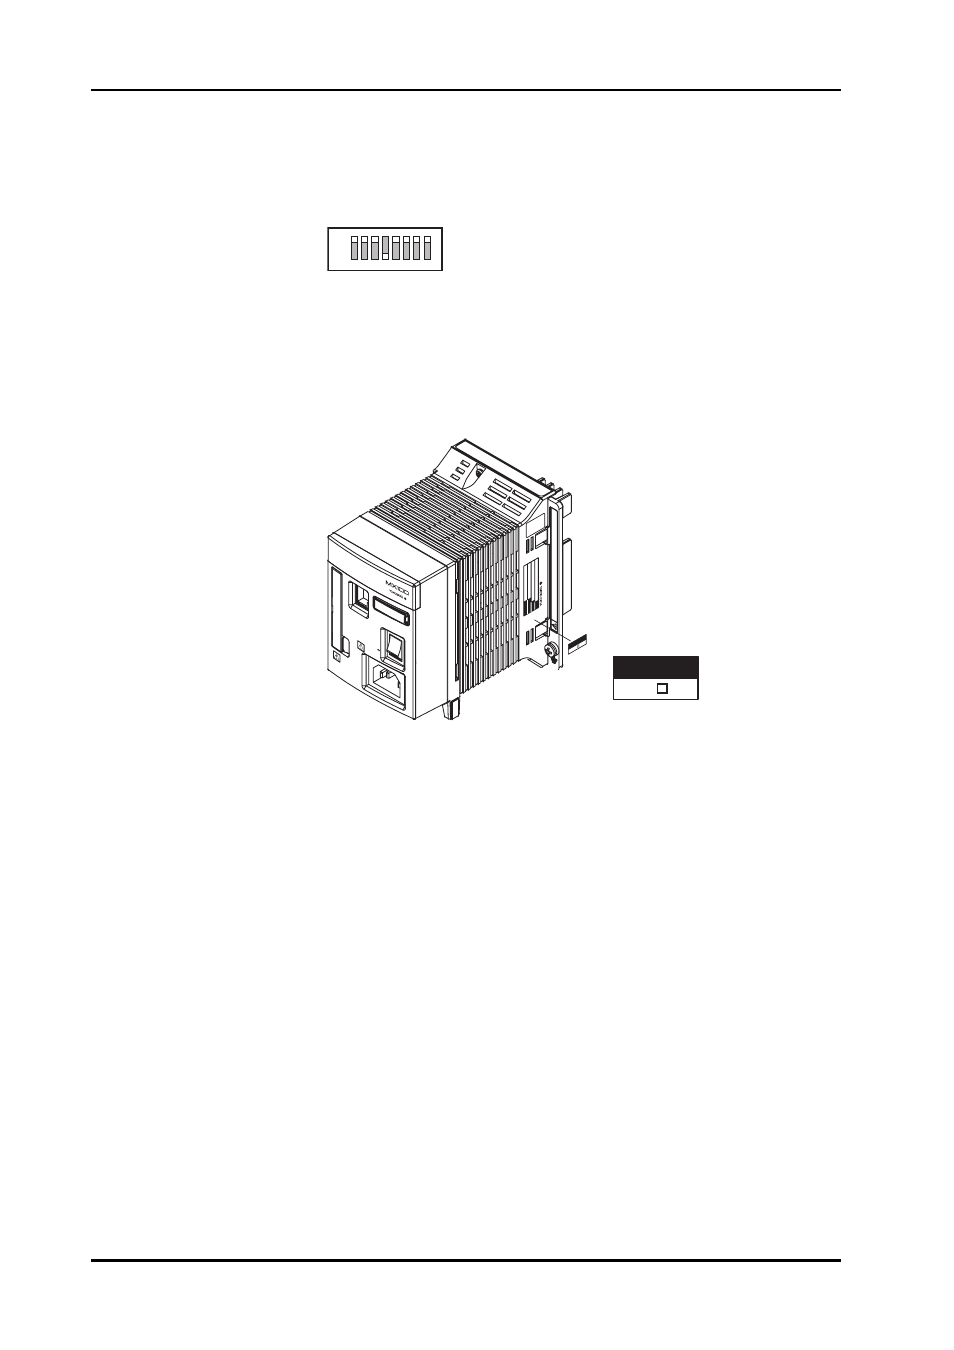
With the power to the MX100 turned OFF, insert the CF card containing the
style upgrade firmware into the card slot.
2.
Turn OFF dip switch number 4.
1
2
3
4
5
6
7
8
ON
SW1 to 3, SW5 to 8: ON
SW4: OFF
3.
Turn ON the power, then wait until the 7-segment LED displays 99.
This concludes the download. If the display reads something other than 99, the
download failed. Make sure the CF card is completely inserted, and repeat the
procedure from step 1.
4.
Turn OFF the power, then return dip switches to their original positions (all ON).
Turn ON the power.
5.
Affix the seal indicating the changed style number below the name plate.
S
ST
YL
E
Affix the upgrade seal
S
STYLE
DAT
A AC
QU
ISITI
ON
UN
IT
ETH
ER
N
ET
10BA
SE-T
10B
AS
E
-TX
100
- 2
40V
AC
PO
WER
SW
ON
1
2
8
7
6
5
4
3
70V
A M
AX
50 /
60Hz
Do not operate without reading saf
ety precautions in user
s man
ual.
ST
Y
L
E
MODEL
MA
C
NO
.
MX100 Standard Software
1.
Remove the old version of the MX100 Standard Software in the Control Panel
under Add/Remove Programs.
2.
Install the MX100 Standard Software for the new style that comes with this kit.
Checking the Style of the MX100 Main Module
Start the MX100 Standard Software, connect to the MX100, then check the style. For
details, see “Connecting and Disconnecting the MX100” in section 2.1 of the MX100
Standard Software User’s Manual (IM MX180-01E).