Yokogawa FS20 Fittings for pH and ORP User Manual
Page 13
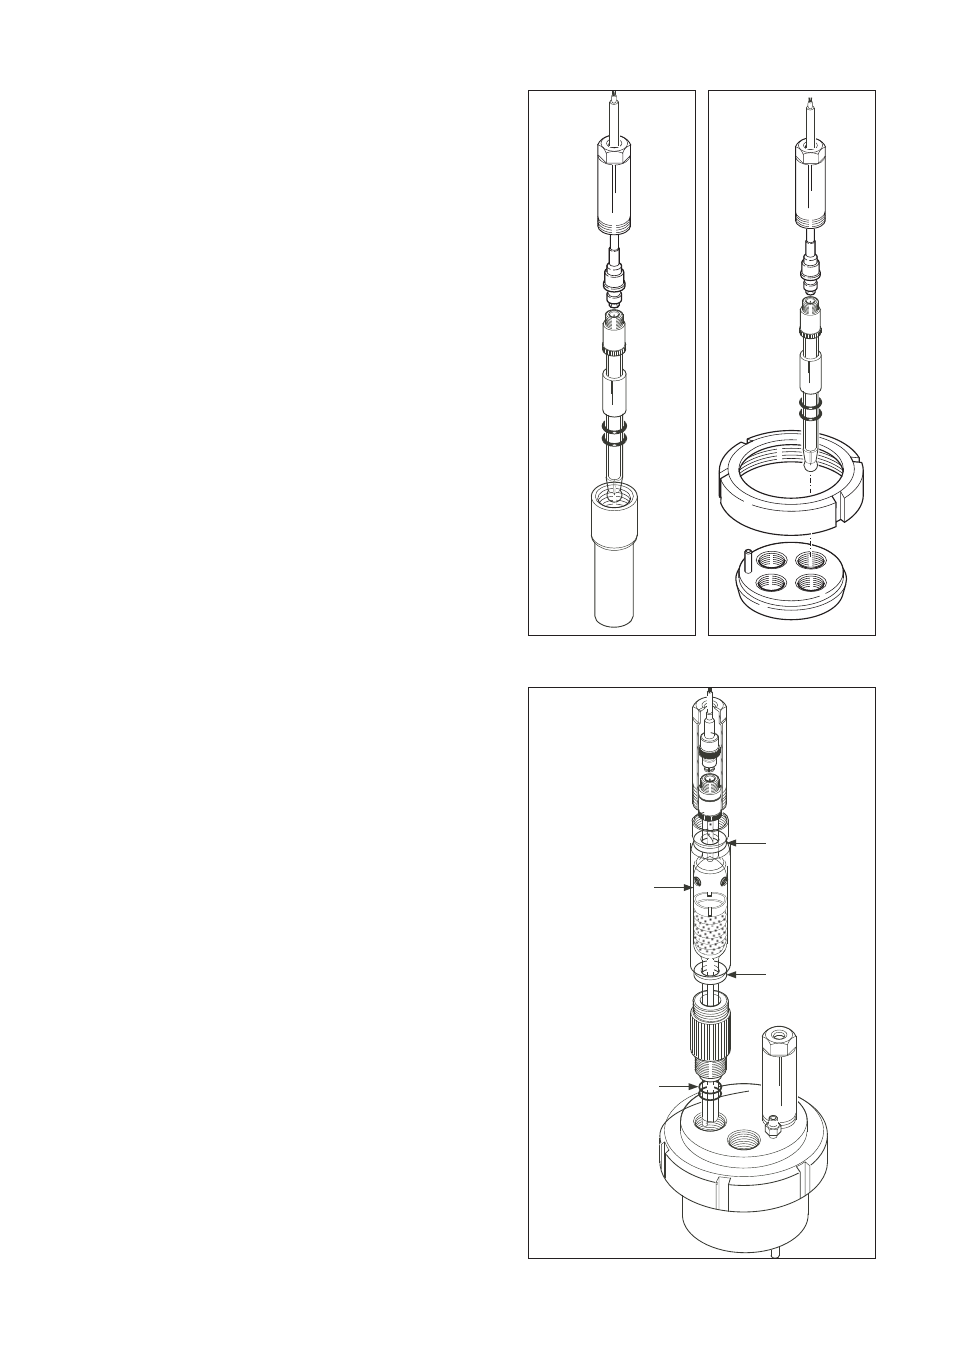
3-4-2. Mounting in a 1-hole design
Unscrew the electrode mounting set and fix the
cable and electrode as shown in fig. 3-8.
3-4-3. Mounting in a 3- and 4-hole design
Unscrew the nut from the top end of the fitting
or subassembly. Fix the electrodes and cables
as shown in fig. 3-9.
Note: In the holes for placing the electrodes are
blanking plugs (stoppers). These plugs
can be placed in unused holes after
pushing the two O-rings over the bottom
end.
ATTENTION
To prevent fouling of the contact new
Yokogawa electrodes are delivered with a cap.
It is recommended to remove the cap just
before fixing the cable.
ENSURE THAT THERE IS NO MOISTURE OR
DUST IN THE PLUG
Figure 3-8
Figure 3-9
4. ACCESSORIES
4-1. General
For mounting the non-DIN sized sensors in the
fittings and subassemblies Yokogawa added a
range of accessories to the program of fittings
which can be indespensable tools for optional
measuring tools (the specifications of the
accessories are on seperate sheets, see GS
12B6J1-E-E).
See the chapters below for mounting the
accessories.
4-2. Mounting kit for BELLOMATIC
electrodes (Model FP20-S13)
Using this mounting kit a BELLOMATIC
electrode of Yokogawa can be fixed in a fitting
or subassembly (see fig. 4-1).
This mounting kit can also be used for fixing
combined electrodes.
Figure 4-1
12B6K1-21
1-HOLE MOUNTING
12B6K1-22
MOUNTING IN A 3- AND
4-HOLE DESIGN
Ring
Ring
Electrode
O-rings
(11 X 3)
IM 12B6K1-01E-E
11