B3.3 installation of yfgw610, B3.3, B3-3 – Yokogawa YFGW610 User Manual
Page 26
B3-3
IM 01W02D02-01EN
B3.3 Installation of YFGW610
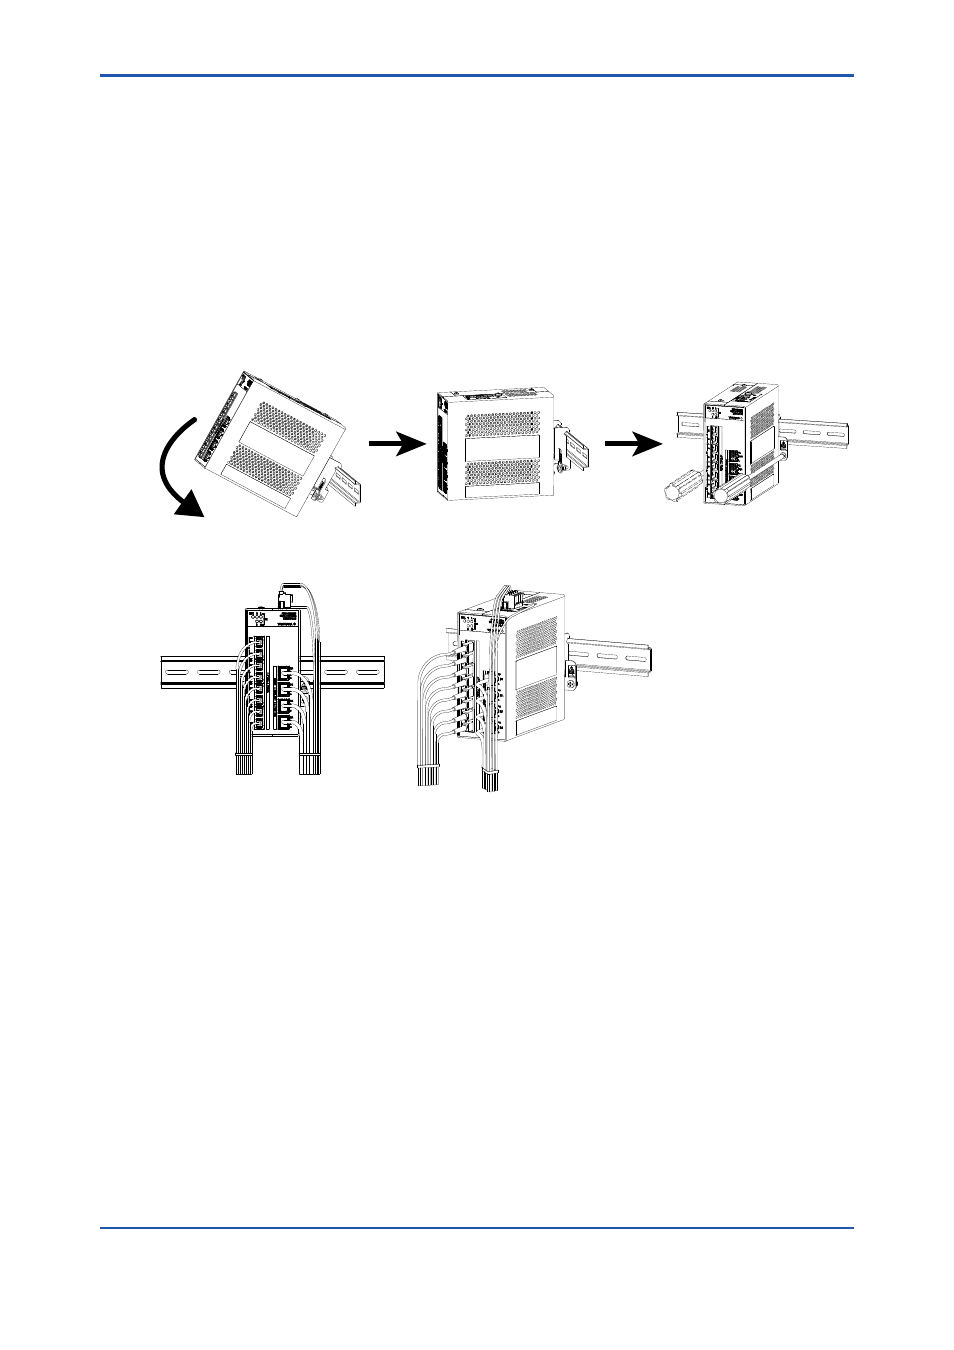
1. Loosen the screws at both sides of the DIN rail mounting bracket (located on the rear pan-
el), by rotating these screws in the reverse direction from the “Lock” position. The screws do
not drop even when fully loosened.
2. As shown in Figure B3-2, hook the top edge of the DIN rail mounting bracket onto the top
of the DIN rail, and return YFGW610 back to the horizontal position. Then, hook the bottom
edge of the mounting bracket onto the bottom of the DIN rail.
3. Tighten the screws at both ends of the DIN rail mounting bracket, by rotating them toward
the “Lock” position. Tighten screws securely to ensure there is no clearance between
YFGW610 and the DIN rails.
4. To remove YFGW610, follow the procedure described above in reverse. Loosen the screws
by three turns.
FB0302
Figure B3-2 Mounting of YFGW610 on DIN rail
FB0303
Figure B3-3 Mounting example of YFGW610 on DIN rail
- EJA130A (4 pages)
- EJA120A (31 pages)
- EJA130A (47 pages)
- EJA120A (40 pages)
- EJA438 (5 pages)
- EJA120A (6 pages)
- EJA115 (85 pages)
- EJA120A (47 pages)
- EJA120A (79 pages)
- EJA130A (2 pages)
- EJA210A (70 pages)
- EJA430A (78 pages)
- EJA130A (4 pages)
- EJX120A (4 pages)
- EJA210E (9 pages)
- EJX115A (55 pages)
- EJA210E (41 pages)
- EJA210E (96 pages)
- EJA210E (52 pages)
- EJA210E (89 pages)
- EJA210E (170 pages)
- FlowNavigator Software (163 pages)
- EJX910A (55 pages)
- EJX910A (175 pages)
- EJX910A (83 pages)
- EJX910A (9 pages)
- EJX910A (103 pages)
- EJA530A (67 pages)
- EJA120A (83 pages)
- EJX530A (52 pages)
- EJA110E (4 pages)
- EJA110E (85 pages)
- EJX120A (85 pages)
- EJA118 (76 pages)
- EJX118A (64 pages)
- EJA438 (72 pages)
- EJA430E (85 pages)
- EJA430E (7 pages)
- EJX430A (6 pages)
- EJX430A (40 pages)
- EJX430A (76 pages)
- EJA430E (96 pages)
- EJA430E (41 pages)
- EJX438A (10 pages)
- ADMAG AXR (194 pages)