En g l is h english – Pfister GT43-YP0Y User Manual
Page 4
E
N
G
L
IS
H
ENGLISH
ENGLISH
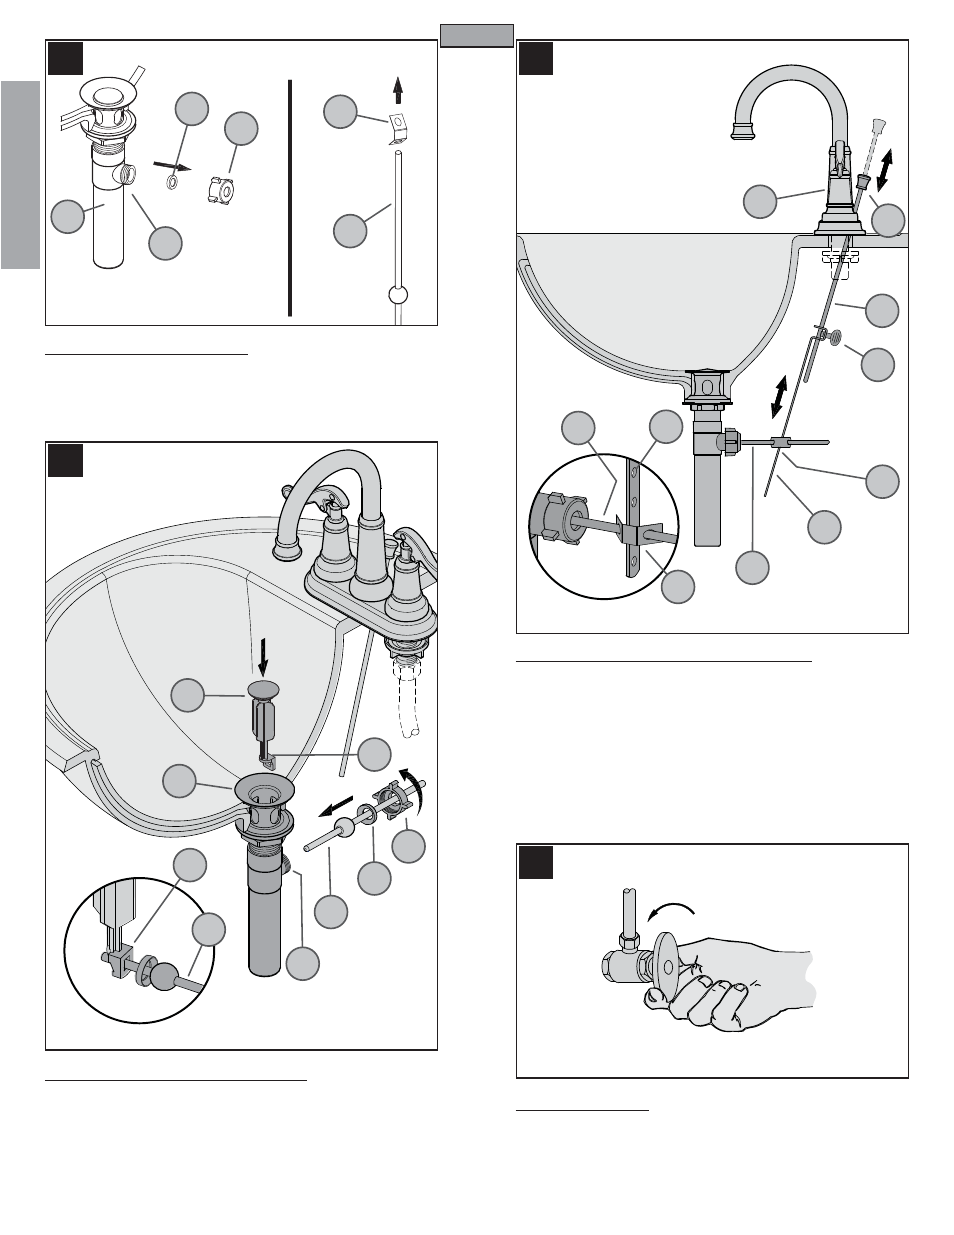
12 BALL ROD PREPARATION
Unscrew Nut (12A) from the Drain Body (12B) and retain one Packing Ring
(12C) inside the Ball Rod Opening (12D). Take off the Spring Clip (12E) from
the Ball Rod (12F).
13 POP-UP BALL ROD INSTALLATION
Drop the Stopper (13A) into Drain Body (13B) with the Off-Set (13C) facing
the rear. Place Nut (13G) and the other Packing Ring (13H) onto Ball Rod
(13D). Insert the Ball Rod (13D) into the Ball Rod Opening (13E) through the
Stopper Hole (13F) and secure with Nut (13G).
14 POP-UP ROD LINKAGE & ADJUSTMENT
Place one end of Spring Clip (14A) onto the end of Ball Rod (14B). Insert the
Ball Rod (14B) through a hole of Strap (14C). Connect the other end of Spring
Clip (14A) to Ball rod (14B). Insert bottom of Lift Rod (14D) into the hole on
top of Strap (14C). Adjust the Lift Rod (14D) height by tightening the Thumb
Screw (14E) on the Strap (14C) or by placing the Ball Rod (14B) on another
hole of Strap (14C). Be sure to leave enough space between Lift Rod Knob
(14F) and Faucet Body (14G) when Lift Rod is down.
15 UNIT START UP
Turn on hot and cold water supplies, and check for leaks above and below
the sink.
12
13
14
15
4
12C
12F
12A
12B
12E
12D
13A
13B
13C
13D
13F
13D
13H
13G
14B
14E
14C
14D
14A
14B
14A
14F
14G
14C
13E