En g l is h english – Pfister GT43-YP0Y User Manual
Page 3
E
N
G
L
IS
H
ENGLISH
ENGLISH
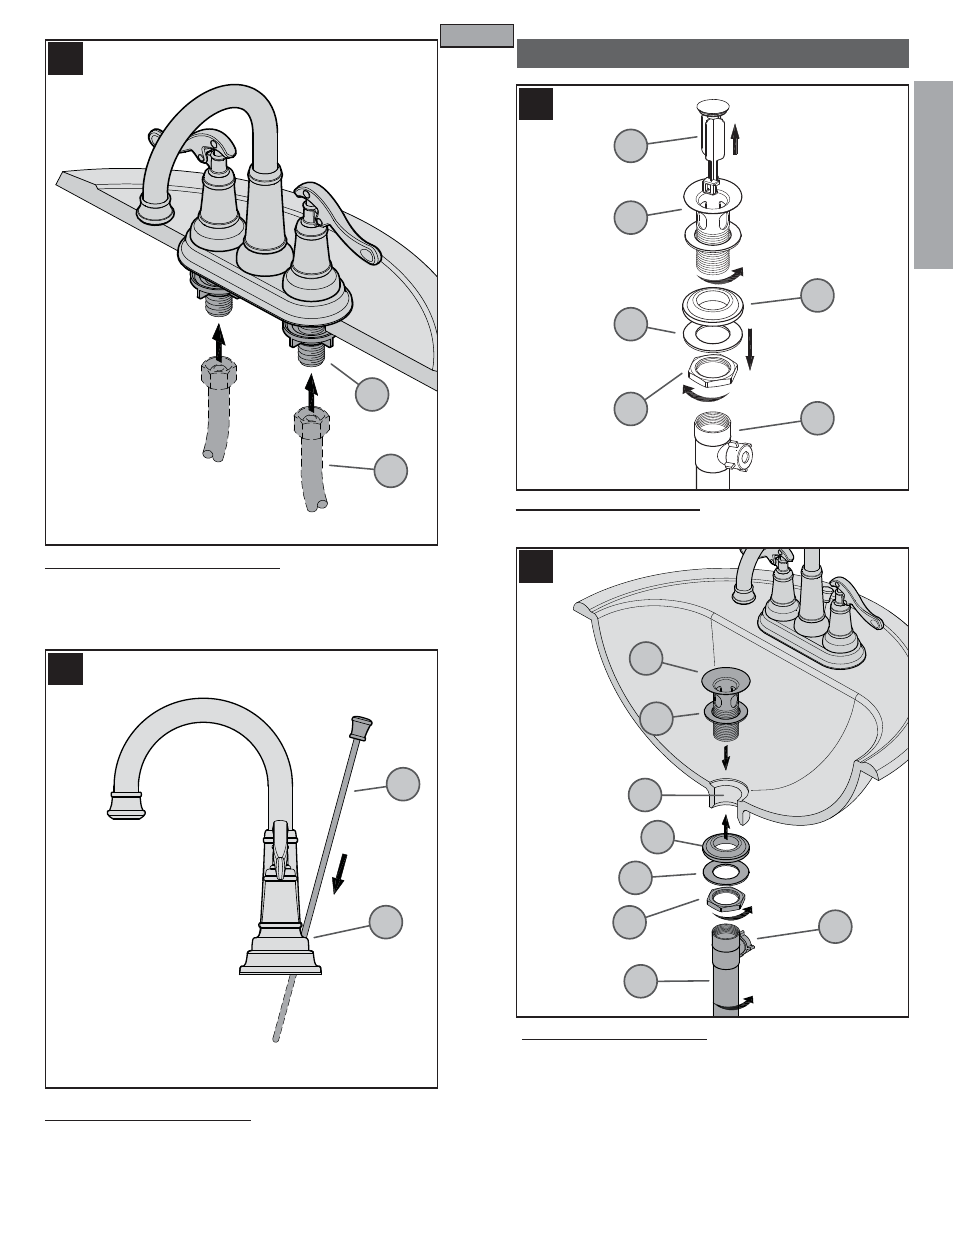
8 WATER SUPPLY CONNECTIONS
Connect water Supply Lines (8A) to Faucet Inlets (8B). Hot water supply
lines go into left inlet. Cold water supply lines go into right inlet. (Supply lines
are not included). Please follow manufacturer’s instructions when installing
suppy lines.
9 POP-UP ROD CONNECTION
Insert Lift Rod (9A) into hole at the back of Spout (9B). Gently, slide Lift Rod
(9A) down the hole in Spout Hub (9B).
10 POP-UP PREPARATION
Remove Flange (10A) from the Drain Body (10B). Remove Locknut (10C), Fric-
tion Washer (10D), Rubber Washer (10E) and Stopper (10F) from Flange (10A).
11 POP-UP INSTALLATION
The Flange (11A) can be installed with or without Rubber Seal (11B). If Flange
(11A) is installed without Rubber Seal, apply a small bead of plumber’s putty
underneath the Flange (11A) and around Drain Opening (11C). Insert Flange
(11A) into Drain Opening (11C). From underneath, slide Rubber Washer (11D)
and Friction Washer (11E) onto the bottom of Flange (11A). Thread Locknut
(11F) until Rubber Washer (11D) seats securely inside Drain Opening (11C).
Remove excess plumber’s putty. Wrap PTFE plumber’s tape to the bottom
external threads of Flange (11A) according to manufacturer’s instructions.
Thread Drain Body (11G) to bottom of Flange (11A) and adjust so that the Ball
Rod Opening (11H) faces the rear.
DRAIN BODY INSTALLATION
8
9
10
11
3
9A
8B
8A
9B
10D
10F
10E
10A
10B
10C
11D
11A
11E
11B
11H
11F
11G
HOT
COLD
11C