English, Lavatory installation – Pfister VSP-P10W User Manual
Page 2
ENGLISH
ENGLISH
LAVATORY INSTALLATION
2
1 BEFORE PROCEEDING
WARNING: Read all the instructions completely before proceeding. Price
Pfister recommends calling a qualified plumber if you are uncertain about installing
this product!
This product should be installed in accordance with all local and state plumbing and
building codes. Vitreous china is heavy and fragile. Use extreme care with all
parts!
2 SHUT OFF WATER SUPPLY
Locate water supply inlets and shut off the water supply valves. These are usually found
under the sink or near the water meter. If you are replacing an existing sink remove the
old sink and clean the surface thoroughly.
3 TOOLS RECOMMENDED
• Silicon sealant
• Slotted screwdriver
• Adjustable wrench
• Pliers
• Electric drill
• Cloth
• Measuring Tape
• Safety glasses
Your installation may require new supply lines and / or shut-off valves or other
additional tools.
4 LAVATORY INSTALLATION
The wall must be of sufficient strength to fully support the lavatory. Place the lavatory
(4A) on the pedestal base (4B) and position it against in its final installed location. Use
a level to assure that the lavatory top is level front to back and side to side. If necessary,
slowly move the pedestal to ensure proper fit.
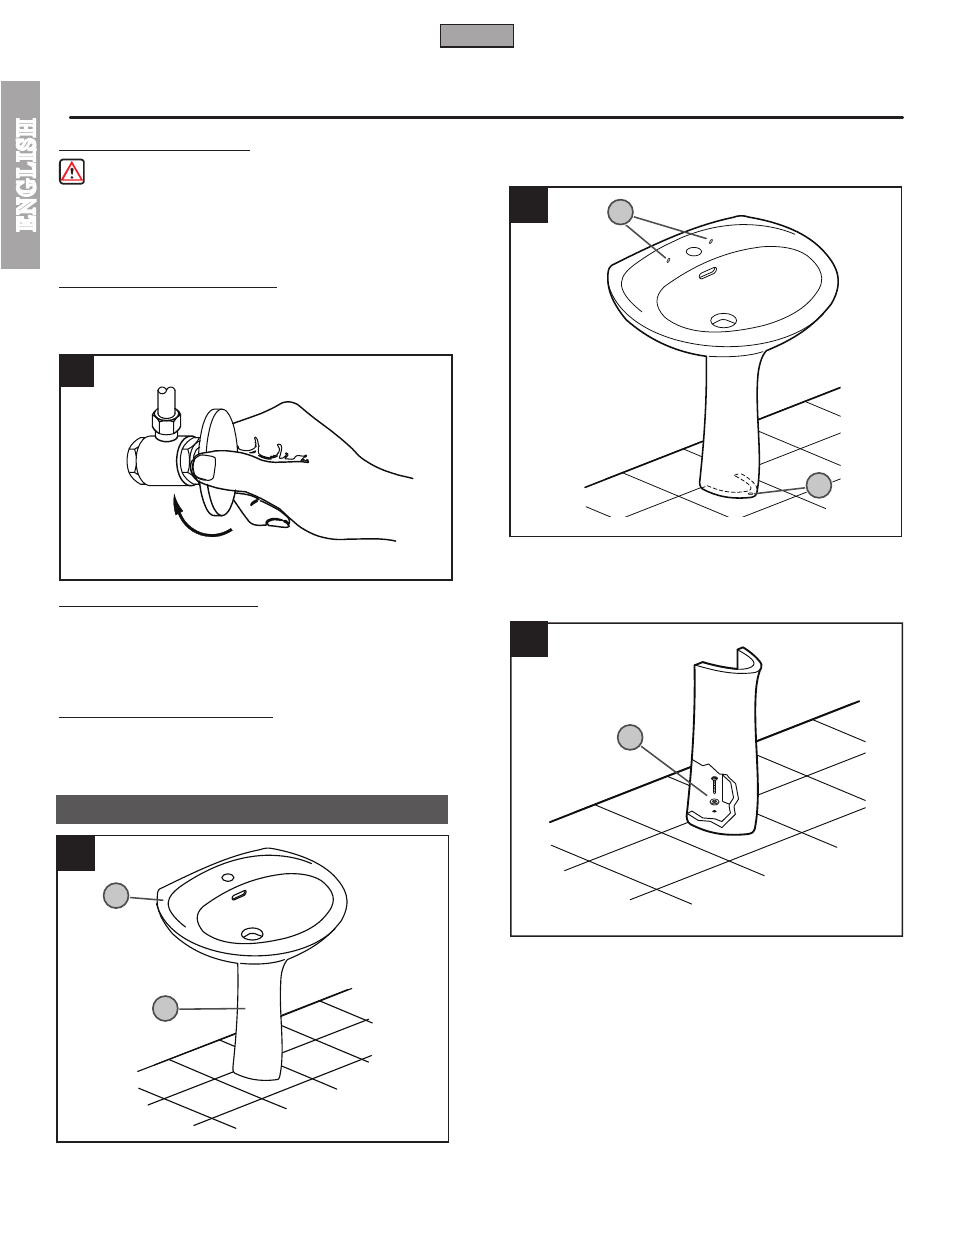
Locate the two lavatory anchoring holes back of the lavatory (5A) and one on bottom of
pedestal (5B). With a pencil, mark these anchoring hole locations on the finished wall
and floor. Remove the lavatory from the pedestal. Set the lavatory and pedestal aside.
Thank you for purchasing this Price Pfister product. All Price Pfister products are carefully engineered, and factory tested to pro-
vide long trouble-free use under normal conditions. This product is easy to install using basic tools and our easy to follow illustrated
instructions. If you have any questions regarding this product, call 1-800-Pfaucet (1-800-732-8238).
Drill 1/4″ mounting holes at the marked locations on the wall and the floor. Install the
lavatory hanger bolts. Place the pedestal over the drilled hole in the floor. Secure the
pedestal to the floor with lag bolt (6A). Note: Overtightening may cause damage to
the pedestal.
5
6
2
4
4B
4A
5B
6A
5A