En g l is h english – Pfister 0T8-410A User Manual
Page 4
E
N
G
L
IS
H
ENGLISH
ENGLISH
11
12
9
10 UNIT START UP
Turn on water supplies, and check all connections for leaks.
11 FLUSHING FOR TUB AND SHOWER COMBINATIONS
Turn on water supply lines allowing water to fl ow from tub spout outlet (11A)
until all foreign matter has cleared the line. Water should not be fl owing from
shower outlet (11B) during this test.
12 FLUSHING FOR SHOWER ONLY INSTALLATION
Be sure to plug Bottom Outlet with Pipe Cap or Plug (12A) using Thread Sealant.
Turn on water supply lines allowing water to fl ow from shower outlet (12B) until
all foreign matter has cleared the line.
13 FINISH WALL PREPARATION
Replace plasterguard (13A) onto Cartridge (13B) and secure with Screw (13C).
Make appropriate holes to fi nished wall. Price Pfi ster recommends that all Tub
Spout holes be 1 1/2” diameter and Shower Outlet holes be 1 1/4” diameter.
CAUTION: Make sure that leak tests and fl ushing are performed before
preparing the fi nished wall.
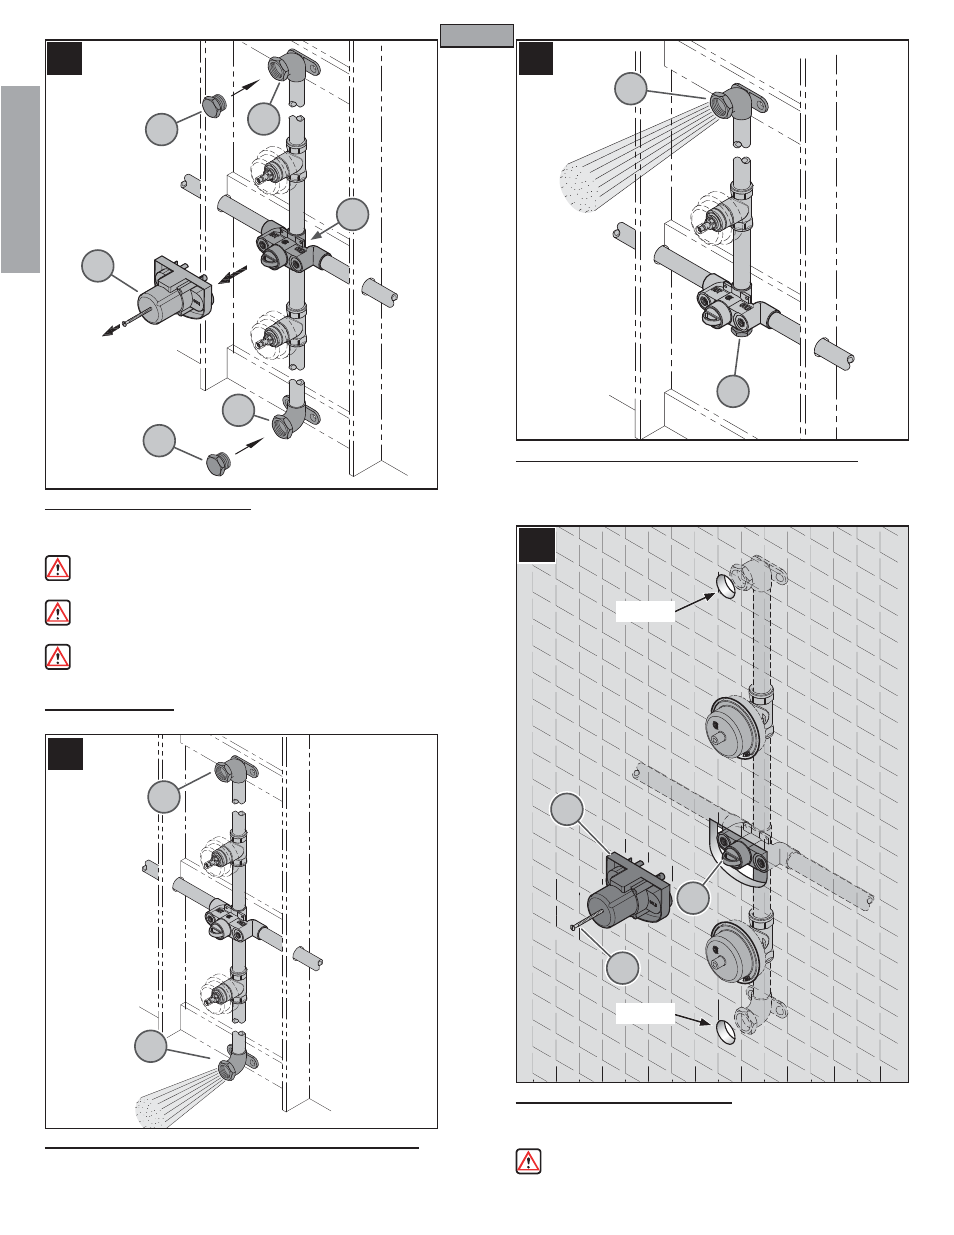
9 PRESSURE TESTING VALVE
Use two iron pipe plugs (9A) (not included) on both Shower Outlet (9B) and
Tub Outlet (9C). Remove Plasterguard (9D) from Valve Body (9E). Perform
pressure test. Look for leaks from the outlets.
WARNING: Pressure testing is not to exceed 250 PSI. Make sure
pressure is balanced between hot and cold inlets.
WARNING: Differential pressure of hot and cold inlets must not exceed
100 PSI.
CAUTION: Slowly remove pipe plugs (9A) from tub and shower outlets
to relieve pressure.
13
4
11A
11B
12A
13A
13B
13C
12B
1 1/2" Dia
1 1/4" Dia
9A
9A
9B
9C
9D
9E