En g li sh – Pfister R15-407K User Manual
Page 4
EN
G
LI
SH
ENGLISH
15
12
11
14
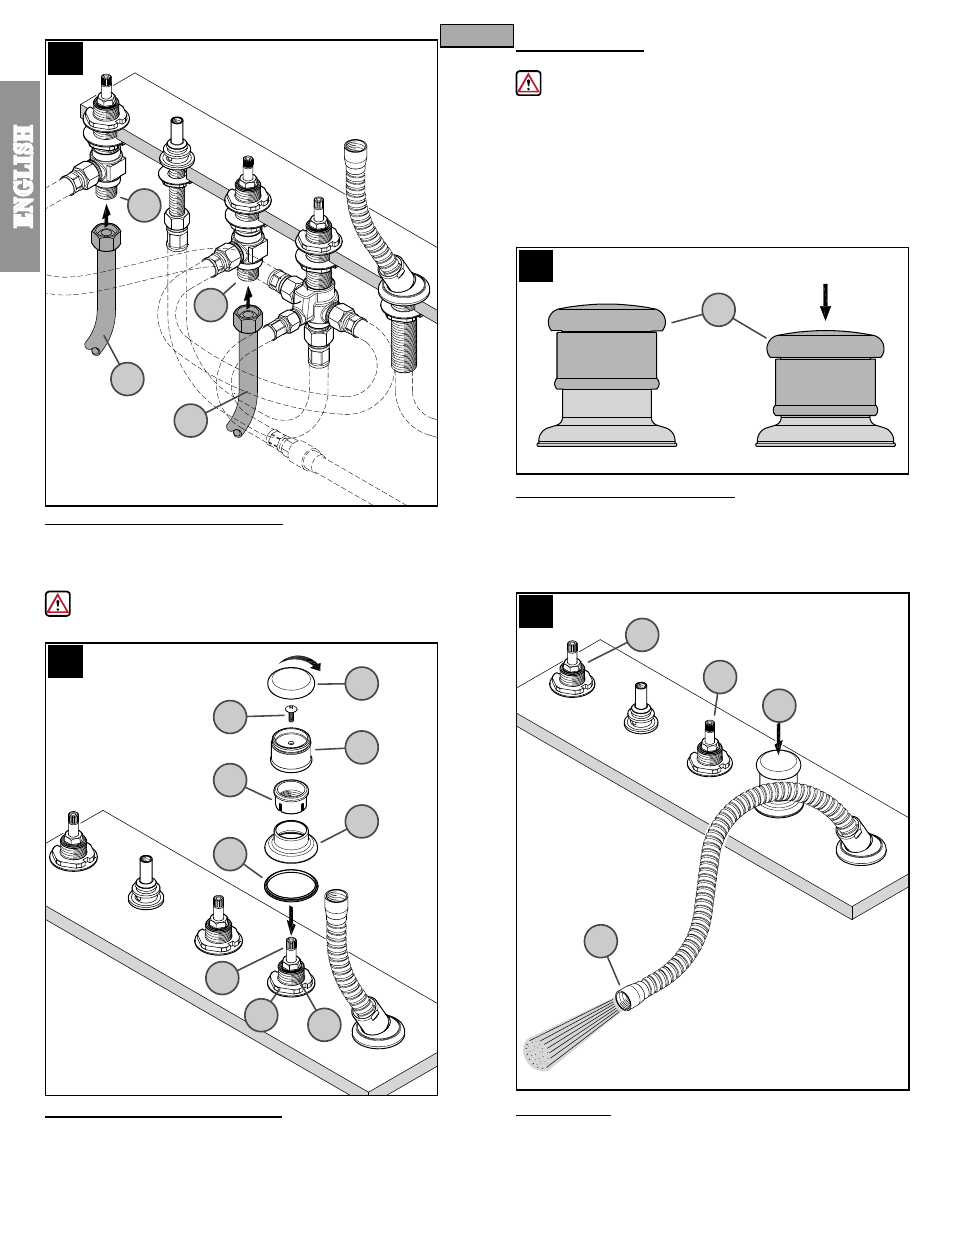
11 WATER SUPPLY CONNECTIONS
Connect water supply lines (11A) to Valve Inlets (11B) using high flow flexible
lines with ½”-14 NPSM threads (Not Supplied), or solder ½” (13 mm) I.D.
(⅝” (16 mm) O.D.) copper lines (cut to length). Please follow manufacturer’s
instructions when installing supply lines.
If any soldering has been done, reinstall all internal parts after heat has
dissipated from all components.
12 DIVERTER TRIM INSTALLATION
Place Plastic Ring (12A) and Flange (12B) over Valve Body (12C) covering
the Valve Body Washers (12D). Secure by screwing the Plastic Nut (12E)
onto the Valve Body (12C). Attach Handle Hub (12F) onto Valve Stem (12G),
and secure with Screw (12H). Hand tighten Decorative Button (12J)) onto
Handle Hub (12F).
13 UNIT START UP
Turn on hot and cold water supply valves.
Caution: Check all connections for leaks. Failure to do so can
result in water damage.
14 DIVERTER VALVE FUNCTION
To activate the handheld shower, press Handle Hub (14A) located on the
diverter.
15 FLUSHING
To prevent damage to the internal parts of your faucet from debris that may
have collected in the water lines, it is necessary to flush the system. Open
Valves (15A) to full on position and activate Diverter Valve (15B) allowing
water to flow from the Spray Hose (15C). Run water for one minute. Repeat
in hot and cold positions.
4
12E
11B
15A
14A
11B
11A
11A
12C
12G
12A
12F
12B
12H
12J
12D
15A
15B
15C
HOT
COLD