English, Faucet functions – Pfister GT531-YPK User Manual
Page 4
ENGLISH
ENGLISH
13
FAUCET FUNCTIONS
12
14
15
11
11 PULL-OUT HOSE ATTACHMENT
From underneath sink, push Quick Connector (11A), located on the end of the Pull-Out
Hose (11B) firmly upward onto the Receiving Tube (11C), until unable to push any further.
Pull down on the Quick Connector (11A). If the housing and the Inner Collet (11D) separate
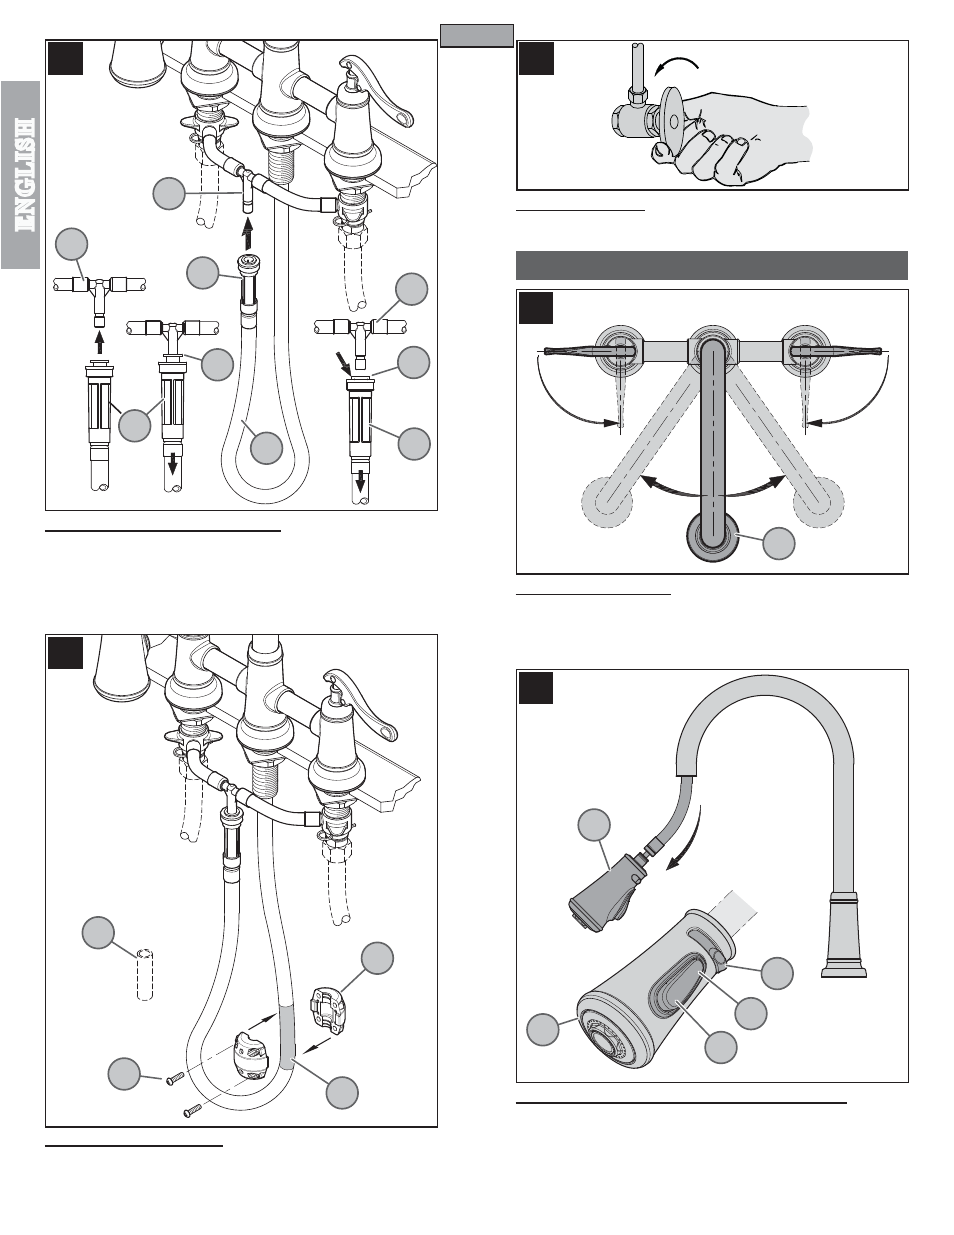
slightly but do not pull off, the Receiving Tube (11C), quick connect is secure.
To remove Pull-Out Hose (11B), Push up on Quick Connector (11A). Holding Plastic Collet
(11D) in place, pull downward on Quick Connector (11A) until Tube (11C) is free.
12 WEIGHT ATTACHMENT
Discard Cardboard Fitting (12B) from Weight (12A). Place Weight (12A) above the
beginning of hose bend (12C) at the spout side (as shown in shaded area). Secure
Weight (12A) with Screws (12D).
13 UNIT START UP
Turn on hot and cold water supplies, and check for leaks above and below the sink.
14 FAUCET FUNCTION
COLD valve: close-counterclockwise, open-clockwise; HOT valve: close-clockwise,
open-counterclockwise. The Spout (14A) can be rotated around the Faucet Body in
any direction.
Note: Flush faucet before turning on valve (see step 16).
15 PULL-OUT OPERATION & SPRAY OPERATION
The Spray Head (15A) can be pulled forward to spray water in any direction.
To activate the spray mode, simply press Toggle Button (15B) located under the spray
head. You can change between spray and stream by pressing the opposite sides of the
Toggle Button (15B/15C) while the faucet is in operation. The water flow will increase
by sliding Spray Selector Switch (15D) from side to side (in spray mode only).
Note: The faucet will always turn on in regular stream mode.
4
HOT
COLD
ON
ON
11A
11D
11D
11A
11C
11C
11A
11B
11C
12B
12A
12C
12D
14A
15C
15B
15D
15A
15A