Val-Matic Threaded Silent Check Valve User Manual
Page 4
3
DISASSEMBLY
The valve should be removed from the pipeline for
disassembly. A skilled mechanic with proper tools
should perform all work on the valve. Refer to
Figure 2.
1.
Clamp the downstream end of the valve body
(1) lightly in a vise using the hex connection
on the valve body. Do not over-clamp the
valve or permanent distortion and leakage
may occur. Remove the seat end of the valve
using a wrench on the hex ends and unthread
the body seat in a counterclockwise direction.
2.
Lift up the disc assembly (3) from the body.
3.
Examine the Teflon seat (2) and inspect the
mating body seating surface for damage.
Some minor dents and discoloration are
normal. Grooves or wear areas will cause
leakage and requires valve replacement.
4. Remove spring (4) and check for wear or
cracks.
REASSEMBLY
All parts must be clean and gasket surfaces should
be cleaned with a stiff wire brush in the direction of
the serrations or machine marks. Worn parts,
gaskets, and seals should be replaced during
reassembly.
1.
Insert spring (5) into body (1).
2.
Lay disc (3) over the spring.
3.
Install the seat half of the body making sure
that the body washer (5) is in place. Tighten
the body pieces as a minimum to the torques
shown in Table 2. If leakage is found during
operation, elevate the torques until leakage
stops.
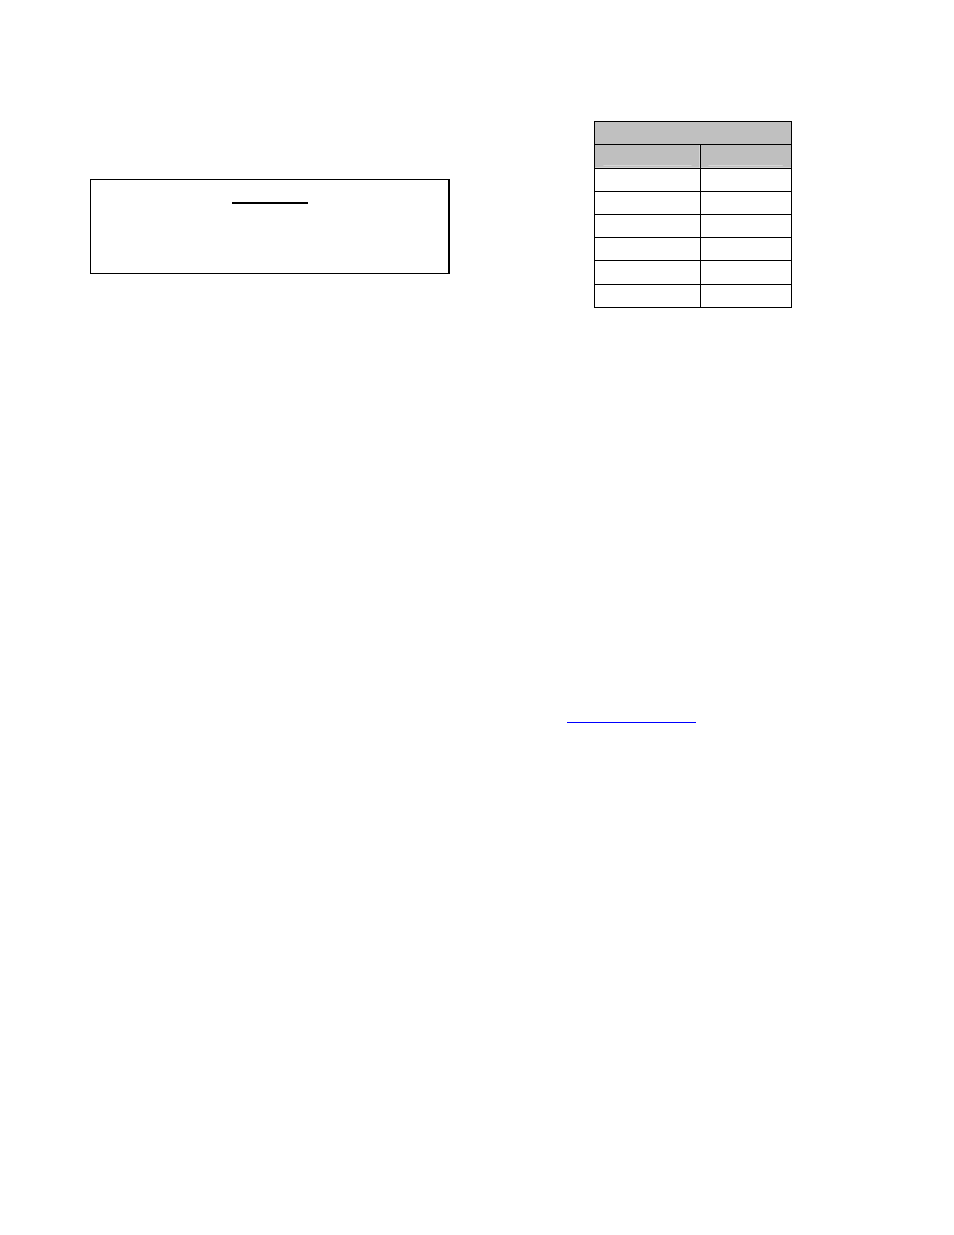
Body Assembly Torque
Valve Size
Torque
1/2” 50
ft-lbs
3/4” 75
ft-lbs
1” 100
ft-lbs
1-1/4” 125
ft-lbs
1-1/2” 150
ft-lbs
2” 200
ft-lbs
TABLE 2. ASSEMBLY TORQUES
PARTS AND SERVICE
Parts and service are available from your local
representative or the factory. Make note of the
Valve Size and Model Number located on the valve
nameplate and contact:
Val-Matic Valve and Manufacturing Corp.
905 Riverside Drive
Elmhurst, IL 60126
Phone:
(630)
941-7600
Fax: (630) 941-8042
www.valmatic.com
A sales representative will quote prices for parts or
arrange for service as needed.
WARNING
The line must be drained before removing
the valve or pressure may be released
causing injury.