Val-Matic Wastewater Combination Air Valve User Manual
Page 5
TROUBLESHOOTING
Several problems and solutions are presented below
to assist you in troubleshooting the valve assembly
in an efficient manner.
• Leakage at Bottom Connection: Tighten valve
threaded connection. If leak persists, remove
valve and seal threads with Teflon* sealant or
tape.
5
WARNING:
The valve must be drained
before removing the cover or
pressure may be released
causing injury.
• Leakage at Cover: Tighten bolts per Table 2,
replace gasket.
• Valve Leaks when Closed: Backwash valve to
remove debris. Disassemble and inspect seat,
orifice button, and float. NOTE: Many floats
contain sand for weight but if water is detected,
replace float.
• Valve not Venting Air: Check that operating
pressure does not exceed Working Pressure on
nameplate. Backwash valve.
*Du Pont registered trademark.
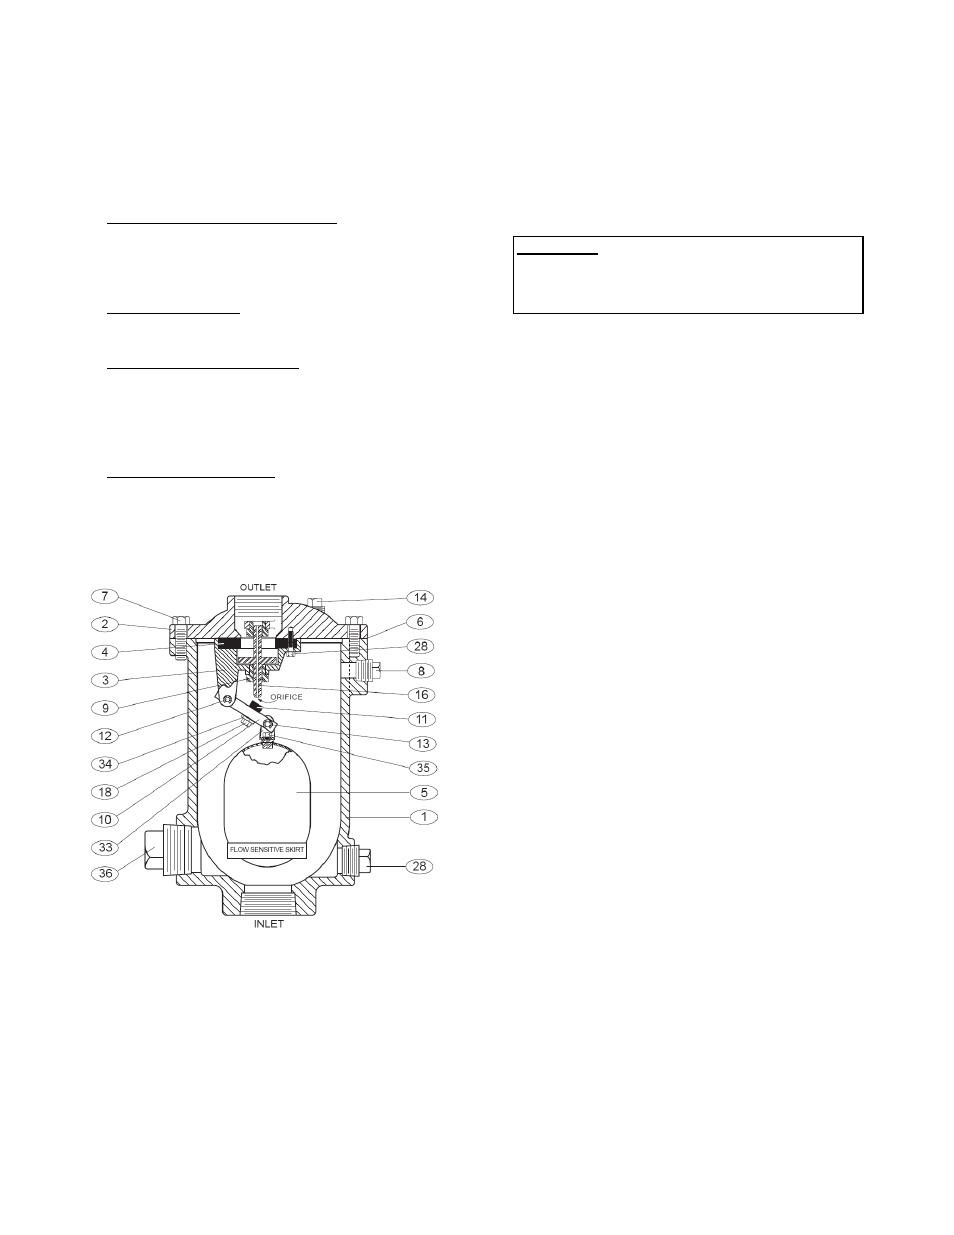
FIGURE 4. VALVE ASSEMBLY
DISASSEMBLY
The valve can be disassembled without removing it
from the pipeline. Or for convenience, the valve can
be removed from the line. All work on the valve
should be performed by a skilled mechanic with
proper tools. No special tools are required.
1. See Figure 3. Close inlet shut-off valve (A).
Open drain valve (B) or remove drain plug. See
Figure 4. Remove the cover bolts (7) on the top
cover.
2. Pry cover (2) loose with sharp chisel or
screwdriver and lift off valve body. The float will
be connected to the cover.
3. Remove the retainer screws (28) and inspect the
seat (4) and button (11) for cracks in the rubber
or wear in the sealing surfaces.
4. Remove the plug (16) from the baffle (3). The
small orifice through the plug should be clean.
The plug shaft and bushing (9) ID should be
polished clean with 4x0 steel wool or 320 grit
polishing compound.
5. Turn guide bushing (9) to remove it from the
baffle. Remove the retainer rings (13) to
disassemble the float arm assembly.
6. Clean and inspect parts. Note: If floats contain
water, replace. Replace worn parts as
necessary.