Val-Matic 4-20 Air/Vacuum Valve With Optional Anti-Slam Valve User Manual
Page 4
3
Item Description Material
1 Body
Cast
Iron
2 Cover
Cast
Iron
4 Seat*
Buna-N
5 Float*
Stainless
Steel
6 Gasket*
Non-Asbestos
7
Cover Bolt
Alloy Steel
8
Retaining Screw
Stainless Steel
9
Guide Bushing*
Stainless Steel
15 Cushion*
Buna-N
23
Hood Assembly
(optional)
Iron, Steel
27
Washer*
(8”-20” valves)
Stainless steel
28
Pipe Plug
Malleable Iron
*Recommended Spare Part
Table 2. Air/Vacuum Valve Parts List
MAINTENANCE
The Air/Vacuum Valve requires no scheduled
lubrication or maintenance.
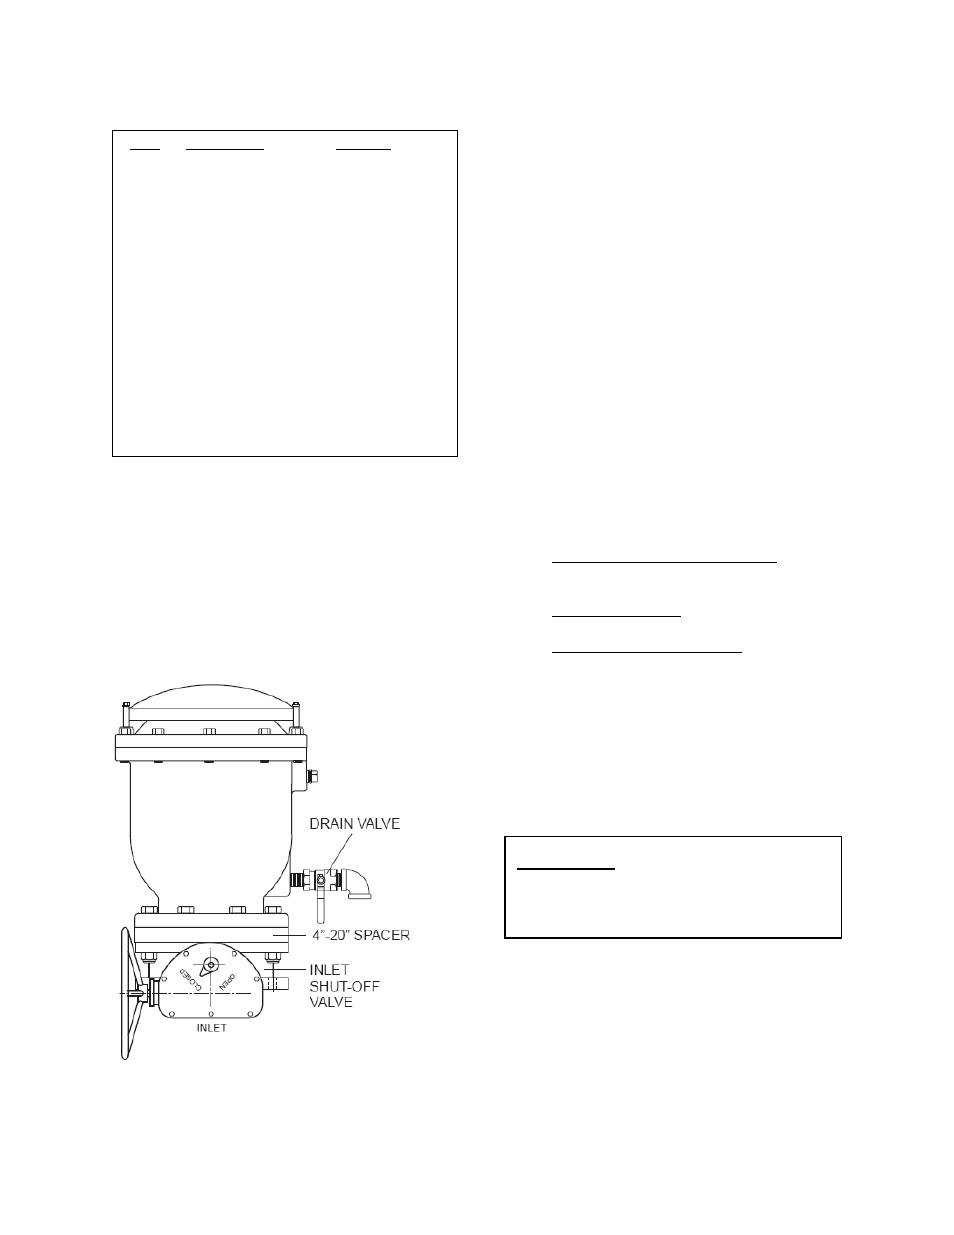
INSPECTION: Periodic inspection for leakage
can be performed. A manual drain valve can be
installed in the lower drain plug to perform this
operation as shown in figure 3.
Figure 3. Inspection Piping
To verify valve function, refer to Figure 3 and:
1. Crack open the drain valve until any air
trapped in the valve is relieved. Close
the drain and the inlet shutoff valve.
2. Open the drain valve to allow the fluid in
the valve to drain. It may be necessary
to apply a downward force on the float
to unseat the valve.
3. Close the drain valve.
4. Slowly open the inlet shutoff valve to fill
the valve with water. Observe the
seating action and verify that the valve
closes without leakage.
5. If leakage occurs, the valve should be
removed and inspected for wear or
possible damage from foreign matter.
TROUBLESHOOTING
Several problems and solutions are presented
below to assist you in troubleshooting the valve
assembly in an efficient manner.
1. Leakage at Bottom Connection: Tighten
valve flanged connection. If leak persists,
remove valve and replace gasket.
2. Leakage at Cover: Tighten bolts, replace
gasket.
3. Valve Leaks when Closed: Inspect seat
for damage and replace.
DISSASSEMBLY
The valve can be disassembled without
removing it from the pipeline. Or for
convenience, the valve can be removed from the
line. All work on the valve should be performed
by a skilled mechanic with proper tools. Refer to
Figure 2.
1. Close inlet shutoff valve. Open drain
valve or remove drain plug. Remove
hood if needed.
2. Remove the cover bolts (7) on the top
cover. Pry cover (2) loose and lift off
valve body.
3. Remove retainer bolts (8) and inspect
seat for cracks in rubber or wear in
sealing surface.
WARNING:
The valve must be drained
before removing the cover
or pressure may be
released causing injury.