Probuilt Professional Lighting Hang-A-Light 400w Metal Halide User Manual
Save these instructions, 400‐watt metal halide pulse start area work light
E
EISA
Compliant
SAVE THESE INSTRUCTIONS
WARNING – Electrical Shock Hazard
!
DISCONNECT THE ELECTRICAL POWER BEFORE INSTALLATION OR SERVICING
Important Safety Instructions:
1. The light fixture with cord is pre‐wired for 120‐volt operation.
2. Never service fixture or replace the lamp (Type‐O only) with the fixture connected to live power.
3. HOT SURFACES! Allow fixture to cool completely before re‐lamping, moving or servicing.
4. Use the spring‐loaded hook to hang the fixture –
never use the cord for this purpose.
5. This fixture must be installed and serviced in accordance with the National Electrical Code
(NEC 2008) and all other applicable codes, regulations, standards and company procedures.
6. All rewiring and servicing of the fixture must be performed by a qualified electrician only.
7. The fixture is equipped with a quad‐tap ballast that may be used with 120, 208, 240 or 277 volts.
To change the service voltage of the fixture, see instructions below.
8. Use only 400‐watt Metal Halide Pulse Start
Type‐O replacement lamps.
9. Do not operate fixture with the wire safety cage or bottom guard missing or damaged.
10. Hang‐A‐Light®
is recommended for use at least 15 feet or higher above work areas.
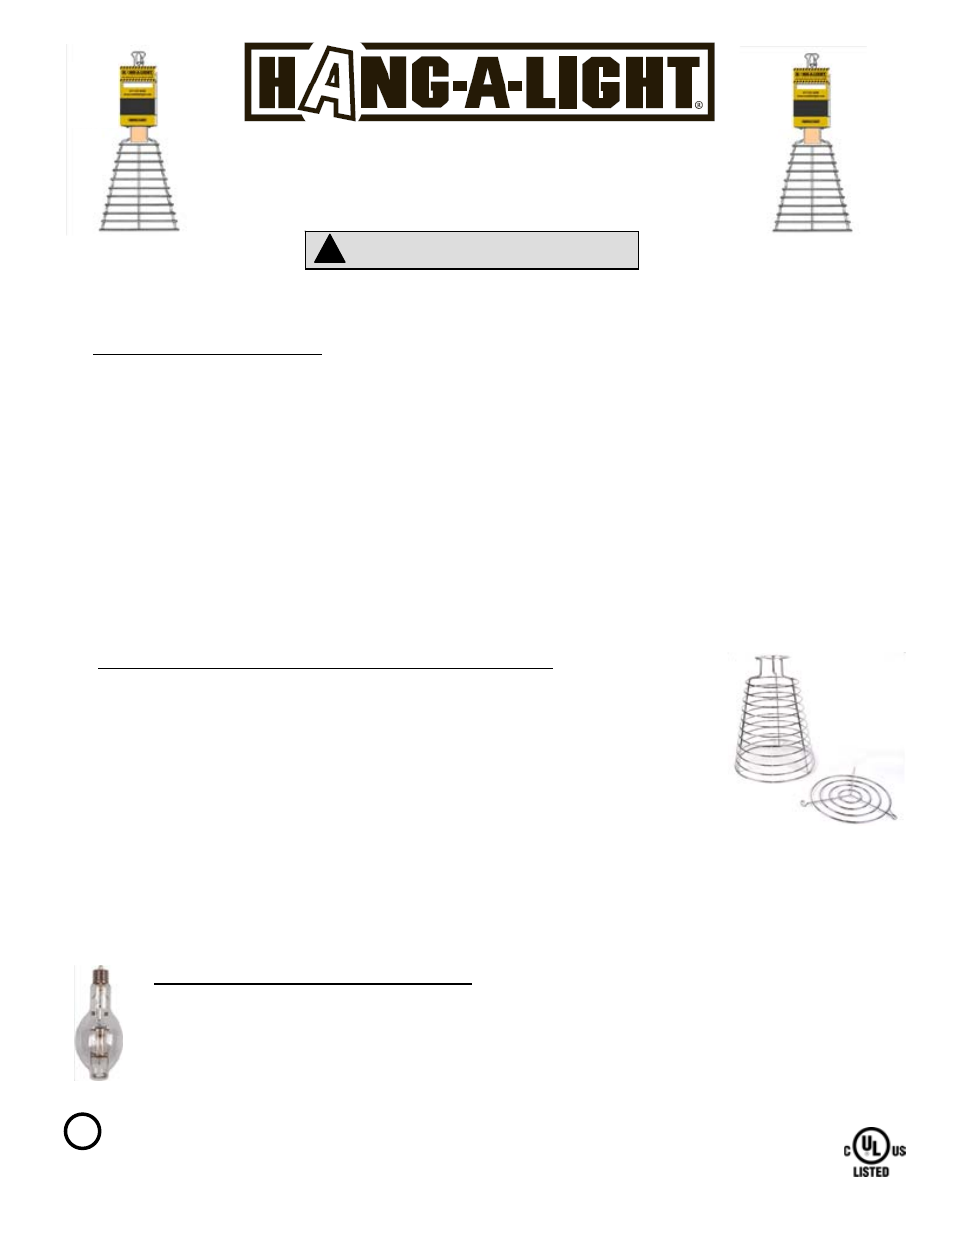
Instructions for Safety Cage and Bottom Guard Installation:
1. DO NOT USE fixture without safety cage and bottom guard in place and secured.
2. Align four holes on top the of safety cage over the four mounting screws on the
fixture housing located around the ceramic socket.
3. Rotate the safety cage clockwise and then tighten each screw
with a Phillips‐head
screwdriver until the safety cage is firmly attached to the
fixture.
4. Install Type‐O lamp (per instructions below) before continuing to attach bottom guard.
5. Locate one open hook and two closed‐loop “S”
hooks on the bottom guard.
6. With hooks facing upward (toward the socket) connect the open hook to the bottom
of the safety cage.
7. Bring the bottom guard closed to meet the safety cage and snap the bottom ring of the safety
cage onto one of the closed‐loop “S”
hooks on the bottom guard. Then apply slight pressure on
the second “S”
hook to connect it to the bottom ring of the safety cage.
Safety Cage
Bottom Guard
Open
Hook
Closed
“S”
Hook
Instructions for Type‐O Lamp Installation:
1. Use only 400‐watt Metal Halide Pulse Start
Type‐O lamps of the type supplied.
2. Inspect lamp and discard / do not use any lamp that is damaged.
3. Install the Type‐O lamp by screwing clockwise into ceramic socket until the center contact is seated
completely in the socket. The lamp will not light if it is
not completely seated in the socket.
400‐watt Metal Halide Pulse Start
Area Work Light
Manufactured by ProBuilt
Professional Lighting, LLC ‐
1170 Allanson Road, Mundelein, IL 60060
Toll Free: 877‐707‐0800 www.probuiltlighting.com