Operating instructions, Preparing the mojack ez for use (steps 1 - 7) – MoJack EZ User Manual
Page 6
MoJack EZ Lift
MoJack EZ Lift
10
11
Operating Instructions
Preparing the MoJack EZ for Use (Steps 1 - 7)
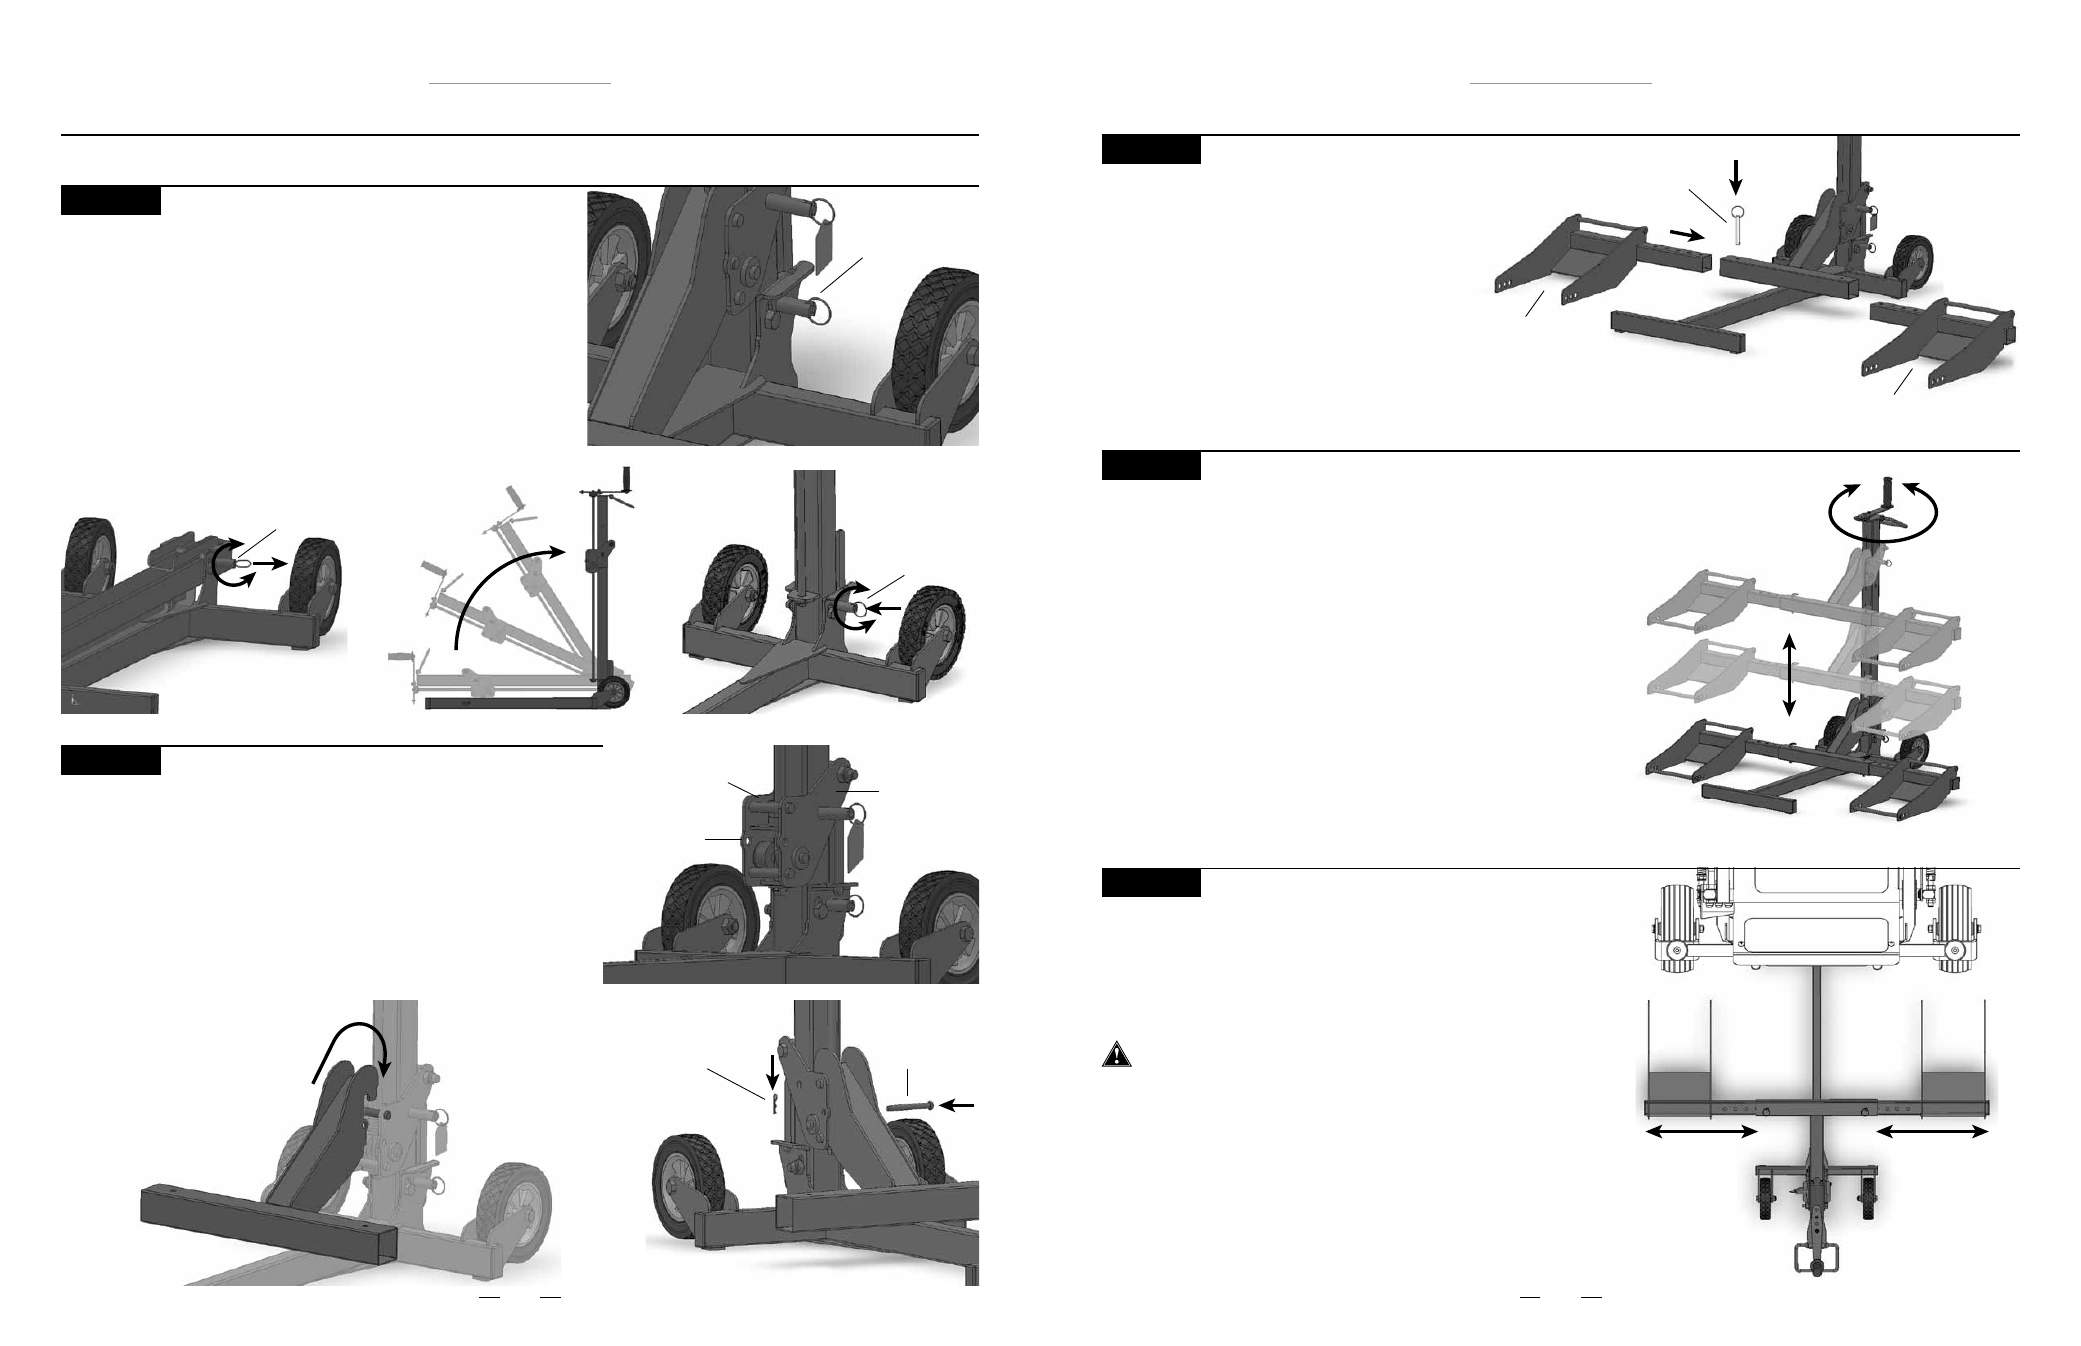
STEP 1
STEP 2
Installing Lift Arm
• Hang the Lift Arm on the Carrier by hooking the slotted area
of the Lift Arm over the top bar of the Carrier.
• Insert Clevis Pin through the hole in Carrier and lock by
fastening the Small Hair Pin to the Clevis Pin.
Unfolding MoJack EZ
• Pull and rotate Tower Locking Pin 90 degrees to the
unlocked position.
• Raise the Tower by pulling up on the Grip Handle. Once the
Tower is in the vertical position, lift up on the Grip Handle and
drop the Tower into the Base.
• Lock the Tower into place by rotating Tower Locking Pin until
the pull ring retracts into the locking slot.
Tower
Locking Pin
(locked position)
Top Bar
Carrier
Clevis Pin hole
Clevis Pin
Small Hair Pin
Tower
Locking Pin
(unlocked position)
Tower
Locking Pin
(locked position)
STEP 4
Familiarize Yourself with the MoJack EZ
• Practice raising and lowering the Lift Arm before attempting to
lift the mower (see Steps 11 – 14 on how to raise and lower
the Lift Arm).
• Practice Step 19 if you intend to raise or lower the mower with
a drill attachment.
STEP 3
Installing Wheel Pads
• Slide the Wheel Pads into the Lift Arm and
temporarily secure with Push Pins.
STEP 5
Aligning Wheel Pads to Fit Mower
• Place the front tires of mower 6” in front of the Wheel Pads.
• Remove Push Pins and align the Wheel Pads so that the front
mower tires will be centered on the Wheel Pads.
• Replace the Push Pins to lock the Wheel Pads to the Lift Arm.
Wheel Pads must be equal distance from the Lift Arm to
maintain proper balance.
Push Pin
Wheel Pad, RH
Wheel Pad, LH
Operating Instructions