Warning, N warning – Lincoln Electric IM10157 12_24V 10A Auto HF Household Charger User Manual
Page 8
CONTROL SETTING INSTRUCTIONS
CHARGE VOLTAGE AND RATE SELECTION
Choose the voltage and amperage that is appropriate
for the size and type of battery being charged. Use the
battery manufacturer’s specific instructions or see the
guidelines below. If the battery voltage is not clearly
marked on the battery, refer to the operator’s manual
for the vehicle / equipment where the battery is used /
intended to be used. Do not begin charging if the
battery voltage cannot be determined.
• Small Motorcycle type 3 Amps or less
• Lawn mower/Tractor 6 Amps or less
• Deep cycle
25 Amps or less
• Maintenance free Auto
45 Amps or less
or Marine Cranking
• Heavy duty Commercial 60 Amps or less
Unless the information is supplied for the particular
battery, always charge small 12 volt batteries at no
more than 2 amps.
Rate and Volt age Selection
2A, 12V for motorcycle, snowmobile, lawn &
garden or other small batteries.
10A, 12V for automobile, truck, farm equipment
and other medium to large batteries.
2A, 24V for slow charging 24V systems.
6A, 24V for charging 24V systems at a medium
rate.
OPERATING INSTRUCTIONS
1. Make sure that the ac power cord is unplugged
from the ac outlet and make sure the vehicle’s
engine is turned off.
2. Position the ac power cord and dc output cables in
such a manner that they cannot be damaged by
moving engine parts or the vehicle’s hood or doors.
3. Check the polarity of the battery terminals. The
POSITIVE terminal should be marked: POSITIVE,
POS, + or P. The NEGATIVE terminal should be
marked: NEGATIVE, NEG,–
or N.
4. Determine whether the vehicle has a positive or
negative grounded battery (positive or negative
cable is connected to the vehicle’s chassis).
WARNING
M O V I N G E N G I N E P A R T S C A N C A U S E
SERIOUS
INJURY!
Stay clear of fan blades, belts, pulleys and other moving
engine parts to reduce risk of serious personal
injury.
a. Negative ground vehicles (The most common
type, see Figure B.3).
N
WARNING
DO NOT ATTEMPT TO OPERATE THIS BATTERY
CHARGER
until you have read and understood the
entire SAFETY SUMMARY
provided in this manu al.
CONNECTING
TO BATTERIES
INSTALLED IN VEHICLES
WARNING
Do not plug the charger power cord into the ac power
source or set any of the charger’s controls until told to
do so in the following instructions.
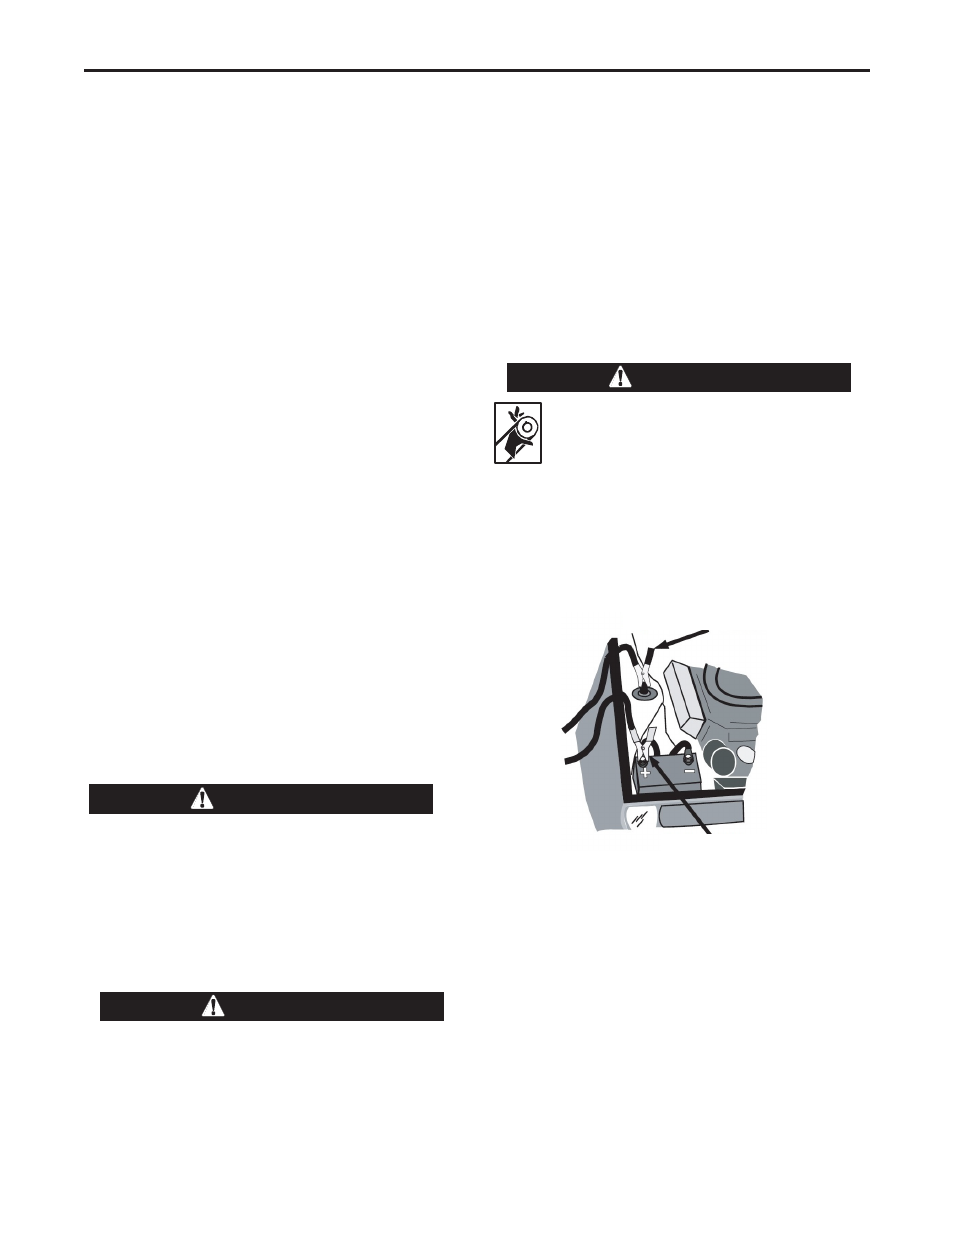
Figure B.3. Negative Ground
1. Connect the POSITIVE (red) clamp from the battery
charger to the POSITIVE, ungrounded terminal of
the battery.
2. Connect the NEGATIVE (black) clamp from the battery
charger to a heavy gauge metal part of the
vehicle chassis or engine block away from the bat-
tery. DO NOT connect the NEGATIVE (N) (black)
charger clamp to the NEGATIVE battery terminal,
carburetor, fuel lines, or sheet metal body parts.
Negative to
Chassis Ground
Positive to Battery
10/6/2A 12V, 6/2A 24V High Frequency Charger
B-2
OPERATION