Setup guide — sw dvi plus series, cont’d, Application diagram, Step 7 — connect rs-232 – Extron Electronics SW DVI Plus Series Setup Guide User Manual
Page 2: Step 8 — wire power connector, Step 9 — power on
Setup Guide — SW DVI Plus Series, cont’d
www.extron.com
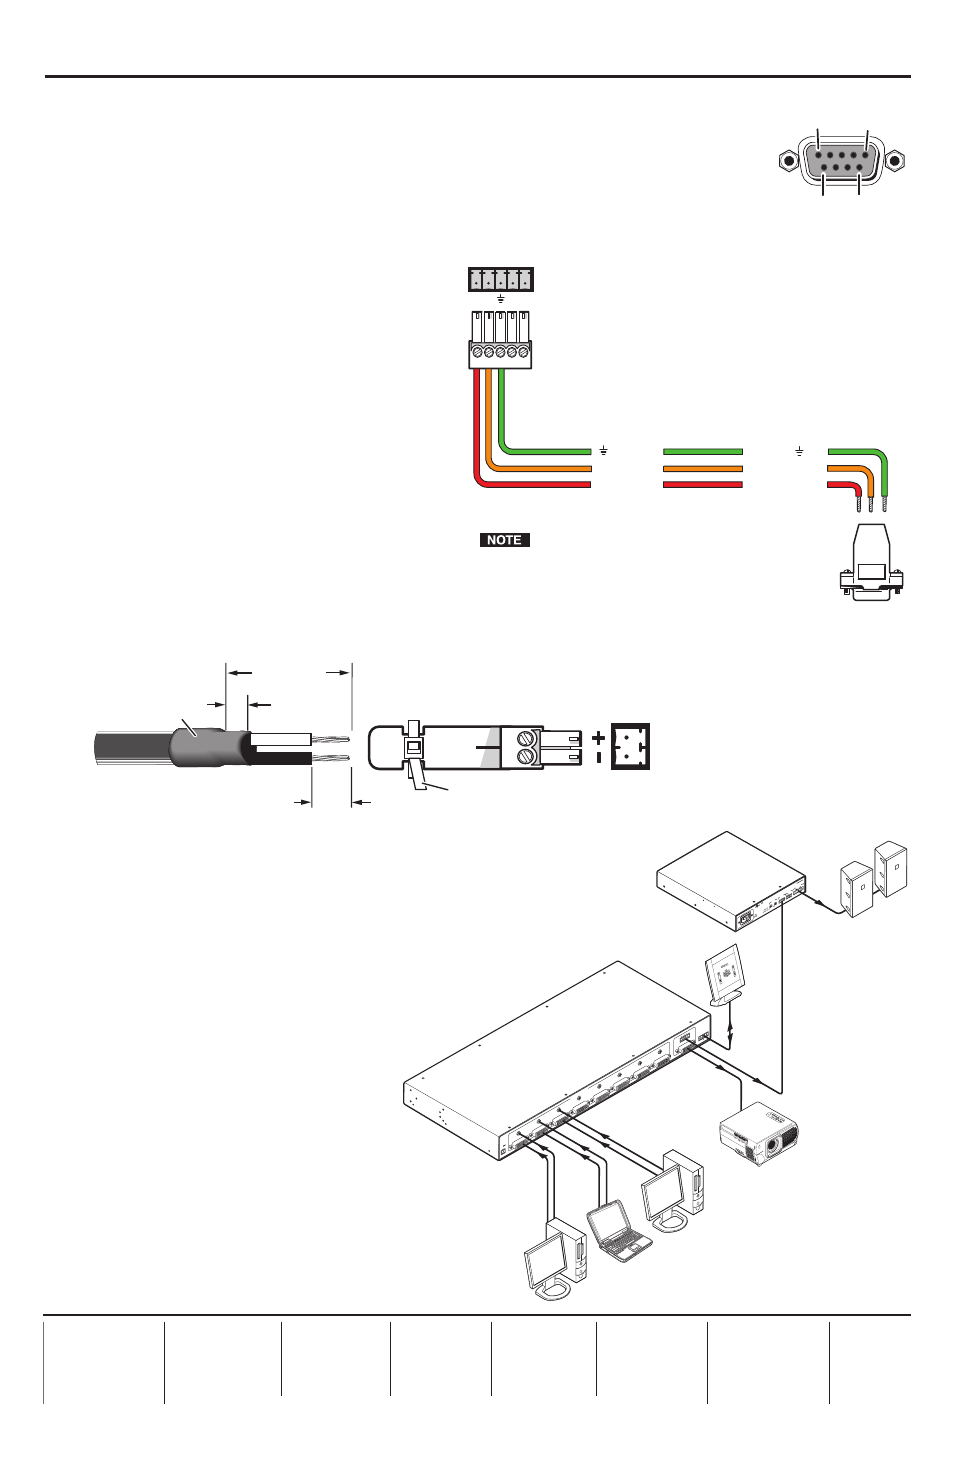
Step 7 — Connect RS-232
• SW2 and SW4 DVI Plus (non-audio) models:
Connect an RS-232 cable
from your computer to this female 9-pin D connector. Protocol for this
port is 9600 baud, 8 data bits, 1 stop bit, no parity. Wire the connector as
follows: pin 2 = Tx, pin 3 = Rx, pin 5 = Gnd.
• All
other models:
Connect a bare wire-to-female
9-pin D RS-232 cable to pins 1, 2,
and 3 of one of the 5-pole captive
screw plugs. Insert the plug into
the Remote/Auto-SW shared
connector, and connect the cable to
the computer’s serial port. See the
illustration at right.
Step 8 — Wire power
connector
If using a different 12 V, 1 A external
power supply from the one that is
included (already wired), attach the
provided two-pole captive screw
connector to the power supply as
shown below.
Step 9 — Power on
a.
Power on the output display.
b.
Apply power to the switcher.
c.
Power on the input devices.
Application Diagram
The figure at right provides an
example of how an SW8 DVI Plus
switcher may be connected.
Captive Screw Connector
Tie Wrap
Heat
Shrink
1/8”
(3 mm)
7/8”
(22 mm)
3/16”
(5 mm) Max.
5
1
9
6
1
3
2
4
5
6
7
8
0.4
A MA
X
POWER
12V
SW8 DVI A P
LUS
DVI-D / AUDI
O
OUTPUT
DVI / AUDIO
INP
UTS
Tx
Rx
A S
REMOT
E / AUTO-
SW
L
R
100
-24
0V
0.5
A,
50-
60H
z
VO
L/M
UT
E
STANDB
Y
CLASS
2 W
IRING
1
2
LIS
TED
17T
T
AU
DIO/VI
DE
O
AP
PA
RA
TU
S
XP
A 1002
C
US
LE
VE
L
1
1
2
1
2
LIM
ITE
R/
PROT
ECT
SIG
NA
L
2
INPUTS
OU
TPU
T
REMO
TE
0
0
10V
50
mA
PC with DVI Out
Extron SI 26
Two Way
Surface Mount
Speakers
Extron
XPA 1002
Power Amplifier
Laptop with DVI Out
PC with DVI Out
Extron
SW8 DVI A Plus
DVI Switcher
with Audio
Projector with DVI In
Control
System
Audio
RS-232
68-1316-50
Rev. C
09 09
If you use cable that has a drain
wire, tie the drain wire to ground
at both ends.
Remote/Auto-SW
To Computer or
Control System
RS-232 Port
SW DVI Plus Switcher
Rear Ranel RS-232 Port
Tx Rx
A S
9 pin HD
Connector
Ground
Green
Orange
Red
Rx Receive
Transmit
Tx
3
Receive (Rx)
Transmit (Tx)
2
Ground
5