Plunger pumps, Rmv series pumps, North america – Vortexx RMV Series User Manual
Page 9: Service pumps (continued)
Plunger Pumps
Operating Instructions and Parts Manual
RMV Series Pumps
First Choice When Quality Matters
NORTH
AMERICA
Service Pumps (Continued)
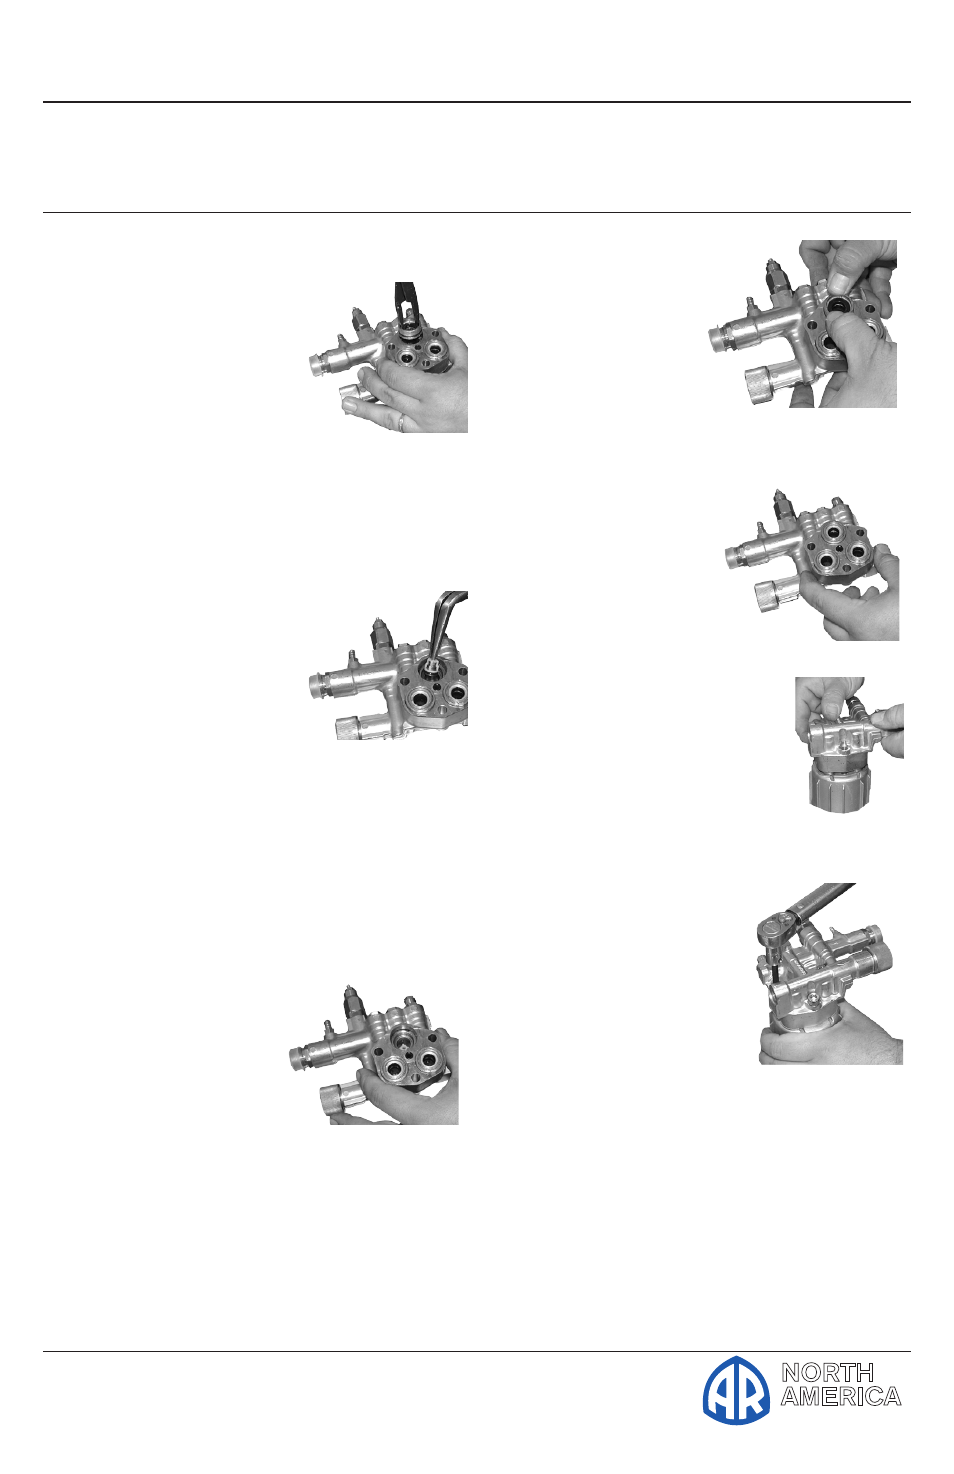
slide hammer to pull
the packing stack up
and out of the head.
(See Figure 20)
NOTE: Damage to
the piston guides and
or the seals may occur during
removal. Inspect carefully before
reusing any components of the
packing stack.
9. Remove the high-
pressure packing by
pulling straight out
with your finger.
(See Figure 21)
Assembly:
1. Install the high-pressure seal into
the head.
NOTE: It should fit snugly. The
packing support is part of the
valve cage.
2. Place the high-
pressure seal at an
angle and work it
into the cylinder.
(See Figure 22)
NOTE: The point of the
“V” or flat side of the packing is
pointed at you.
3. Lubricate the packing retainer
O-ring with a light film of oil and
install it into the
cylinder. Push it
completely into
place. (See Figure
23)
NOTE: The O-ring
will seat just inside the
manifold and you will
hear a slight pop.
4. Insert the low-
pressure seal by
placing it into the
cylinder in at an
angle and pushing it into
place.
(See Figure 24)
5. Put a thin coat of oil
on the plungers and
packings.
(See Figure 25)
6. Carefully install the
manifold and
torque the bolt
to the proper
specifications.
(See Figure 26)
Valve life is dependant
on many variables. Hard
water, cavitation, corrosion,
chemicals and equipment care. The
valves are a wear item and need
periodic replacement. Worn O-rings
or damaged valves will cause pressure
loss and pulsations.
NOTE: Water seals are wear items.
Life of the seals is dependent on
Figure 22
Figure 20
Fig-
Figure 24
Figure 21
Figure 25
Figure 23