4 setting the gas pressure – A.O. Smith BTI 85 G User Manual
Page 17
17
2.3
Removing and
replacing the control
panel front cover
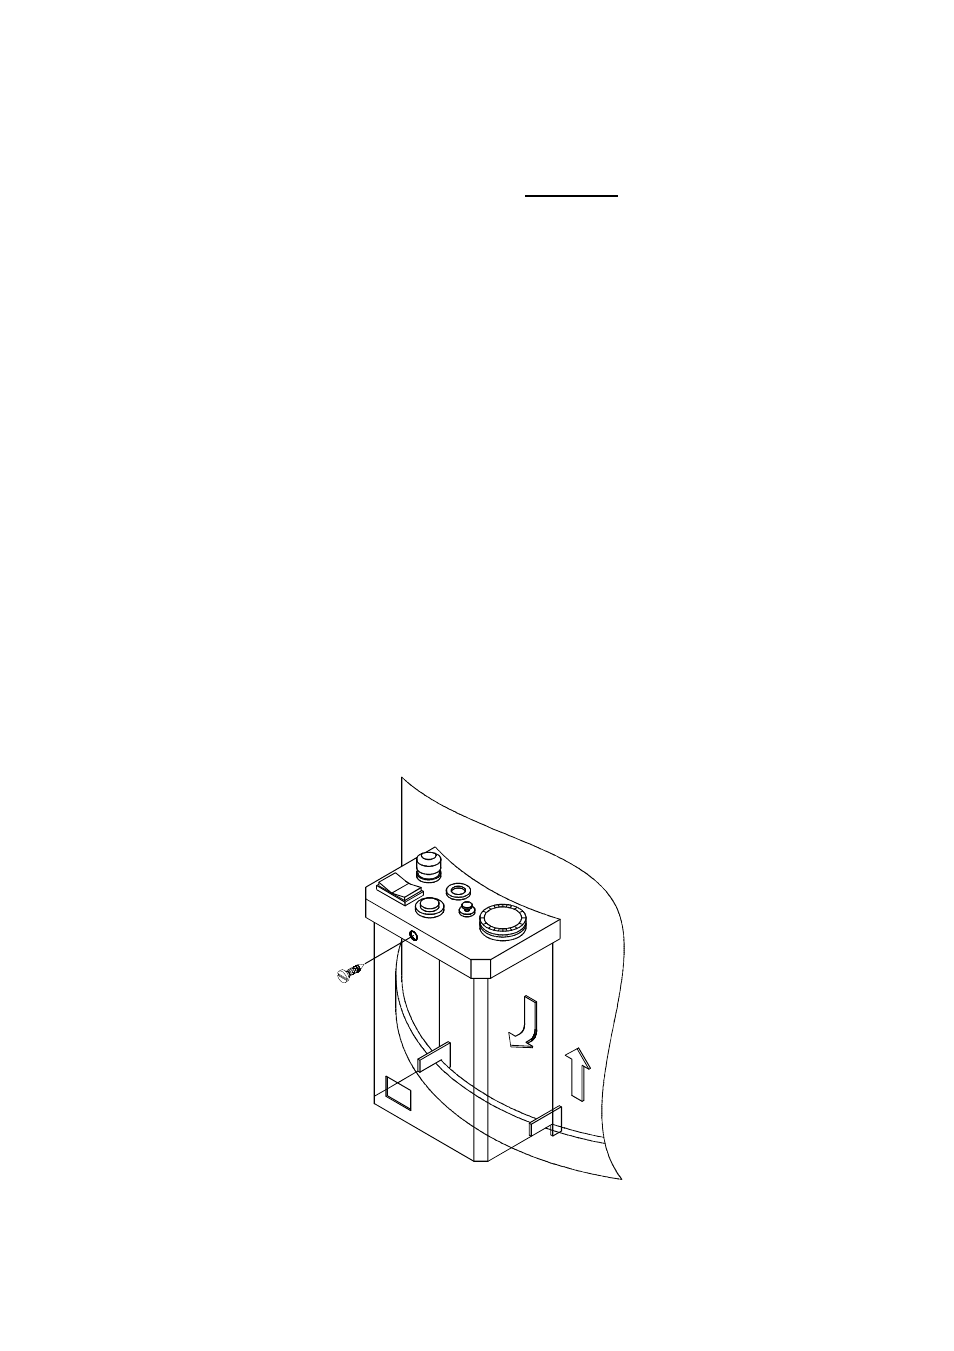
Removing the cover (see figure 7)
1. Remove the screw at the top centre of
the control panel.
2. Push the cover upwards until the
hooks at the lower end clear the
burner access opening and base tray.
3. Pull the lower end of the cover slightly
forward.
4. Pull the cover down until the top edge
is clear of the control panel and then
remove.
Replacing the cover (see figure 7)
1. Place the top of the cover inside the
rim of the control panel and push it up
as far as possible.
2. Position the bottom hooks inside the
burner access opening and over the
rim of the base tray.
3. Push the cover downwards until the
lower hooks engage and the top
screw holes align.
4. Replace the screw in the top centre
of the cover.
2.4
Setting the gas pressure
The gas pressure has been set to the
correct values at the factory.
Important: The following proce-
dure must be followed when
checking or setting the gas
pressure:
1. Shut down the heater by switching
off the mains current (switch off
main switch);
2. Connect a manometer to the
pressure test nipple to measure the
burner pressure on the gas control.
3. Activate the heater and allow the
burner to ignite;
4. Check the burner pressure. If
necessary, reset it by means of the
burner pressure adjusting screw.
Turning it anti-clockwise reduces
burner pressure. Turning it
clockwise increases burner
pressure;
5. Shut down the heater, remove the
manometer and close the pressure
nipple;
6. Restart the heater (test for
soundness).
Figur 7 taking off and mounting the
control panel
AOS 1130