Connections, Installation – Audiovox PLV16081 User Manual
Page 9
E
8
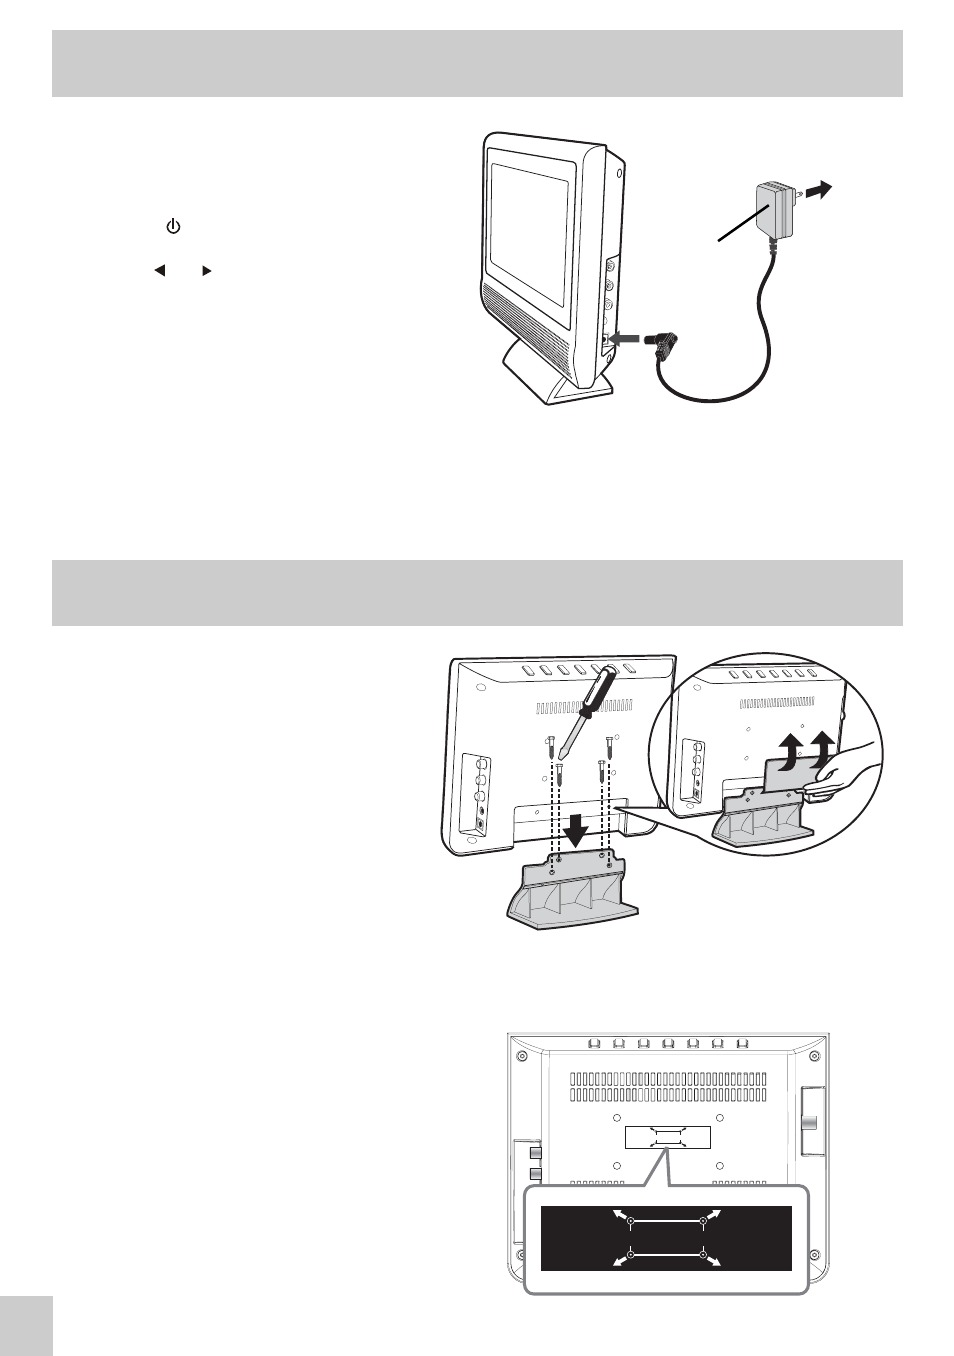
CONNECTING THE AC ADAPTER
This AC adapter operates on AC 100-240V.
1. Connect the AC adapter a wall outlet.
2. Press the
/ON button to turn on the
unit.
3. Use the or button to select NO,
then press ENTER button. (Only apply
to the first time POWER ON.)
4. Press the FUNCTION button repeatedly
to select TV / AV IN mode, then press
ENTER button.
CONNECTIONS
NOTES
• The included AC adapter is for use with this unit only. Do not use them with other equipment.
• When the AC adapter is plugged in, the unit is not completely disconnected from the main, even
when the power is turned off.
• Be sure the AC adapter is disconnected and all functions are off before making connections.
• Make sure that all the components are connected correctly.
• When you are not going to use the unit for a long period of time, disconnect the AC adapter.
REMOVING THE BASE STAND
WARNING: The LCD display is very
fragile, and must be protected at all times
when removing the base stand. Be sure
that no hard or sharp objects, or anything
that could scratch or damage the LCD
display, come in contact with it. Do NOT
place pressure on the rear of the unit at
anytime because the screen could crack.
INSTALLATION
1. Disconnect any cables or cords
connected to the unit.
2. Remove the rear cover.
To AC Wall Outlet
To DC
IN 12V
AC Adapter
MOUNTING ON THE WALL
This unit is VESA-compliant, and is
designed to be wall-mounted with a VESA-
compliant 1.375” x 2.9375” (35mm x
75mm) mounting kit designed for flat-panel
TVs (sold separately). Mount this unit
according to the directions included with
the mounting kit.
NOTE
Remove the base stand before mounting
the unit on the wall.
WALL MOUNTING HOLES : 35 X 75 MM
WALL MOUNTING HOLES : 35 X 75 MM
3. Lay the unit down on a flat surface, so the back side is facing up, making sure to place a soft
cushioned material (such as a pillow or thick piece of foam) beneath the screen.
4. Remove the 4 screws and then remove the BASE STAND from the unit.