Setup>>basic menu, Setup>>b, Asic – Staub Electronics D963HD VIVITEK - 1080P MULTIMEDIA PROJECTOR (4500 LUMENS) User Manual
Page 31
D
D
D
L
L
L
P
P
P
P
P
P
r
r
r
o
o
o
j
j
j
e
e
e
c
c
c
t
t
t
o
o
o
r
r
r
—
—
—
U
U
U
s
s
s
e
e
e
r
r
r
’
’
’
s
s
s
M
M
M
a
a
a
n
n
n
u
u
u
a
a
a
l
l
l
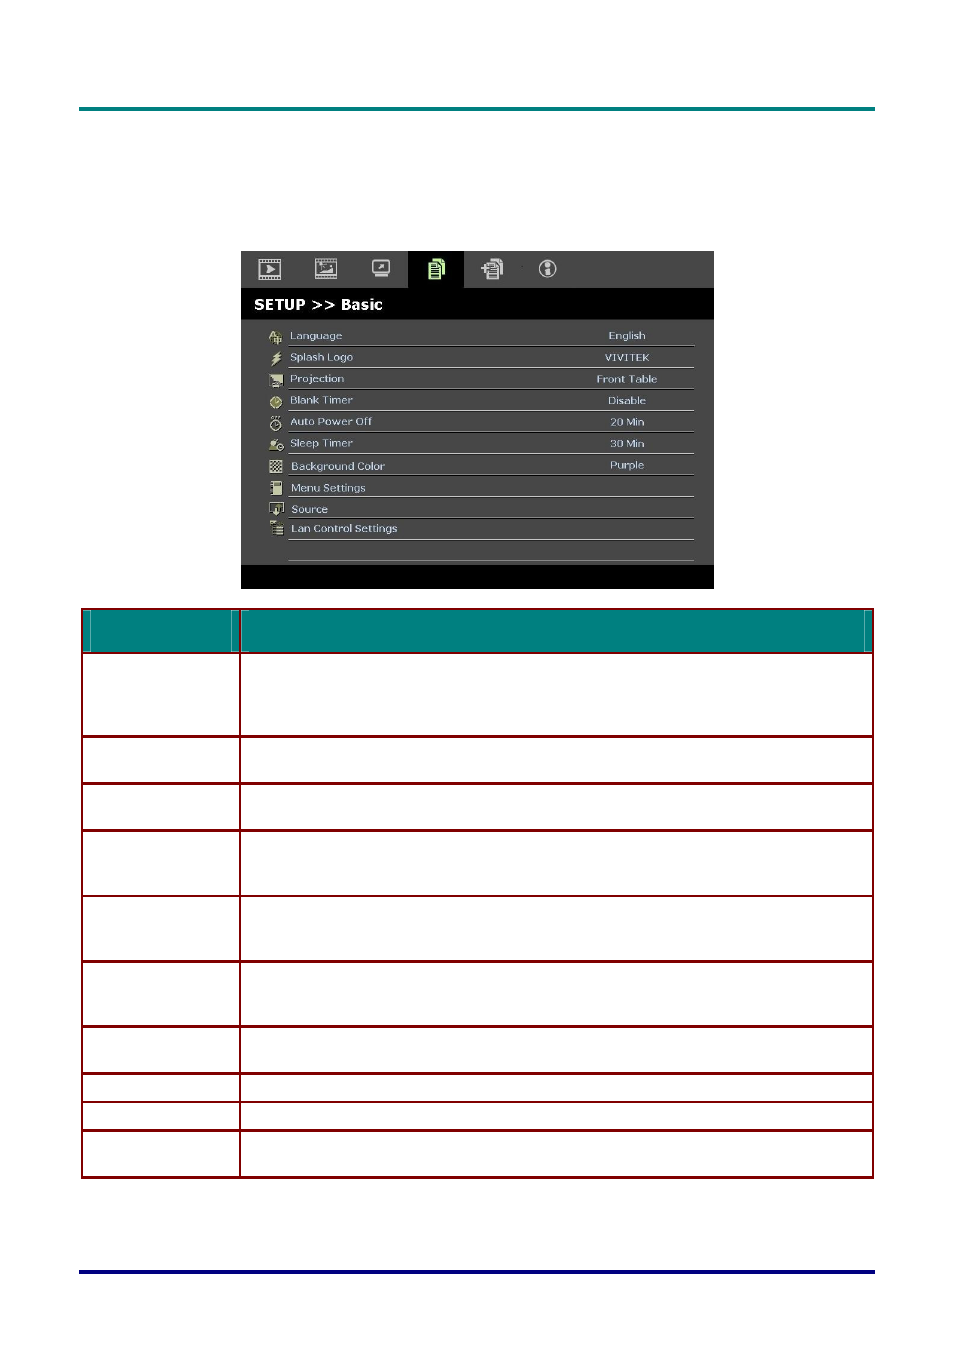
SETUP>>Basic Menu
Press the MENU button to open the OSD menu. Press the cursor ◄► button to move to the
SETUP>>Basic
menu. Press the cursor ▲▼ button to move up and down in the
SETUP>>Basic
menu. Press ◄► to change values for settings.
I
TEM
D
ESCRIPTION
Language
Press the cursor ◄► buttons to select a different localization menu.
(Range: English/ Danish/ Dutch/ Finnish/ French/ German/ Italian/ Japanese/ Ko-
rea/Norwegian/ Polish/ Portuguese/ Russian/ Traditional Chinese/ Simplified Chinese/
Spanish/ Swedish)
Splash Logo
Press the cursor ◄► buttons to select a different startup screen.
(Range: Vivitek/ Blue/ Black)
Projection
Press the cursor ◄► buttons to choose from four projection methods:
Front Table
/ Front Ceiling/ Rear Table/ Rear Ceiling.
Blank Timer
Press the cursor ◄► buttons to set the Blank Screen timer. The projected image is automati-
cally restored after the set time.
(Range: Disable/ 5 min/ 10 min/ 15 min/ 20 min/ 25 min/ 30 min)
Auto Power Off
Press the cursor ◄► buttons to set the Auto Power Off timer. The projector automatically
turns off if no input source is detected after the preset period of time.
(Range: Disable/ 5 min/ 10 min/ 15 min/ 20 min/ 25 min/ 30 min)
Sleep Timer
Press the cursor ◄► buttons to set Sleep timer. The projector automatically turns off after the
preset period of time.
(Range: Disable/ 30 min/ 1hr/ 2hr/ 3hr/ 4hr/ 8hr/ 12hr)
Background Color
Press the cursor ◄► buttons to select the background color when no input source is detected.
(Range: Purple/ Black/ Blue)
Menu Settings
Press the ENTER button to enter the Menu Settings sub menu. See Menu Settings on page 25.
Source Press
the
ENTER
button to enter the Source sub menu. See Source on page 25.
Lan Control Settings Press the
ENTER
button to enter the Lan Control Settings sub menu.
See Lan Control Settings on page 26.
– 24 –