1 search ip camera and storage, 2 register ip camera and storage, 3 view ip camera – LevelOne WBR-6022 User Manual
Page 26: 1 view all ip cameras
24
6.2.1
Search IP camera and Storage
Press the “Search New Device” icon, the HomeGuard would try to search all compatible devices on LAN, and would
list them all in following page.
6.2.2
Register IP camera and Storage
You have to name each device with unique ID, and for each IP camera, you MUST enter the correct User
Name/Password with administrator permission.
After press “Register” button, the page would show you the time information of this system. Please check the time
setting, it would be used for all devices paired with HomeGuard system. If you used Easy-Setup to configure once, the
time information should be set already.
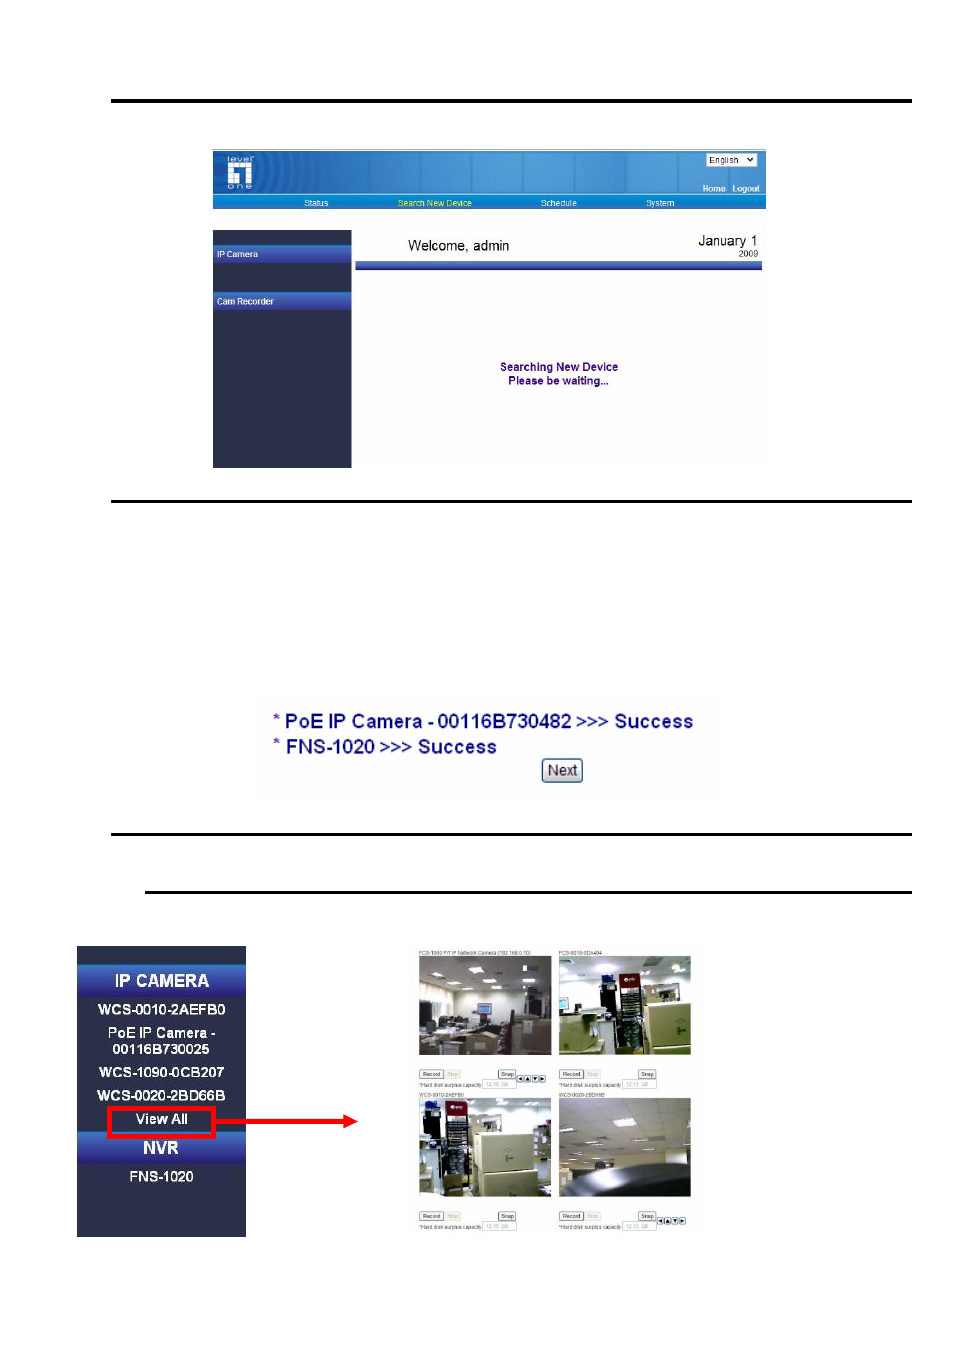
After pressing SAVE icon, HomeGuard system shows the saving result and then the register process is done, like
following screen:
6.2.3
View IP camera
6.2.3.1 View All IP Cameras
Enter the “View All” page under “Status” tag, the IP cameras that you registered correctly would show their image here.
PS: the WBR-6022 can support view up to 4 cameras in a web ui.