Step 2 - adjusting pipe length, Step 3 - fit sampling pipe to sdp-2, Step 4 - drill hole in duct – Hochiki SDP-2 User Manual
Page 2: Step 5 - mounting the sdp-2 on the duct
Hochiki Europe (UK) Limited
Page 2 of 4
2-3-0-456/ISS5/FEB09
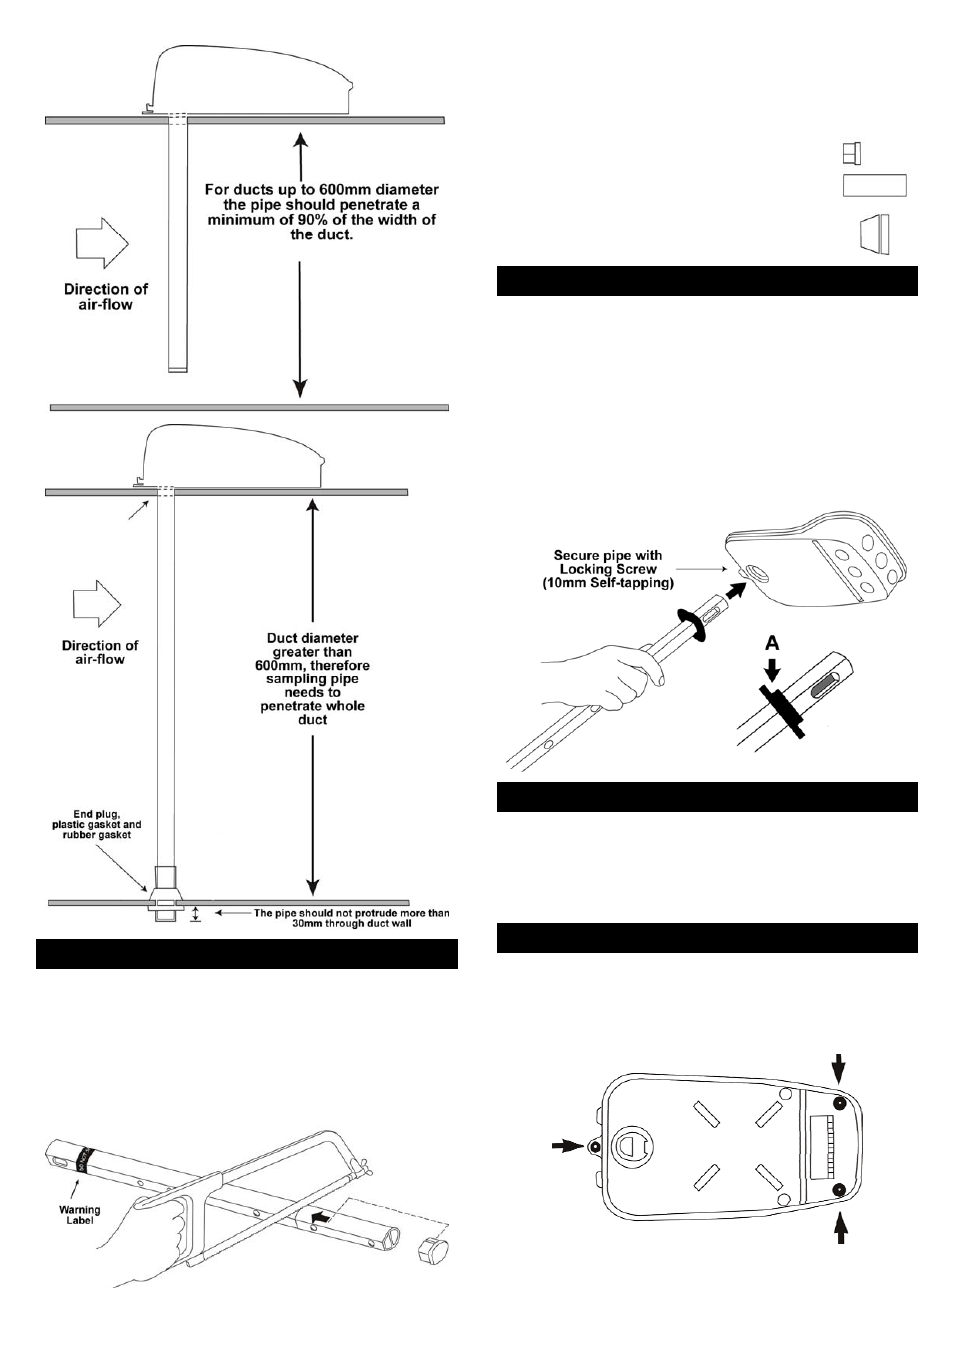
STEP 2 - Adjusting Pipe Length
After measuring the diameter of the duct and
deducing the length of pipe required, shorten the
pipe if necessary. The pipe should penetrate a
minimum of 90% of the width of the duct.
Do not cut the end of the pipe with warning label.
Only cut between sampling holes.
Once cut to length, insert the end plug.
Large Diameter Ducts
When using a sampling pipe within a duct greater than
600mm diameter the pipe should penetrate the whole
duct:
Shorten the pipe to correct length if
required
Insert the end plug
Fit the end plastic gasket
Fit the rubber gasket
STEP 3 - Fit Sampling Pipe to SDP-2
Before fitting the pipe to the unit, remove the cover and
the air-flow block. With the sampling pipe cut to length,
fit it to the underside of the SDP-2 unit:
Mount the gasket (A) on to the pipe the correct way
round (see below)
Push the pipe into the hole in the underside of the
unit (the pipe is specially shaped to only fit the
correct way round).
Tighten the locking screw to secure the pipe to the
unit.
STEP 4 - Drill Hole in Duct
Before mounting the SDP-2, drill a hole in the duct for
the sampling pipe:
Without bracket - hole diameter = 35mm
With bracket - hole diameter = 48mm (see “Using
the Optional Mounting Bracket” on page 4).
STEP 5 - Mounting the SDP-2 on the Duct
Carefully mount the SDP-2, inserting the sampling
pipe into the hole in the duct wall.
Secure the SDP-2 with the supplied three 25mm
Self-tapping screws (positions shown).