Hochiki SDP-2 User Manual
Hochiki sdp-2 duct probe installation instructions, Introduction, Mounting position
Hochiki Europe (UK) Limited
Page 1 of 4
2-3-0-456/ISS5/FEB09
HOCHIKI SDP-2 DUCT PROBE
INSTALLATION INSTRUCTIONS
Introduction
Hochiki's Duct Probe housing allows a standard
photoelectric smoke detection device, either a
conventional detector or an analogue sensor, to be
mounted on the outside of an air duct for the purpose of
monitoring the air within the duct. Air within the duct is
drawn via a pipe into the duct probe's housing. This
allows constant sampling with a standard, LPCB
approved smoke detector and makes smoke detection
within the duct simple, effective and easy to maintain.
Compatible Hochiki devices that can be used within the
SDP-2 are:
ESP
ACA-E (inc all variants)
ALG-E (inc all variants)
ALG-EN (inc all variants
CDX
SLR-E3 (inc all variants)
SLR-E3N (inc all variants)
Compatible Hochiki Bases that can be used within the
SDP-2 are:
ESP YBO-R/SCI,
YBN-R/3
CDX
YBN-R/6, YBN-R/6SK, YBO-R/6R, YBO-R/6RN
and YBO-R/6RS.
Mounting Position
The SDP-2 should be installed with the arrow on the
cover corresponding to the direction of airflow in the
duct. The SDP-2 can be placed horizontally or vertically,
on the top, side or bottom of the duct. Hochiki
recommends that the SDP-2 is mounted away from
heating, cooling or humidity devices following the same
guidelines for flow monitors.
Example of location after
change of duct direction
Example of location
after air inlet
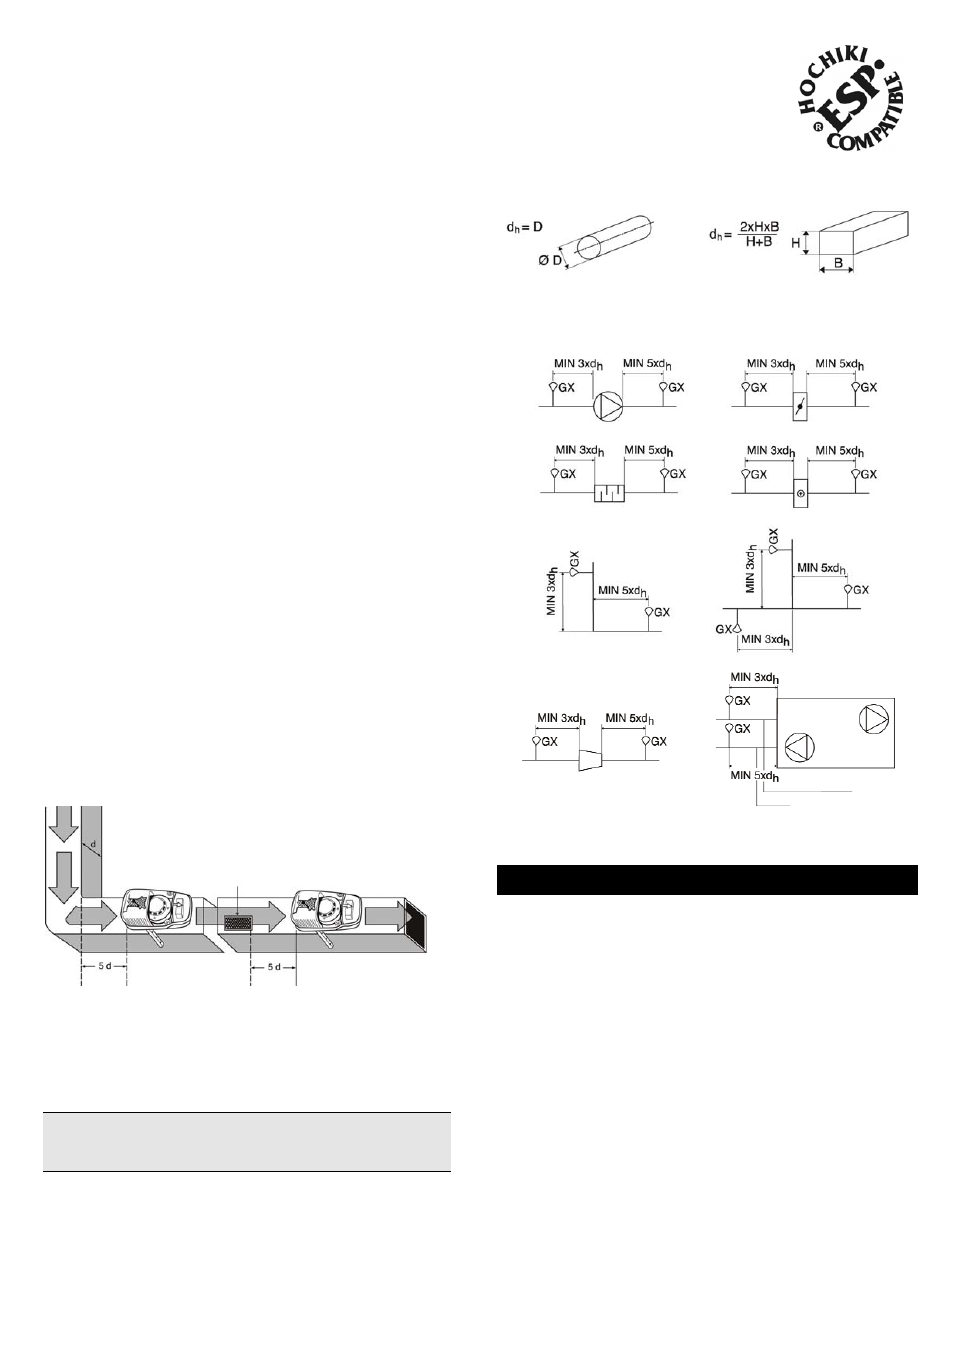
A distance of three times the duct diameter should be
left before a damper, filter or change of duct direction,
and five times the diameter after these devices.
NOTE: The word “diameter” has been used throughout.
In the case of square-section ducts this should be read
to mean width.
Air Flow Parameters
The SDP-2 Duct Probe will operate within the following
air velocity range and should be installed to meet this
requirement: 1.0ms
-1
to 10.0ms
-1
Hydraulic Diameters
Circular Duct
Rectangular Duct
Location Examples
(GX represents duct probe)
Fan Damper
Silencer Battery
Change of duct direction
Duct branching
Duct narrowing or expansion
Air “control“ equipment
Installation Procedure
STEP 1 - Selecting Pipe Length
The supplied 600mm sampling pipe can only be used
with ducts up to a maximum diameter of 600mm, but the
pipe can be shortened if required (see Step 2).
For ducts with a diameter greater than 600mm use the
1200mm sampling pipe cut to size but penetrating the
whole width of the duct (see “Large Diameter Ducts” on
Page 2).
For ducts with a diameter greater than 1200mm contact
Hochiki Europe Customer Support for advice
([email protected]).