Figure 3 figure 4 – Sonnet Technologies xMac mini Server (Revisions A - C) User Manual
Page 9
A – PCIe Cards Installation Steps (continued)
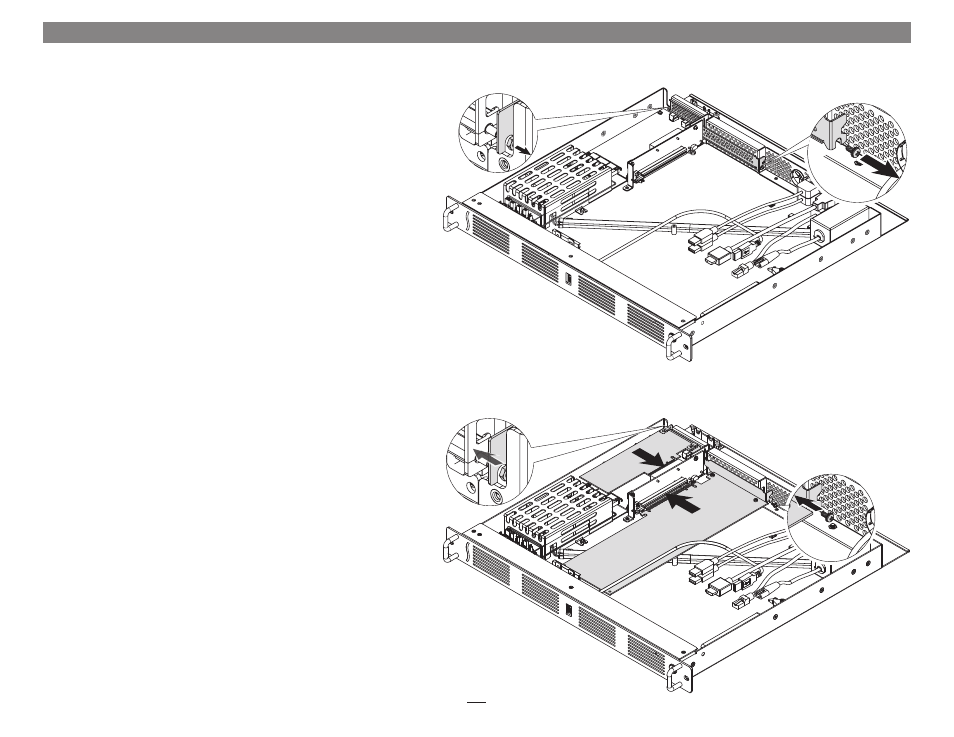
5. If you are installing a card into PCIe Slot 1, remove and set aside the
screw securing its port access cover, and then remove the cover. If you
are installing a card into PCIe Slot 2, remove and set aside the nut
securing its port access cover, and then remove the cover
(Figure 3).
6. If you are installing a card into PCIe Slot 1, remove the card from its
packaging, handling the card by its edges and without touching any
components or gold connector pins. Otherwise skip to step 9.
7. Line up the card’s connector with the slot, and then gently but firmly
press the card straight into the slot;
do not rock the card or force the
card into the slot. If you encounter excessive resistance, check the
card’s connector and the slot for damage, and then try inserting the
card again
(Figure 4).
8. Secure the card using the screw you removed previously (Figure 4).
9. If you are installing a card into PCIe Slot 2, remove the card from its
packaging, handling the card by its edges and without touching any
components or gold connector pins.
10. Turn the card components side down, and then lower it into the
cavity where the slot is, aligning the notch in the card bracket with
the stud bolt used to secure the card
(Figure 4).
11. Line up the card’s connector with the slot, and then gently but firmly
press the card straight into the slot;
do not rock the card or force the
card into the slot. If you encounter excessive resistance, check the
card’s connector and the slot for damage, and then try inserting the
card again
(Figure 4).
12. Secure the card using the nut you removed previously (Figure 4).
Chapter 3 – PCIe Cards, Computer, and xMac mini Server Installation Steps
Figure 3
Figure 4
5