Figure 5 figure 6 – Sonnet Technologies xMac mini Server (Revisions A - C) User Manual
Page 10
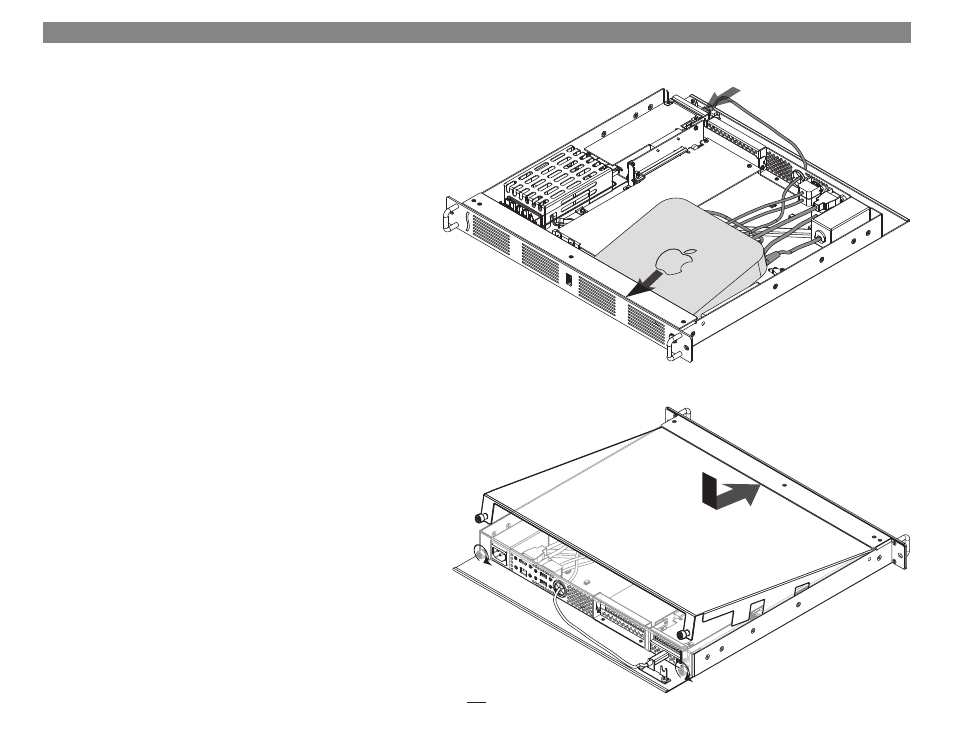
Chapter 3 – PCIe Cards, Computer, and xMac mini Server Installation Steps
B – Mac mini Installation Steps
1. Remove the Mac mini from its packaging.
2. Carefully insert the Mac mini under the top edge of the enclosure, push
it against the gasket behind the enclosure’s face plate, and then lower
the computer onto the floor behind the small plastic posts
(Figure 5).
3. Loosen the thumbscrews securing the Thunderbolt connector lock, and
then slide it away from the xMac mini Server’s Thunderbolt ports.
4. Connect one end of the supplied Thunderbolt cable to either one of the
xMac mini Server’s Thunderbolt ports, route the other end of the cable
through the external cable passthrough, and then connect it to the Mac
mini’s Thunderbolt port
verify the cable is plugged in securely at
both ends (Figure 5).
5. Plug all the xMac mini Server’s cables into the back of the Mac mini;
verify the cables are plugged in securely (Figure 5).
6. Route any external cables that need to be connected to the computer
(or PCIe cards) through the cable passthrough, and then connect them;
verify the cables are plugged in securely.
7. Slide the the Thunderbolt connector lock toward the xMac mini
Server’s Thunderbolt ports, and then tighten the thumbscrews to secure
it in place.
8. If desired, secure the cables to the bottom of the xMac mini Server with
cable ties.
9. Insert the top cover under the top edge of the enclosure, lower the lid,
and then secure it with the captive thumbscrews
(Figure 6).
Figure 5
Figure 6
6