Kasco Marine LR375 User Manual
Page 5
5
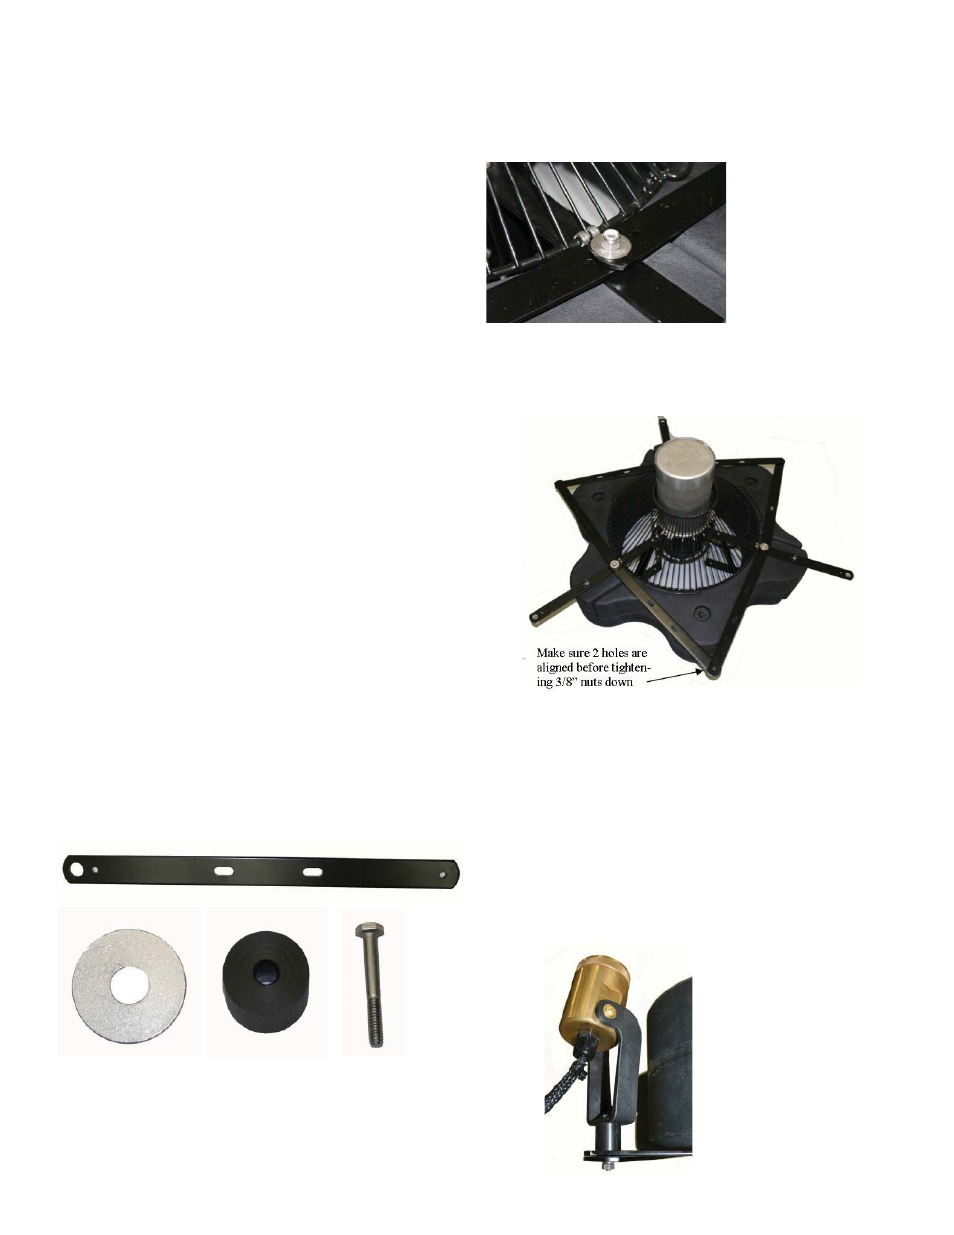
1. Turn the unit upside down. Loosen and remove the
3/8” nuts on the three 9” bolts that are closest to the
motor unit. Place 2 Lower Float Brackets(Part #1) and
one 3/8” washer(Part #2) on each of the 9” bolts over
the bottom screen clips and replace the 3/8” nut.
2. Arrange the brackets into the position shown and
tighten down the nuts. Once the brackets are secure,
turn the unit back into its upright position.
3. For 8400, 2.3, 3.1 & 3.3 models, follow the in-
struction on the previous page to mount the light kit,
except use the ¼” x 2” bolts (part #4) that came with
the adapter kit instead of the ¼” x 1” bolts that came
with the light kit. Install the round spacers (part #3)
between the light fi xture bracket and the lower fl oat
bracket.
For 5.1, 5.3 & 7.3 models, use the ¼” x 1” bolts that
came with the light kit. The round spacers are not
needed.
8400, 2.3, 3.1
& 3.3 models
Use 2” bolts &
Round Spacers
STEP SIX:
Upon installation of the assembled unit, connect your
lighting package to your fi eld installed GFCI protected
outlet and timer.
STEP SEVEN:
Using the nylon cable tie provided, tie the light kit
power cord to a fl oat bracket opposite the fountain
power cord. This will keep the cord from being dam-
aged by the fountain and balance the unit properly.
Note:
Each light fi xture and cord entrance must be sub-
merged at least 1” in order for lights to operate prop-
erly.
Instructions On Adapter Kit For 6
Lights
Instructions for attaching (2) LR375 light kits on
2hp or larger fountains or decorative aerators
Adapter kit (Part# 840322) includes:
Lower fl oat brackets (Qty 6)
1.
3/8” washers (Qty 3)
2.
Round Spacers (Qty 6)
3.
1/4” x 2” Stainless Steel Bolts (Qty 6)
4.
Note: Part #3 and Part #4 are only used with
the 2hp & 3hp (or 8400, 2.3, 3.1 & 3.3) assemblies
Part 1
Part 2
Part 3
Part 4