3 create array, 1 raid 0 for performance, Asus k8v deluxe motherboard user guide 5-21 – Asus K8V User Manual
Page 129
ASUS K8V Deluxe motherboard user guide
5-21
5.4.3 Create Array
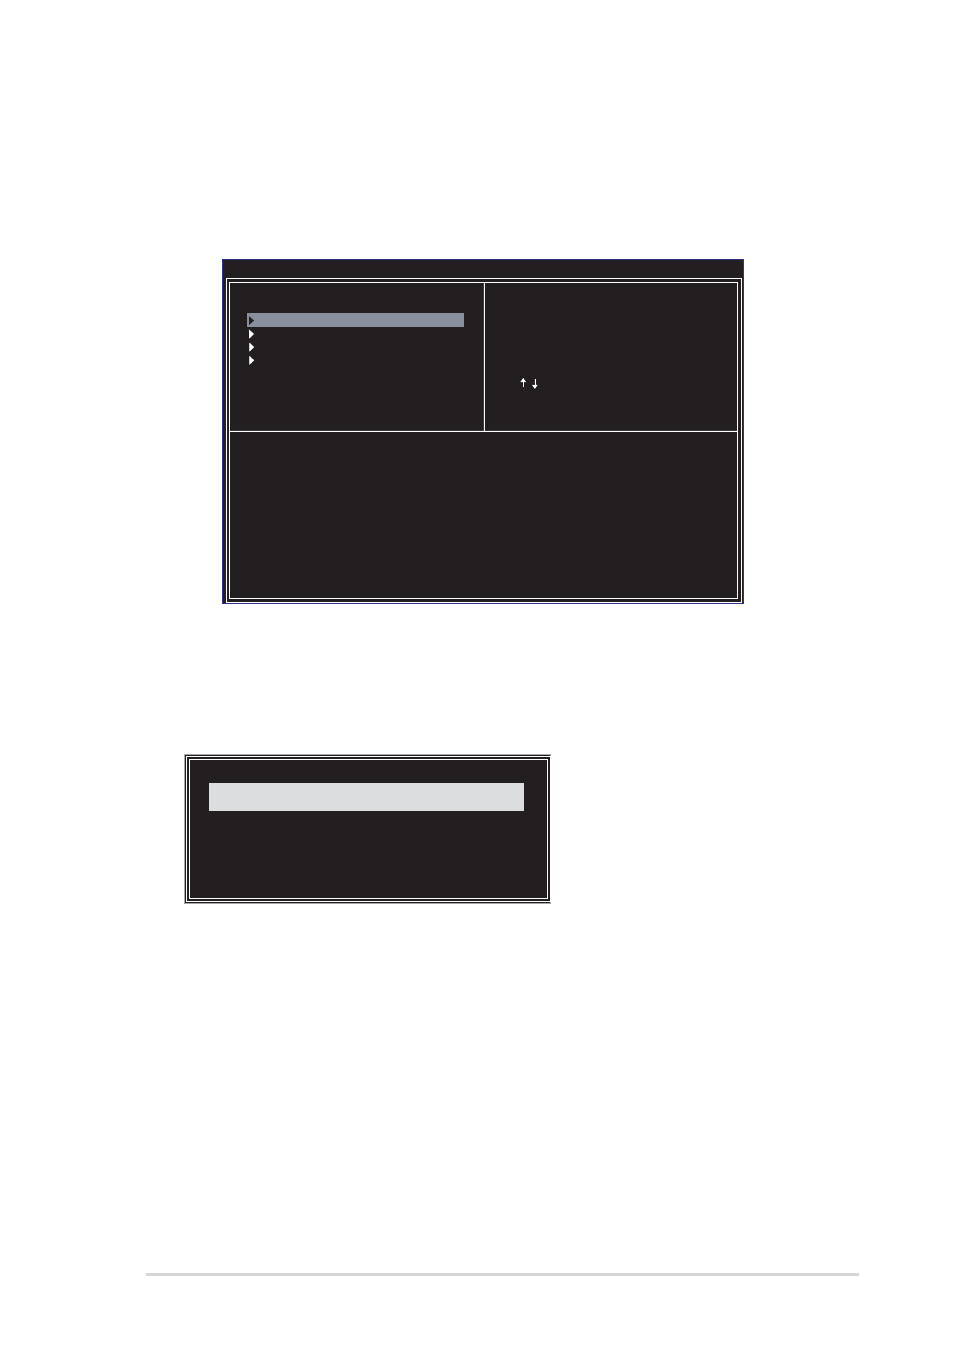
1. In the VIA RAID BIOS utility main menu, select Create Array then
press the
of the screen are replaced with create array menu options.
Channel
Drive Name
Array Name
Mode Size(GB) Status
Channel0 Master
XXXXXXXXXX
xxxxx xxx.xx
Hdd
Channel0 Slave
XXXXXXXXXX
xxxxx xxx.xx
Hdd
Channel1 Master
No Drive
Channel1 Slave
No Drive
VIA Tech. RAID BIOS Ver 0.96
Auto Setup For Data Security
Array Mode RAID 1 (Mirroring)
Select Disk Drives
Start Create Process
Create a RAID array with
the hard disk attached to
VIA IDE controller
F1
: View Array/Disk Status
,
: Move to next item
Enter: Confirm the selection
ESC
: Exit
5.4.3.1 RAID 0 for performance
1. Select the second option item Array Mode, then press the
The RAID system setting pop-up menu appears.
2. Select RAID 0 for performance from the menu and press
From this point, you may choose to auto-configure the RAID array by
selecting Auto Setup for Performance or manually configure the
RAID array for stripped sets. If you want to manually configure the
RAID array continue with next step, otherwise, proceed to step #5.
3. Select Select Disk Drives, then press
select disk drive/s, then press
asterisk is placed before the selected drive.
4. Select Block Size, then press
valid array block sizes are displayed on a pop-up menu.
RAID 1 for data protection
RAID 0/1
RAID SPAN for capacity
RAID 0 for performance