Figure 1 – Mityvac 04700 AirEvac User Manual
Page 3
Page Number - 3
Form 823538
CAUTION!
TO AVOID PERSONAL INJURY AND/OR
VEHICLE DAMAGE:
While some precautions are specified in
this manual, and should be noted to avoid
personal injury or vehicle damage, it is
not possible for these cautions to cover all
conceivable ways in which service or test-
ing might be done, or all possible hazard-
ous consequences of each way, nor could
Lincoln possibly know or investigate all
such ways. It is therefore the responsibility
of anyone using this manual or any other
Mityvac product, to satisfy him or herself
completely that neither personal safety nor
vehicle safety will be jeopardized by the ser-
vice methods selected. Any such injury or
damage is entirely the user’s responsibility.
This device is not to be used in any manner
on the human body.
Instructions for Evacuating the
Cooling System and Checking
for Leaks
Important: This kit is designed for
servicing a variety of vehicles in a
safe, convenient manner. However,
differences in radiator and expan-
sion tank filler necks prevent its use
on every possible make and model.
The procedures below are to serve as
guidelines for the use of this equip-
ment, in addition to these guidelines,
always follow the manufacturer’s rec-
ommended procedures when servic-
ing each unique vehicle.
Never remove the radiator cap or
expansion tank cap while the engine
is at operating temperature. Always
allow the engine to cool before remov-
ing the radiator cap or expansion tank
cap. The cooling system is under
pressure. Failure to allow the engine
to cool before opening the cooling
system could result in serious injury.
1. Properly position the vehicle for
service access to the radiator or
coolant expansion tank. Turn on the
heater control, and set it to its highest
temperature setting.
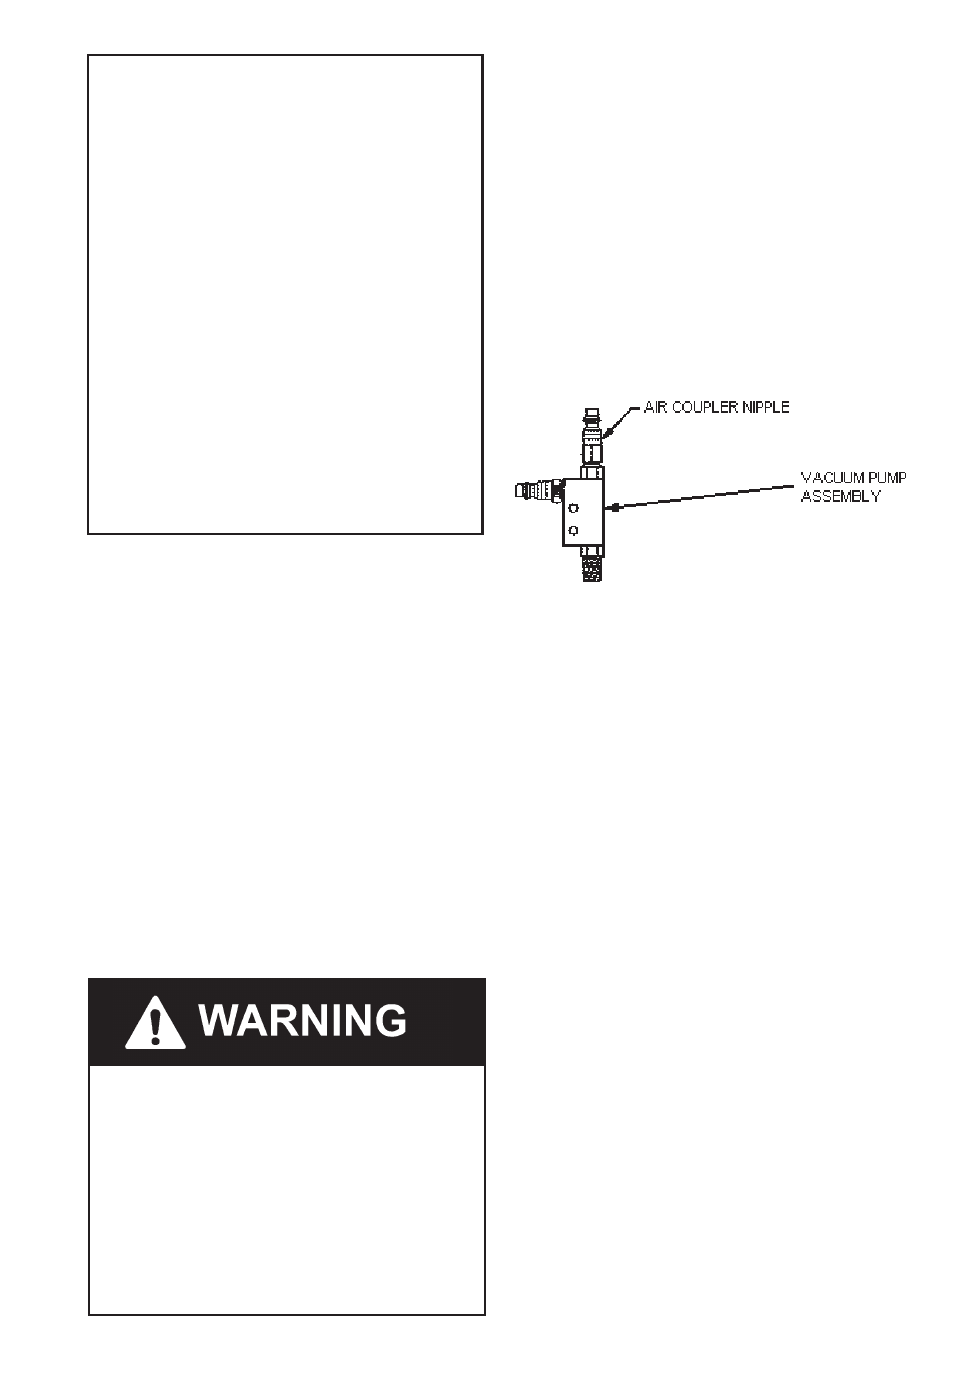
2. Thread a ¼” NPT air coupler nipple
(not included) compatible with your
compressed air system, into the
Vacuum Pump Assembly.
3. After ensuring the engine and cooling
system are cool, cautiously remove
the cap from the radiator or coolant
expansion tank.
4. Turn the tension knob on the Cooling
System Adapter Assembly counter-
clockwise until all tension has been
relieved from the expandable rubber
body. (See Figure 2.)
5. Insert the expandable rubber body of
the Cooling System Adapter Assem-
bly into the filler neck of the radiator
or coolant expansion tank until the
largest possible diameter fits snuggly.
Note: In case none of the diameters
on the expandable rubber body fits
snuggly, two additional bushings
have been provided. These bushings
install over the second step of the
rubber body, and allow a snug fit with
larger diameters fill necks. A third
“micro-neck” rubber adapter has also
been included, and can be installed
onto the head of the shaft on the
adapter, below the expandable rubber
body. (See Figure 2).
Figure 1