Hardware setup, Asus cuvl-vm user’s manual 17 – Asus Apollo PL133 Chipset Socket 370 Motherboard CUVL-VM User Manual
Page 17
ASUS CUVL-VM User’s Manual
17
3. HARDWARE SETUP
3. H/W SETUP
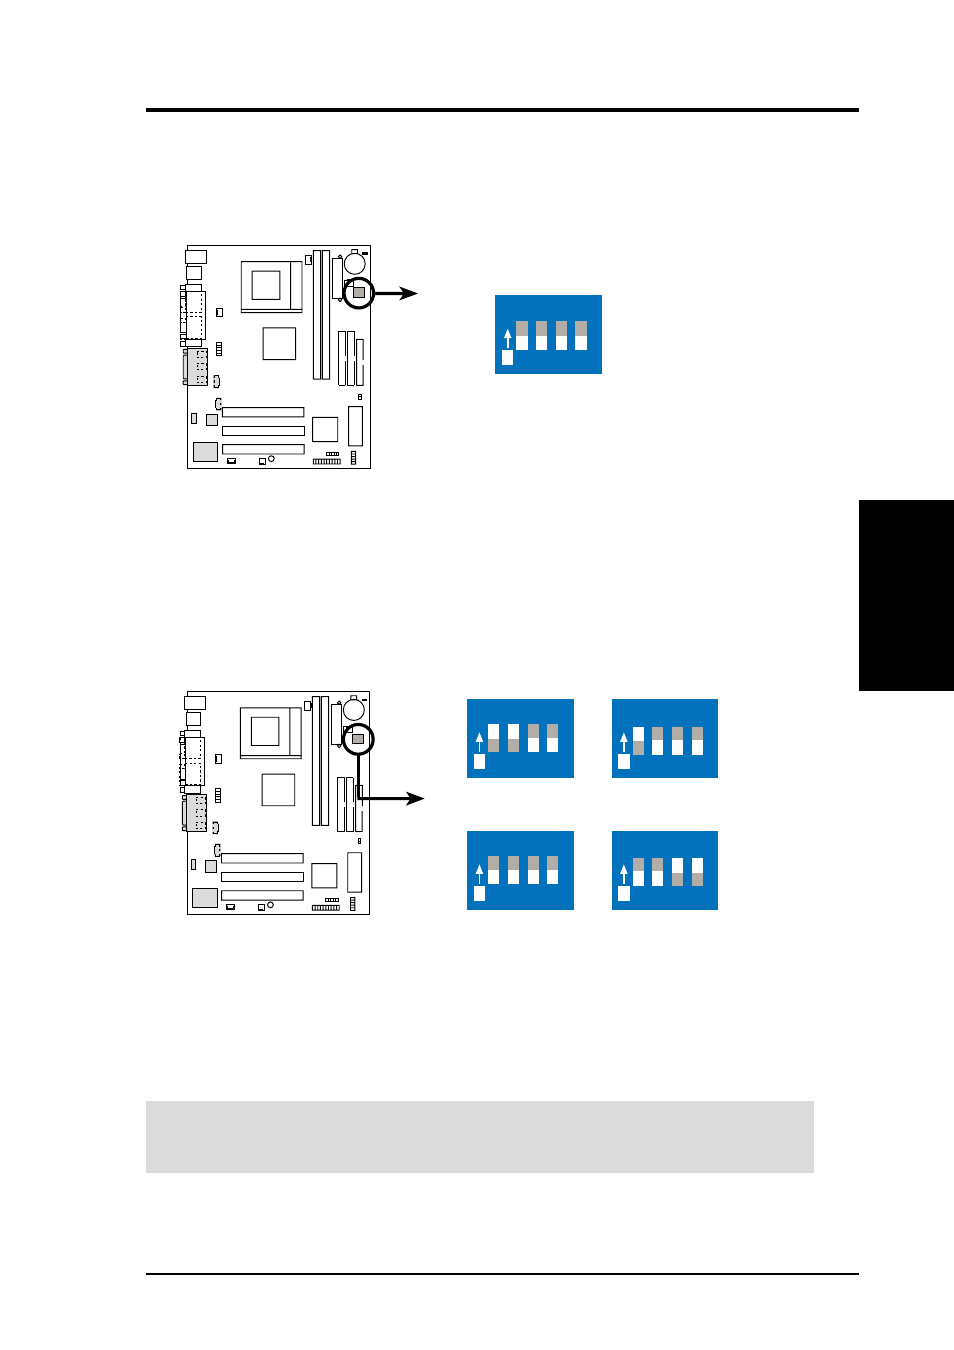
Motherboard Settings
Motherboard Features Settings (DIP Switches - SW1)
The motherboard frequency is adjusted through the DIP switches (SW1). The position
of the white block represents the switch setting. The illustration below shows all the
switches in the OFF position.
CUVL-VM
1. Frequency Selection
2. Frequency Selection
3. Frequency Selection
4. Frequency Selection
CUVL-VM DIP Switches
SW1
O
N
4
3
2
1
1) CPU External Frequency Selection (SW1 Switches 1–4)
This option tells the clock generator what frequency to send to the CPU, DRAM,
and the PCI and AGP buses. This allows the selection of the CPU’s External
frequency (or BUS Clock). The BUS Clock multiplied by the Frequency Multiple
equals the CPU’s Internal frequency (the advertised CPU speed).
WARNING!
Frequencies other than the recommended CPU bus frequencies are
not guaranteed to be stable.
NOTE: Overclocking the processor is not recommended. It may result in a
slower speed.
CUVL-VM
CUVL-VM CPU
External Frequency Selection
CPU 66MHz
133MHz
CPU
100MHz
140MHz
O
N
4
3
2
1
O
N
4
3
2
1
O
N
4
3
2
1
O
N
4
3
2
1