Lectrosonics SRb_SRb5P User Manual
Page 17
UHF Digital Hybrid Wireless
®
Rio Rancho, NM
17
TUNING
In addition to the NOR (normal) mode, this screen also
allows Selection of one of four factory pre-selected
frequency groups (Groups a through d) or two user
programmable frequency groups (Groups u and v).
•
NOR allows selection of all 256 frequencies that the
receiver will tune. Each press of the UP or DOWN
button will step in 100 kHz increments to the next
frequency.
•
a, b, c, d sets the receiver to tune only factory
preselected frequencies, up to eight in each group.
Each press of the UP or DOWN button will step to
the next frequency in the group.
•
u, v allow up to 16 user-selected frequencies to
be stored in each group. Each press of the UP or
DOWN button will step to the next stored frequency
in the group.
Note: The Tuning Setup Screen only selects the
tuning mode (NORMAL or Group Tuning). Actual
operating frequencies are chosen through the
Frequency Screens.
USING THE GROUP TUNING MODES
Press MENU to select receiver 1 or 2.
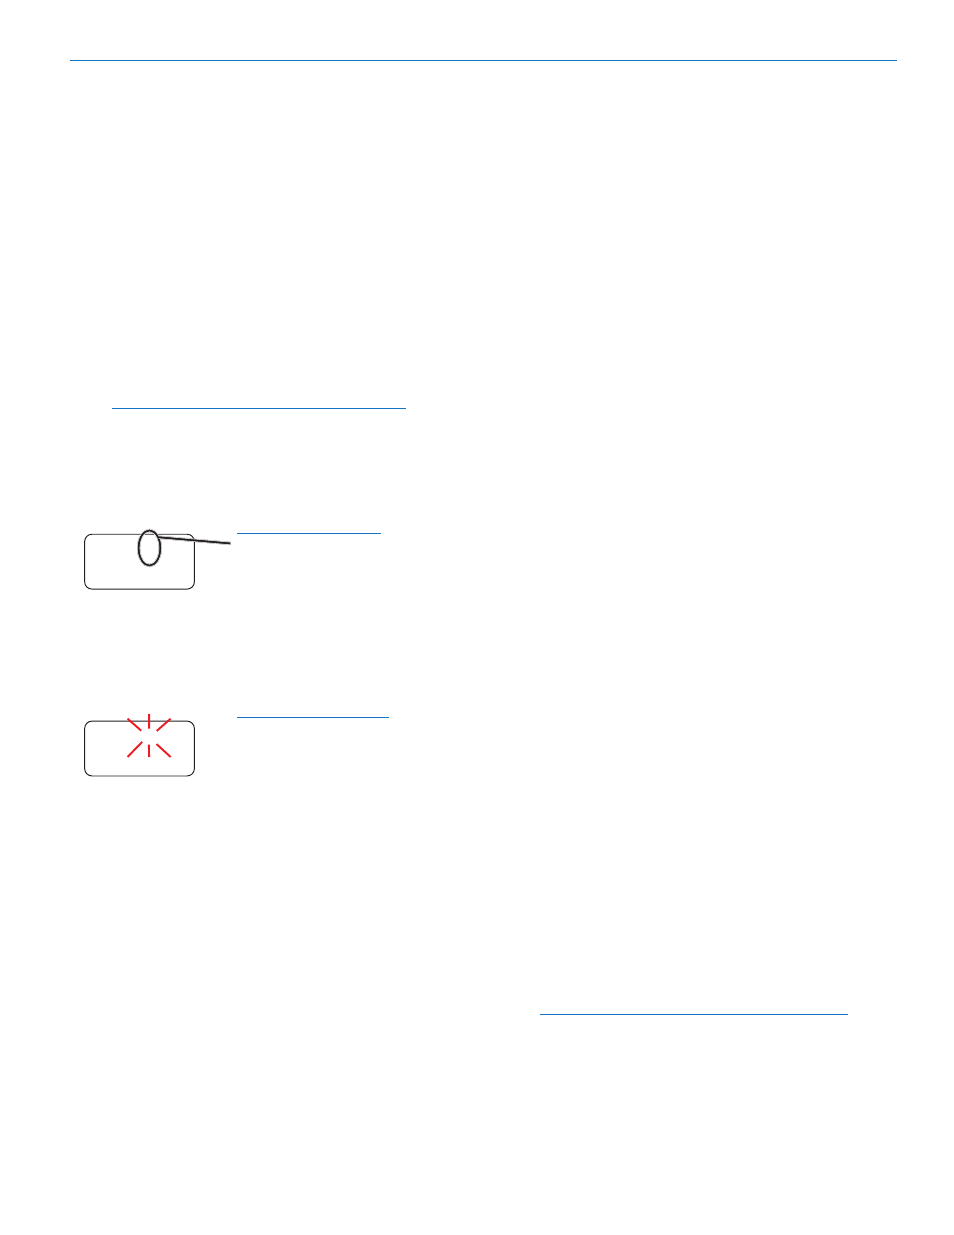
When a tuning group is
Selected, a letter will appear
next to the hex switch settings.
1
05
640.500
a
Holding the MENU/SEL button while pressing the UP or
DOWN button will step to the next frequency in 100 kHz
steps, which will select a frequency that is not stored
in the group. In this case, the group letter in the display
will blink to indicate that the selected frequency is not
included in the group.
The letter will blink when
a frequency outside of the
tuning group is Selected.
1
05
640.500
a
When no frequencies are stored in groups u and v, the
UP and DOWN buttons will function the same as in
the NORMAL mode (each press moves up or down in
100kHz steps).
When only one frequency is stored in group u or v, the
UP and DOWN buttons will not change the frequency. In
this case, hold the MENU/SEL button in and then press
UP or DOWN to scroll to the desired frequency.
To add a frequency to tuning either group u or v, Select
the desired frequency, then hold the MENU/SEL button
in and then hold the UP
or DOWN button in until the
letter stops blinking.
To delete a stored frequency, select it with the UP and
DOWN buttons, then hold the MENU/SEL button in,
then hold the UP
or DOWN button in until the letter
starts blinking.
SmtNR
This setup screen is available only in the Digital Hybrid
COMPAT (compatibility) mode. Select the desired mode
while listening to the audio to of one of three choices:
•
OFF provides no noise reduction for complete
transparency, which is useful in controlled environ-
ments with very little high frequency noise such as
an indoor motion picture production set.
•
NORMAL applies a moderate amount of noise
reduction to noticeably reduce hiss from subtle
sources such as electret microphones.
•
FULL is very similar to the Lectrosonics noise
reduction system used for many years in the 195
and 200 Series analog systems. Hiss from electret
microphones and some environmental HF noise are
suppressed.
PHASE
This setup screen allows the audio output phase to be
inverted to compensate for situations such as phase
reversal caused by microphone wiring.
TXBAT
This setup screen allows you to Select the exact battery
being used in the transmitter to provide more accurate
battery level monitoring.
When the COMPAT mode is set to HYB (Digital Hybrid)
or the 200 Series mode, the choices are:
•
9V - Transmitter uses a 9V alkaline battery.
•
9VL - Transmitter uses a 9V lithium battery (not
rechargeable).
•
9VT - Transmitter uses a 9V battery of any type.
Monitor its status with the timer in the LCD Main
Window. This is the best choice when using a re-
chargeable battery in the transmitter.
•
AA - Transmitter uses a AA alkaline battery.
•
AAL - Transmitter uses a AA lithium battery (not
rechargeable).
•
AAT - Transmitter uses an alkaline, lithium or re-
chargeable AA battery. This is the best choice when
using a rechargeable battery in the transmitter.
In compatibility modes other than Digital Hybrid and
200 Series, no battery telemetry information is avail-
able, so the TXBAT setup screen offers only two
choices:
•
--- (no timer) - Display no transmitter battery status
in the main window.
•
TIM - Monitor the transmitter battery status with the
battery timer in the LCD Main Window.
NOTE: To reset the timer, set the TXBAT mode to
anything other than 9VT or AAT, then back to the
desired mode.