Operation – Agri-Fab Smartlink Platform 45-04731 User Manual
Page 8
8
DeTHaTCHer
Mow lawn and remove loose clippings prior to use.
•
Start tractor engine with controls in neutral and place
•
throttle at slow engine speed.
Engage shift lever at lowest possible forward speed and
•
lower dethatcher, allowing spring tines to touch the ground.
Increase speed until best dethatching action is achieved.
For best results, use a crisscross pattern on your lawn.
•
Do not cross over walks or drives without first raising the
•
dethatcher to the transport position.
On sloped lawns, always dethatch in an up and down
•
direction. Do not attempt to follow the contour of the
ground.
If the dethatcher appears to be "jumping" during use,
•
then extra weight should be added to the tray. In most
conditions, extra weight will be needed. Bags of sand or
concrete blocks (up to 140 lbs. total weight) may be added
to the tray. Always secure weight to the tray with ties or
straps fastened to the front and rear of the tray. Fasten so
that the ties cannot become entangled in rotating parts.
Do not attempt to aerate if ground is too wet.
•
sPIke aeraTor
Mow lawn and remove loose clippings prior to use.
•
Start tractor engine with controls in neutral and place
•
throttle at slow engine speed.
Engage shift lever at lowest possible forward speed and
•
lower aerator, allowing spiker points to enter the ground.
Increase speed as conditions permit.
Aerate in the straightest line possible, making overlapping
•
passes to increase the spiker point pattern.
Avoid extremely sharp turns with spiker points engaged in
•
ground to prevent damage to lawn.
Do not cross over walks or drives without first raising the
•
aerator to the transport position.
On sloped lawns, always aerate in an up and down
•
direction. Do not attempt to follow the contour of the
ground.
To increase depth of spiker point penetration, up to 140 lbs.
•
of weight, such as bags of sand or concrete blocks may be
added to the tray. Always secure weight to the tray with ties
or straps fastened to the front and rear of the tray. Fasten
so that the ties cannot become entangled in rotating parts.
If ground is extremely hard and dry, it is recommended that
•
it be sprinkled or watered down for one or two hours prior
to aerating.
Do not attempt to aerate if ground is too wet.
•
oPeraTIon
Operation of the Smartlink Platform will change depending on
what tool has been attached. Refer to the operation section for
each tool before using it.
aTTaCHInG Tools - loCkInG Tools
Secure each axle retainer to the tray assembly with
1.
a 3/8 x 3/4" clevis pin (15) and .08 x 1.58" hair cotter
pin (17). See figure 14.
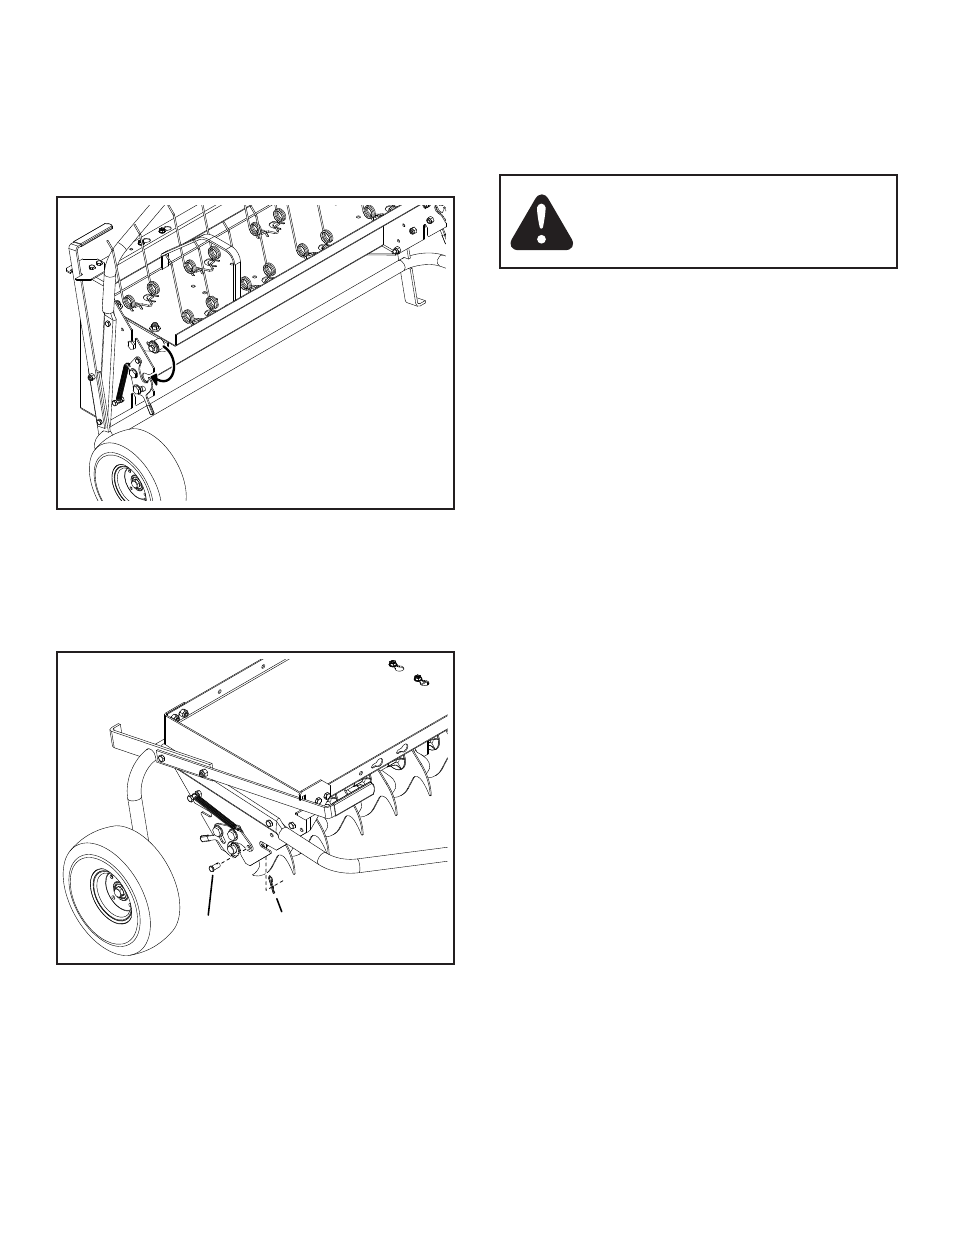
fIGure 14
fIGure 13
CLEVIS PIN,
3/8 X 3/4" (15)
HAIR COTTER PIN,
.08 X 1.58" (17)
DeTHaTCHer
With the platform standing on footstands, slide the
1.
shoulder bolts on the dethatcher down into the
retainer slots. See figure 13.
Rotate the dethatcher until the bushings go into the
2.
axle retainers. See figure 13.
Proceed to LOCKING TOOLS section below.
3.
remoVInG Tools
To remove a tool from the Smartlink Platform, remove
1.
the 3/8 x 3/4" clevis pins (15) and .08 x 1.58" hair
cotter pins (17) securing the axle retainers to the tray
assembly. See figure 14.
Use the handles on the axle retainers to unlock the
2.
tool, then remove it from the Smartlink Platform. See
figure 14.
neVer leaVe an unaTTaCHeD Tool
laYInG unaTTenDeD. Tools lefT
unaTTenDeD Can Cause Personal
InJurY.