Hydrotech 5600 SE Valve Carbon & Multi-Media Filter Operation Manual User Manual
Page 5
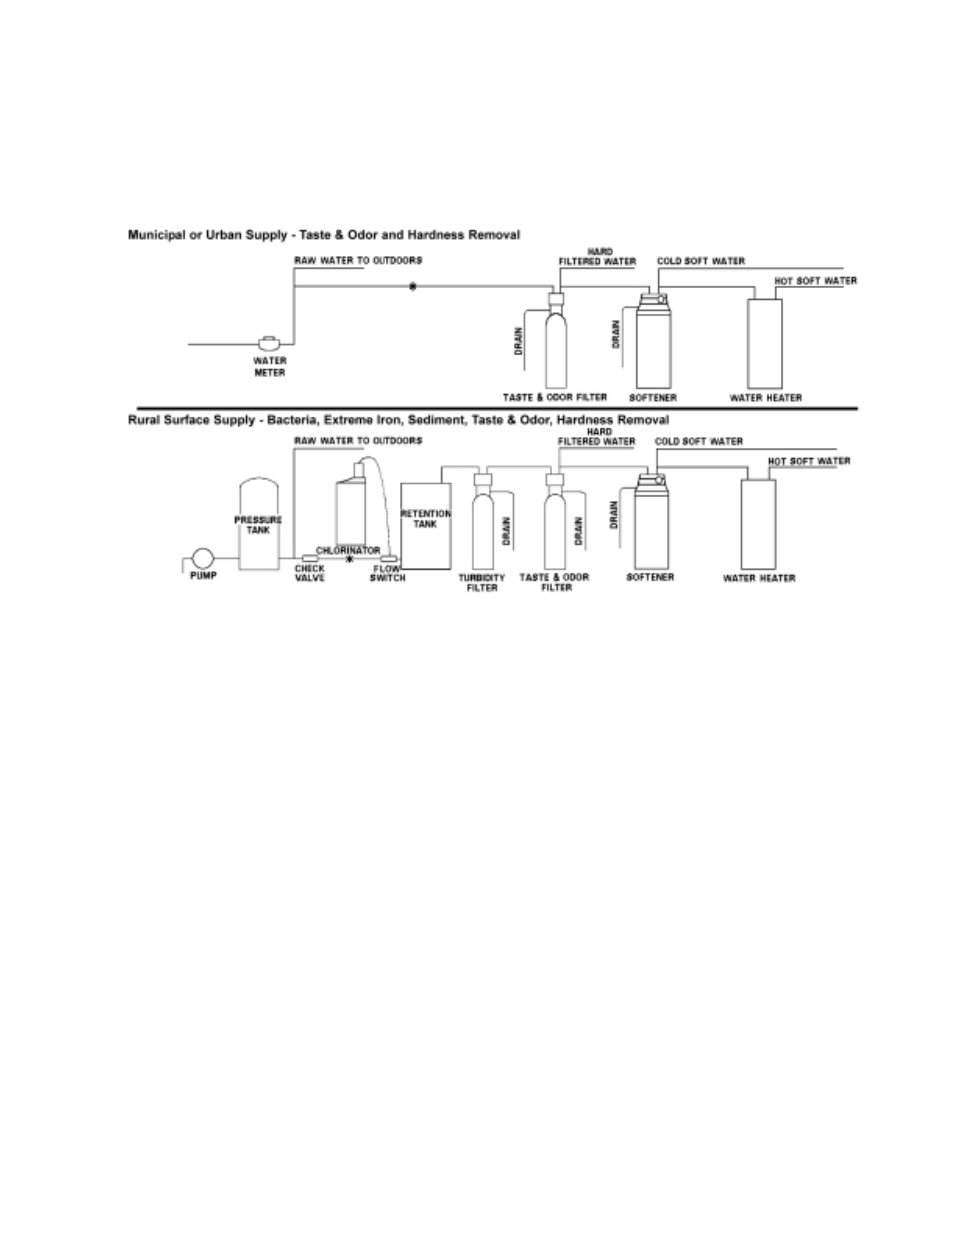
3
1.
Determine the best location for your water filter, bearing in mind the location of your water supply lines, drain line
and 120 volt AC electrical outlet. Subjecting the softener to freezing or temperatures above 110°F (43° C) will void
the warranty.
NOTE: Some units are shipped with the media bed in separate bags. To install, unscrew the control valve from the
top of the fibreglass tank, position the riser tube in the center of the tank lugging the tube with a cloth and pour the
media into the tank in the following order: coarse, fine gravel and then the filter media. Remove the cloth and
carefully screw the valve into the tank (When replacing the media, the tank must first be inverted and the old media
bed removed. See instructions provided with the replacement media).
2.
Attach the bypass valve to the control valve. Connect the inlet and outlet of the water filter to the plumbing in the
house. The control valve must not be submitted to temperatures above 71°C (110°F). When sweat fittings are used,
to avoid damaging the control valve, solder the threaded copper adapters to the copper pipe and then, using Teflon
tape, screw the assembly onto the bypass valve.
CAUTION: Do not use pipe thread compound as it may attack the material in the valve body.
3.
Using teflon tape, screw the 1/2” hose barb into the drain port in the valve. Attach 1/2” drain hose to the hose barb
and tighten securely with a hose clamp. Run the drain line to a floor drain or a laundry drain. Complete any
necessary plumbing.
4.
Make sure the bypass valve is in the service position.
5.
Plug the 24-volt transformer into a 120 VAC 60 Hz outlet. This valve has four positions: 1) Backwash 2) Brine/Rinse
(not used) 3) Rapid Rinse and 4) Brine Refill (not used). When the valve is in the Service position, the extra cycle
button (far left button as shown on Figure 4) must be pressed and held for 5 seconds before it activates. Press and
hold the extra cycle button for 5 seconds to advance the valve to the “1” Backwash position. Slowly turn on the
water supply and allow the unit to backwash until the air purges out of the tank and clears the system.
NOTE: On taste and odor filters, the initial water running to the drain will be very black. This is created by the
carbon fines being flushed from the bed. Backwash all filters until the water running to the drain is clear.
6.
Press the extra cycle button to advance the valve to the “2” position (not used). Press once more to advance to the
“3” position. Press once more to advance to the “4” Brine refill position. Press the extra cycle button to advance the
valve back into the service position indicated by the red dot in the upper left corner of the display.