Hellwig Sway Bar 7876 User Manual
Page 2
1. Entirely remove the front factory sway bar and end links. Keep the hardware as some of it will be reused in
the installation.
2. Lubricate the insides of the D-bushings and place them on the bar. Then place the U-plates over the bush-
ings.
3. Using the factory bolts kept in Step 1, attach the sway bar to the underside of the frame in the stock loca-
tion as shown in Photo 1.
4.
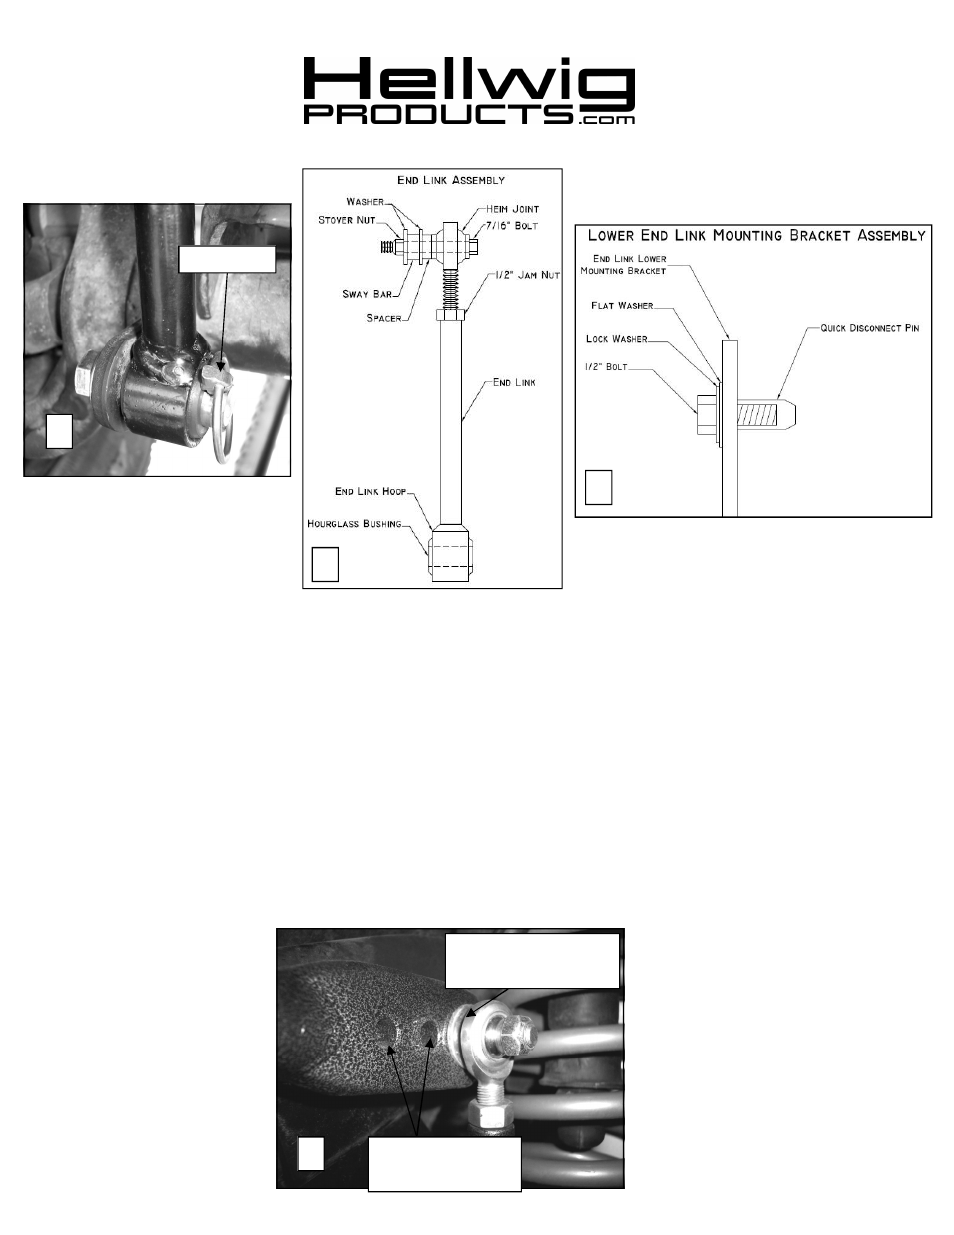
Remove end link bolt from axle brackets. Penetrating fluid may be necessary if the bolt is rusty. The new
end link pin will occupy the mounting hole in the axle brackets.
5. Assemble end links together as shown in Diagram 3 above. The heim joint will be threaded into the end
link with a jam nut. Lubricate the outside of the hourglass bushing and tap it into the hoop on the end link.
Leave loose at this time for later adjustment.
6. Loosely attach the rod end to the middle hole on the sway using the 7/16” bolt, washers and stover nut.
The middle hole position is for sizing the end link only, it is recommended to start with the end link at-
tached to the outermost (softest) hole until the driver gets used to the change in ride characteristic and they
can then adjust the hole positioning for their driving style ash shown in Photo 5.
559-734-7451 800-367-5480 FAX 559-734-7460
2
Linch Pin
3
4
5
Outermost Hole for
Initial Driving
Inner Holes for
Stiffer Handling
7876 ( R-7876 )
03/15/2012