Hellwig Sway Bar 6706 User Manual
Page 2
1. Remove the factory mounted front sway bar.
2. Install the D-shaped poly bushings on the sway bar in the position that they will make
contact with the mounting bracket on the vehicles frame.
3. Raise the sway bar up to the frame using the supplied U-plates and the mounting hard-
ware. Start the mounting bolts but
do not tighten - leave loose at this time to allow
for adjustment later.
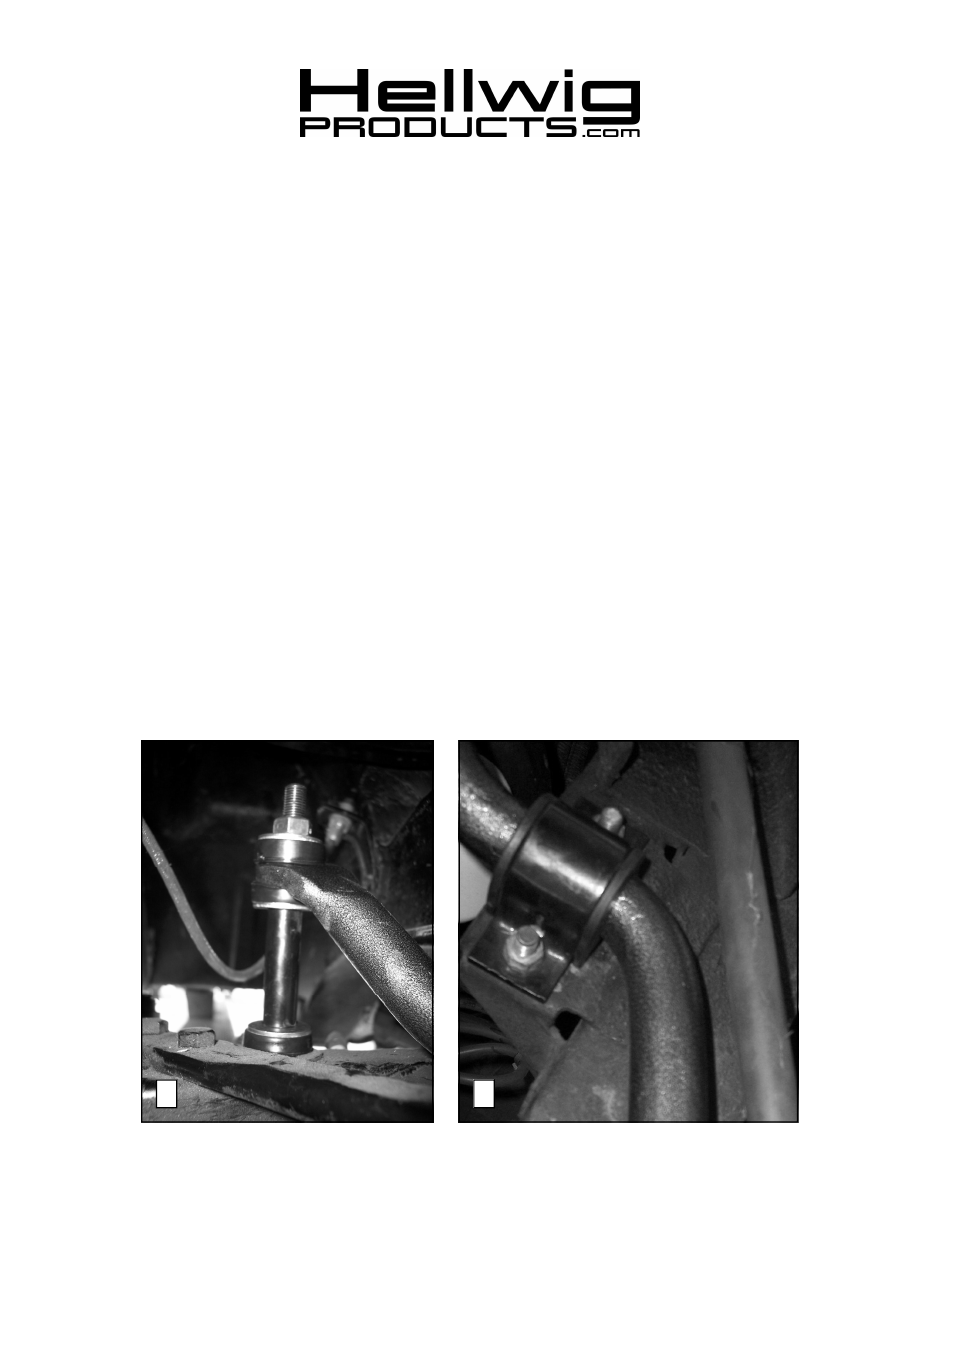
4. Assemble the end link assemblies as per PHOTO TWO (2). Install the end links on the
lower control arms of the vehicle.
5. Raise the arms of the sway bar over the end links. Install the end links on the arms of
the sway bar. Tighten just slightly that the poly bushings start to bulge.
Do not over
tighten or damage can result to the poly bushings.
6. With the sway bar centered and the end links as square as possible, torque the frame
mounting bolts to specifications.
7. Bounce the vehicle and check for clearance on all under carriage components. Make
sure that all mounting are securely tightened.
8. After one week of driving recheck your installation - readjust if necessary . Recheck
your installation on a monthly regular basis thereafter.
ATTENTION INSTALLER:
BE SURE THAT THE CUSTOMER RECEIVES THIS INSTRUCTION
SHEET, ALL IMPORTANT NOTE CARDS AND THE WARRANTY
FORM
6706 ( R-6706)
07/09/04
2
3
559-734-7451 800-367-5480 FAX 559-734-7460